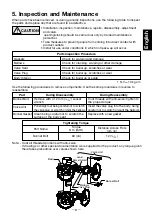
5. Inspection and Maintenance
CAUTION
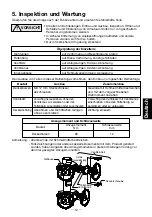
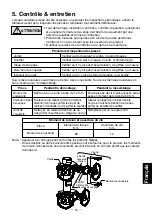
Parts Inspection Procedure
Gaskets
Bellows
Valve Seat
Valve Plug
Body Interior
Check for warping and damage
Check for cracking, warping or other damage
Check for build-up, scratches or wear
Check for build-up, scratches or wear
Check for build-up or scale
When parts have been removed, or during periodic inspections, use the following table to inspect
the parts and replace any that are found to be defective.
• Installation, inspection, maintenance, repairs, disassembly, adjustment
and valve.
opening/closing should be carried out only by trained maintenance
personnel.
• Take measures to prevent people from coming into direct contact with
product outlets.
• Install for use under conditions in which no freeze-up will occur.
1 N
•
m
≈
10 kg
•
cm
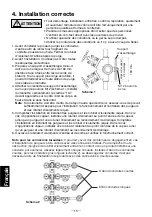
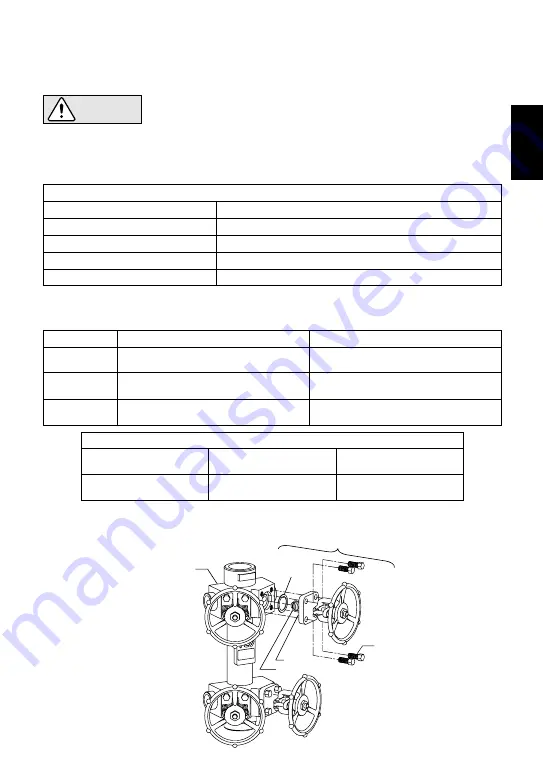
Use the following procedures to remove components. Use the same procedures in reverse to
reassemble.
Note: - Coat all threaded portions with anti-seize.
- If drawings or other special documentation were supplied for the product, any torque given
there takes precedince over values shown here.
Bonnet Bolt
Valve Unit
Bonnet Gasket
Remove with a 12 mm ( ") socket
wrench
Coat threads with anti-seize; tighten to
the proper torque
Insert the valve plug into the body, being
careful not to scratch or dent the bellows
Replace with a new gasket
Pull straight out being careful not to scratch
the valve plug or scratch or dent the bellows
Clean being careful not to scratch the
surface of the body seat
During Disassembly
Part
During Reassembly
Torque
N·m (lbf·ft)
60 (44)
12 ( )
Distance Across Flats
mm (in)
Tightening Torque
Part Name
Bonnet Bolt
32
15
/
32
15
/
Body
Lower
Bonnet Gasket
Valve Unit
Bellows
Valve Plug
Bonnet Bolt
English
― 8 ―
Summary of Contents for M12
Page 19: ... 18 ...
Page 26: ... 25 ...


