DVOR 432
Operation and Maintenance
Repairs
6-19
Ed. 01.04
6.2.3.2.1
Replacing EPROM
NOTE:
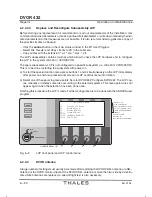
Before starting it is recommended to read out all parameters of the installation:
Use command
Download Parameters
or make a printout of all parameters or write down
manually the indicated parameters if other measures are not possible.
It is also recommended to generate a copy of the specific site files as backup:
- In the PC User Program, click the
Control
button in the Main Status window.
- Select
File Transfer
and
Copy SITE file to PC
in the submenu. Copy all files with the
extension:
*.sit
,
*.oio
,
*.msk
,
*.ptt.
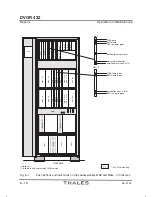
The EPROM should always be replaced by qualified personnel only. The following subassemblies
contain EPROM which may need to be replaced: MSG-C, MSP, CSL (test generator). The locations
are shown in Section 6.2.4.
CAUTION
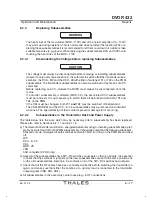
Since the EPROM are electrostatically sensitive components, the following safety precauĆ
tions must always be observed (see also Section 6.2.1.1.3 ): The person replacing the
EPROM should preferably not wear shoes with rubber or plastic soles, and should first
eliminate any static charges by touching the transmitter rack with both hands.
a) Switch off both transmitters: set the TX1 and TX2 switches on the PMM to OFF.
b) Release the MSG-C resp. MSP or CSL with the lever mechanism and remove it from the slide-in
chassis in the rack. Lay the subassembly down on an electronically conductive surface (e.g. on
the special packaging provided).
c) Remove the EPROM:
Identify the EPROM to be replaced by means of its inscription and note its orientation (notch on
one of the narrow sides). Lever the EPROM slowly out of the base by carefully applying a flat,
pointed object (e.g. a screwdriver) to the narrow sides alternately.
d) Fit the new EPROM:
Fit the new EPROM into the empty base in the same position. If the EPROM is swapped from one
unit to another, determine the correct orientation by comparing the two units. Before fitting the
EPROM, check that all the pins are aligned exactly. Press the two rows of pins into the base one
at a time.
e) Reinstall the MSG-C resp. MSP or CSL and lock it in position.
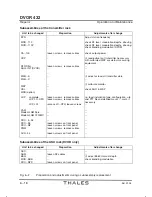
f) Execute the following checks after switching on the transmitter again:
- the live LED must light up (MSG-C, MSP)
- create new EPROM checksumfor monitor 1 and 2 (refer to 6.2.3.2.2 ).
- all the transmitter and monitor settings must correspond to test reports.
6.2.3.2.2
Creating new Checksum for MSP EPROM in ADRACS
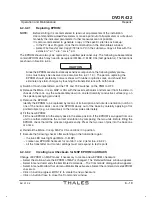
Change of EPROM on MSP makes it necessary to create a new EPROM checksum:
- Select the station where the EPROM of MSP is changed. The 'Detailed Status' window appears.
- Select in menu
Commands
the item
More Commands...
. The 'Commands' dialog window appears.
- Select in menu
Monitors
the submenu
Monitor Miscellaneou
s. Select the command
create EPROM
checksum.
- Click on button
program MON 1/2
to create the new checksum.
- Click on button
Close
to close the 'Commands' window.
Summary of Contents for DVOR 432
Page 2: ......
Page 4: ......
Page 16: ...DVOR 432 Table of Contents Operation and Maintenance X Ed 01 04 ...
Page 38: ...DVOR 432 General Information Operation and Maintenance 1 6 Ed 01 04 ...
Page 40: ...DVOR 432 General Information Operation and Maintenance 1 8 Ed 01 04 ...
Page 46: ......
Page 66: ...DVOR 432 Installation Operation and Maintenance 2 24 Ed 01 04 ...
Page 74: ......
Page 136: ...DVOR 432 Installation Operation and Maintenance 4 32 Ed 01 04 ...
Page 172: ...DVOR 432 Repairs Operation and Maintenance 6 22 Ed 01 04 ...
Page 186: ...DVOR 432 Repairs Operation and Maintenance 6 36 Ed 01 04 ...
Page 192: ...DVOR 432 Installation Operation and Maintenance Annex Nextfield AN 4 Ed 01 04 ...
Page 194: ......
Page 196: ...DVOR 432 General Operation and Maintenance Annex Nextfield L 2 Ed 01 04 ...
Page 204: ...DVOR 432 Alignment Procedure Operation and Maintenance Annex Nextfield AN 14 Ed 01 04 ...
Page 234: ...DVOR 432 Maintenance Operation and Maintenance Annex Nextfield AN 44 Ed 01 04 ...

