Service and Repair Manual
June 2021
Ground Controls
70
GS
™
-84 • GS
™
-90
Part No. 1306587GT
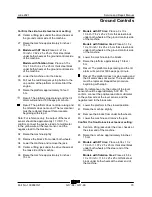
10 Tighten the level sensor adjusting fasteners
until the bubble in the top of the level sensor
is centered in the circles.
Note: Be sure there are threads showing through
the top of the adjusting fasteners.
Result: The tilt sensor alarm should not
sound.
11 Center a lifting jack under the drive chassis at
the ground controls side of the machine.
12 Raise the machine approximately 4 inches /
10 cm.
13
Models with RT tires:
Place a 2.59 x 10 x
10 inch / 6.58 x 25 x 25 cm thick steel block
under both wheels at the ground controls side
of the machine.
Models with flotation tires:
Place a 2.72 x
10 x 10 inch / 6.91 x 25 x 25 cm thick steel
block under both wheels at the ground
controls side of the machine.
14 Lower the machine onto the blocks.
15 Raise the platform approximately 16 feet /
5 m.
Result: The tilt sensor alarm should not
sound.
Result: The drive function and the lift function
will not operate and the tilt alarm will sound at
180 beeps per minute. Turn the level sensor
adjusting nuts just until the level sensor alarm
does not sound.
16 Lower the platform to the stowed position.
17 Raise the machine slightly.
18 Remove the blocks from under both wheels.
19 Lower the machine and remove the jack.
20 Center a lifting jack under the drive chassis at
the engine side of the machine.
21 Raise the machine approximately 4 inches /
10 cm.
22
Models with RT tires:
Place a 3 x 10 x
10 inch / 7.62 x 25 x 25 cm thick steel block
under both wheels at the ground controls side
of the machine.
Models with flotation tires:
Place a 3.15 x
10 x 10 inch / 8 x 25 x 25 cm thick steel block
under both wheels at the ground controls side
of the machine.
23 Lower the machine onto the blocks.
24 Raise the platform approximately 16 feet /
5 m.
Result: The drive function and the lift function
will not operate and the tilt alarm will sound at
180 beeps per minute.
Result: The level sensor alarm does not
sound. Adjust the level sensor until the alarm
just begins to sound.
25 Lower the platform to the stowed position.
26 Push in the red Emergency Stop button to the
off position at both the ground and platform
controls.
27 Turn the key switch to the off position.
28 Raise the machine slightly.
29 Remove the blocks from under both wheels.
30 Lower the machine and remove the jack.
Summary of Contents for Genie GS-3384
Page 185: ...June 2021 Service and Repair Manual 171 Ford MSG 425 Engine Wire Harness...
Page 188: ...Service and Repair Manual June 2021 174 Deutz D 2 9 L4 Engine Wire Harness...
Page 189: ...June 2021 Service and Repair Manual 175 Deutz TD 2 2 L3 Engine Wire Harness...
Page 192: ...Service and Repair Manual June 2021 178 Deutz TD 2 2 L3 Engine Wire Harness...
Page 193: ...June 2021 Service and Repair Manual 179 Hydraulic Schematic...
Page 194: ...Service and Repair Manual June 2021 180 GS 84 GS 90 Part No 1306587GT Hydraulic Schematic...
Page 195: ...June 2021 Service and Repair Manual Part No 1306587GT GS 84 GS 90 181 Hydraulic Schematic...
Page 196: ...Service and Repair Manual June 2021 182 Hydraulic Schematic...
Page 197: ...June 2021 Service and Repair Manual 183 Electrical Schematic Ford Engine Models ANSI CSA...
Page 200: ...Service and Repair Manual June 2021 186 Electrical Schematic Ford Engine Models ANSI CSA...
Page 201: ...June 2021 Service and Repair Manual 187 Electrical Schematic Deutz Engine Models ANSI CSA...
Page 204: ...Service and Repair Manual June 2021 190 Electrical Schematic Deutz Engine Models ANSI CSA...
Page 206: ...Service and Repair Manual June 2021 192 Electrical Schematic SCON ANSI CSA...
Page 207: ...June 2021 Service and Repair Manual 193 Electrical Schematic Ford Engine Models AS CE...
Page 210: ...Service and Repair Manual June 2021 196 Electrical Schematic Ford Engine Models AS CE...
Page 211: ...June 2021 Service and Repair Manual 197 Electrical Schematic Deutz Engine Models AS CE...
Page 214: ...Service and Repair Manual June 2021 200 Electrical Schematic Deutz Engine Models AS CE...
Page 217: ......

