
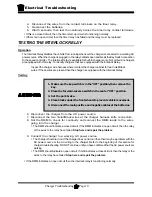
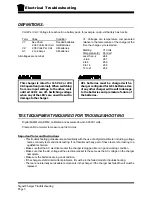


Electrical Troubleshooting
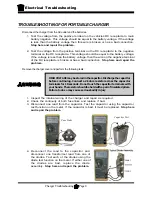
Signet Charger Troubleshooting
Page 5
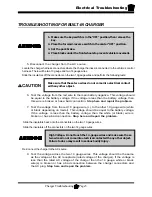
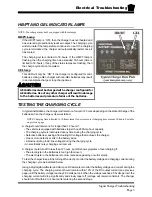
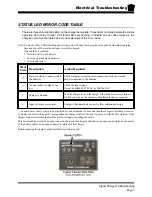
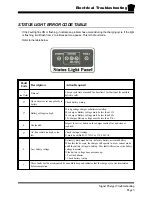
STATUS LED ERROR CODE TABLE
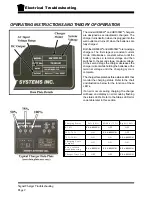
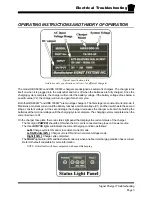
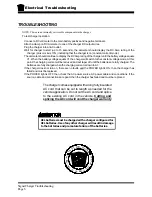
There are three status lights (LED’s) on the charger name plate. These LED’s normally indicate the current
operating state of the charger. If all three LED’s are flashing, it indicate an error has occurred in the
charging cycle. See the table below for an explanation of the error codes:
Error
Code
Description
Action Required
1*
Reverse polarity or open circuit to
the batteries
Check wiring for corrosion, loose connections. broken wires and
proper connection to the batteries
2
AC line voltate too high or too
low
Check the input voltage.
It must be within 96-132VAC or 196-266VAC
3
Charger overheated
Wait for charger to cool, the charger will automaticaly restart. Inspect
for dirt or debris on the charger cooling fins and clean as required.
4
Input or Output over current
Charger will automaticaly correct for this condition and restart
Note: If only the 100% LED is flashing and all others are OFF then the charger has exceeded its maximum charging
time and shut off before the batteries were fully charged.
This could be a result of:
•
Defective battery or batteries
•
Excessively discharged batteries
•
Oversize batteries
* - In many cases fault 1 will only be displayed for a short amount of time and then the charger will attempt to restart.
Typically, the fault will repeat 8-times and then the charger will start the boot up process with the 50% light on. If the
charger cannot restart then the fault loop will start again, repeating the fault 1.
This fault could be a result of an open connection between the charger and batteries, an open connection on one or more
of the battery cables, or an open connection internal of the charger.
Before replacing the charger, confirm all battery wiring is good.
Summary of Contents for B0-248-48AC
Page 2: ......
Page 70: ...Maintenance Service and Repair Steering Page 22 Exploded View of Steering Gear...
Page 88: ...TAYLOR DUNN...
Page 114: ...TAYLOR DUNN...
Page 120: ...TAYLOR DUNN...
Page 132: ...TAYLOR DUNN...
Page 134: ...TAYLOR DUNN...
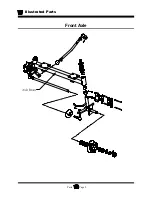
Page 164: ...Illustrated Parts Parts Page 2 Front Axle...
Page 166: ...Illustrated Parts Parts Page 4 Steering Knuckle...
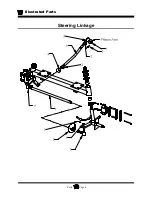
Page 168: ...Illustrated Parts Parts Page 6 Steering Linkage...
Page 174: ...Illustrated Parts Parts Page 12 Rear Suspension View from rear...
Page 176: ...Illustrated Parts Parts Page 14 Transmission Gear Case...
Page 180: ...Illustrated Parts Parts Page 18 Rear Brakes Front Brakes...
Page 182: ...Illustrated Parts Parts Page 20 Brake Lines Master Cylinder...
Page 184: ...Illustrated Parts Parts Page 22 Motor...
Page 186: ...Illustrated Parts Parts Page 24 Motor Mount Apply 94 421 34 grease to inside of motor coupler...
Page 188: ...Illustrated Parts Parts Page 26 Wheels and Tires Ref wheel hub 1 2 5 assembly 4 3 6 7 8 9 10...
Page 196: ...Illustrated Parts Parts Page 34 Lighting Stobe Light 4 1 2 3 5 6 7...
Page 206: ...Illustrated Parts Parts Page 44 Seat Cushions and Deck...
Page 208: ...Illustrated Parts Parts Page 46 Mirrors 92 202 00 Assembly Miscellaneous Frame Components...
Page 210: ...Illustrated Parts Parts Page 48 Decals...
Page 212: ...Illustrated Parts Parts Page 50 Cab Options Steel Cab Fiberglass cab...
Page 218: ...Illustrated Parts Parts Page 56 Hydraulic Dump Body Option...
Page 220: ...Illustrated Parts Parts Page 58 Rear Cargo Box 1 2 3 4 5 6 5 Top Covers...
Page 222: ...Illustrated Parts Parts Page 60 Hitches...
Page 224: ...TAYLOR DUNN...


