D01017520A
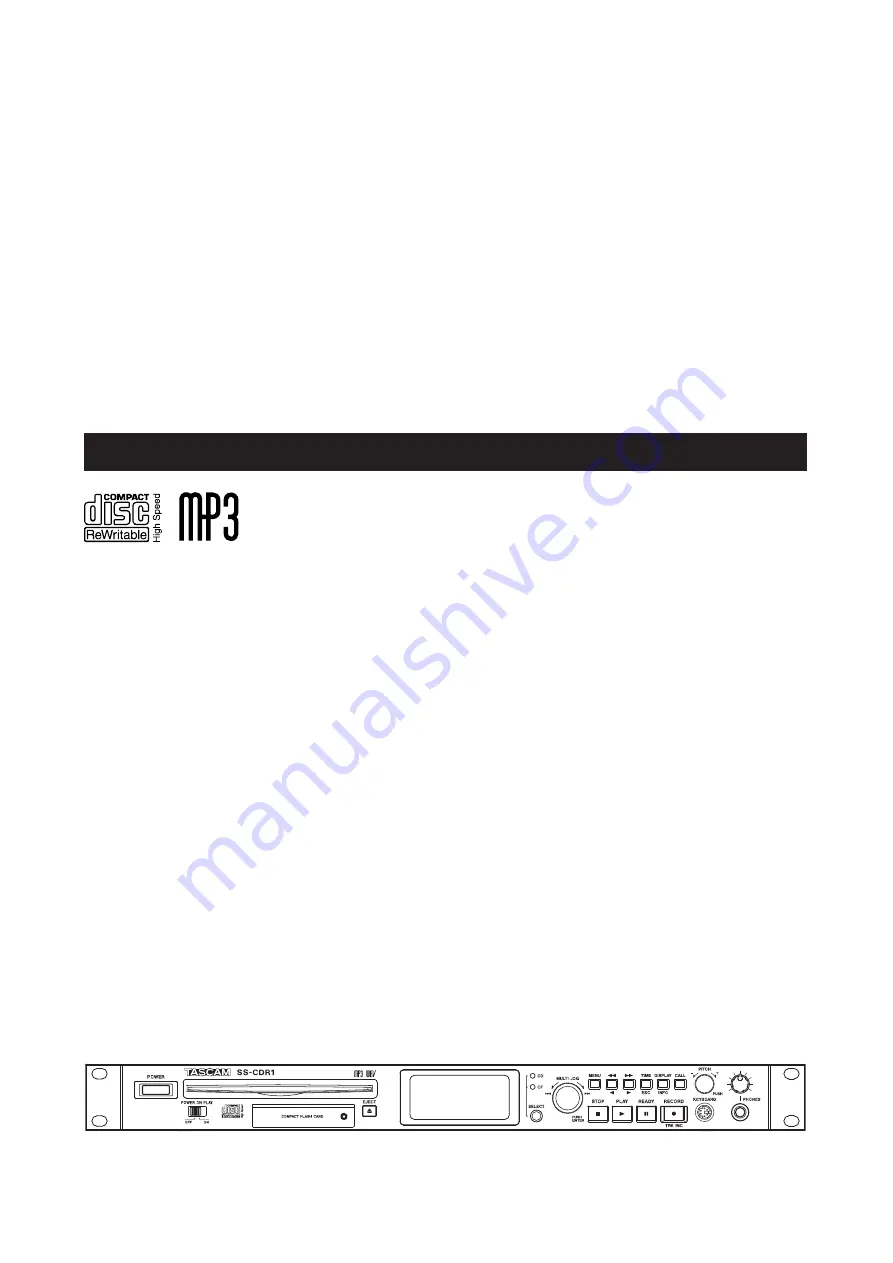
SS-CDR1
Solid State/CD Stereo Audio Recorder
»
OWNER'S MANUAL
Page 1: ...D01017520A SS CDR1 Solid State CD Stereo Audio Recorder OWNER S MANUAL ...
Page 2: ...lasse A Dans un environnement domestique cet appareil peut provoquer des interférences radio dans ce cas l utilisateur peut être amené à prendre des mesures appropriées Für Kunden in Europa Warnung Dies ist eine Einrichtung welche die Funk Entstörung nach Klasse A besitzt Diese Einrichtung kann im Wohnbereich Funkstörungen versursachen in diesem Fall kann vom Betrieber verlang werden angemessene M...
Page 3: ...anufacturer or sold with the apparatus When a cart is used use caution when moving the cart apparatus combination to avoid injury from tip over 13 Unplug this apparatus during lightning storms or when unused for long periods of time 14 Refer all servicing to qualified service personnel Servicing is required when the apparatus has been damaged in any way such as power supply cord or plug is damaged...
Page 4: ...eration because invis ible laser radiation emitted inside of this product is completely confined in the protective housings The label required in this regulation is shown at 1 Optical pickup Type HOP 6201TC Manufacturer Hitachi Media Electronics Co Ltd Laser output Less than 75 mW on the objective lens record Wavelength 777 to 787 nm CAUTION DO NOT REMOVE THE PROTECTIVE HOUSING USING A SCREWDRIVER...
Page 5: ...ing a track number 26 Fast forward rewind search 26 Time search 26 Time searching from an incomplete entry 27 Time skip 27 Playback modes 27 Specifying the playback mode 27 Program playback 28 Switching the playback time display mode 28 Power on play 29 Repeat playback 29 Conventional repeat playback 29 A B Repeat playback 29 Pitch Control playback 30 Specifying the Pitch Step 30 Key Control playb...
Page 6: ... only 58 Moving a file within a folder 58 Moving or copying a file between folders 59 8 Using the CD DA finder screen AudioCD only 60 Opening the CD DA finder screen 60 Selecting the track to play 60 Editing CD text 60 9 Editing a playlist CF only 62 Overview 62 Opening the playlist finder screen 62 Navigating in the playlist finder screen 62 Operations in the playlist menu screen 63 Adding a file...
Page 7: ...dio Use CD discs to record play CD DA audio CD or MP3 audio or to play WAV audio Provides parallel and serial control ports to allow control from outside Flash Start function allows playback to begin instantly Playback control functionality such as Pitch Control and Key Control Play lists and folders can be used to freely specify the range of playback Track editing is provided only for linear PCM ...
Page 8: ...t oil based felt tipped pen to write the information Never use a ball point or hard tipped pen as this may cause damage to the recorded side Always keep the recording sides of the discs away from grime and dust to avoid a reduction in sound quality To clean a disc wipe gently with a soft dry cloth from the center towards the outside edge Do not use thinner gasoline benzene or LP cleaning fluid as ...
Page 9: ...actFlash cards are referred to as CF cards CD DA format is sometimes referred to as audio CD format An audio disc containing tracks recorded in audio CD format is sometimes referred to as an audio CD A CD containing MP3 or WAV files is sometimes referred to as a data CD Never use a stabilizer or printable discs Using commercially available CD stabilizers or printable recordable discs with this pla...
Page 10: ... first listed function and can be used as conventional parallel controllers When this pin is low the above listed input pins will func tion as flash start keys 3 Pin 20 Flash Page When pin 14 Remote Select is low the assigned tracks will be as follows according to the high low state of pin 20 14 20 Flash start status Low High 1 10 Low Low 11 20 Tall signals are open collector with a maximum curren...
Page 11: ... card only on page 58 0 MENU key While the home screen is displayed press ing this key will enter menu mode The MENU screen will appear By holding down this key while stopped or paused you can access the finder screen for the current device and playback area setting see Opening the folder finder screen on page 50 Opening the play list finder screen on page 62 and Opening the CD DA finder screen on...
Page 12: ... or de select a file y STOP key When you press this key while playing back or recording playback or recording will stop Pressing this key while stopped or while selecting a track will cancel the track selection Pressing this key while stopped in program mode will clear all programs Pressing this key while editing will cancel the editing operation u PLAY key While stopped or paused press this key t...
Page 13: ...TS L R BALANCED jacks These are analog input jacks XLR balanced The nominal input level is 4 dBu Pin wiring pin 1 ground pin 2 hot pin 3 cold f ANALOG INPUTS L R UNBALANCED jacks These are analog input jacks RCA pin jacks The nominal input level is 10 dBV g ANALOG OUTPUTS L R UNBALANCED jacks These are analog output jacks RCA pin jacks The nominal output level is 10 dBV h ANALOG OUTPUTS L R BALANC...
Page 14: ...his key for A B Repeat playback opera tions see A B Repeat play on page 29 p PITCH key This has the same function as pressing the front panel PITCH knob see Pitch Control play on page 30 keys These have the same function as turning the front panel PITCH knob see Pitch Control play on page 30 a INPUT SEL key This selects the recording input source You can choose ANALOG RCA ANALOG XLR or COAXIAL see...
Page 15: ...ntly se lected input 4 Level meter During playback this shows the playback level and during recording or in record ready mode it shows the recording level 5 Current device This area indicates the current device CF or CD However if the current device is a CD and a CD RW or CD R disc is inserted this will indicate CDRW or CDR 6 Time display mode indicator This shows the selected time display mode 7 ...
Page 16: ...to Ready function is active 7 INC_PLAY This will be lit if the Incremental Play function is active 8 FLASH This will be lit if Flash Load has been completed While recording or record ready 9 FILE This indicates the recording file format WAV MP3 or CD DA 0 FS This indicates the sampling rate of the recording file q BIT This indicates the bit rate of the file being recorded only for an MP3 file w A_...
Page 17: ... on off Page 29 KEY Key Control on of and setting Page 31 PREFERENCE Various playback preferences Page 34 REC INPUT SELECT Input source selection Page 38 INPUT VOLUME Input volume setting Page 41 REC FORMAT Recording file format setting Page 39 SYNC Sync Recording setting Page 44 AUTO TRACK Auto Track Increment setting Page 47 PREFERENCE Various recording preferences Page 40 UTILTIY MEMORY FORMAT ...
Page 18: ...ttom of the list As a specific example we ll explain how to turn the PLAY menu item AUTO CUE on and then change the auto cue level 1 Press the MENU key to access the main menu list screen 2 Select the desired menu From the SS CDR1 Turn the MULTI JOG dial to highlight PLAY and then press the MULTI JOG dial From the remote Use the cursor keys to highlight PLAY and press the ENTER key 3 Select the AU...
Page 19: ...he REC menu item INPUT VOLUME Connecting audio devices outputs Connect an external monitor system or mixer to the SS CDR1 s ANALOG OUTPUTS BALANCED plugs ANALOG OUTPUTS UNBALANCED jacks or DIGITAL OUT jack Computer If you connect the SS CDR1 s RS 232C connector to your computer s RS 232C connector you ll be able to control the SS CDR1 from your computer via a serial connection After making connect...
Page 20: ... recorded in the audio file 1 Press the MENU key to access the menu list screen 2 Turn the front panel MULTI JOG dial or use the remote s cursor keys to highlight UTILITY and press the MULTI JOG dial or the remote s ENTER key The UTILITY menu selection screen will appear 3 Turn the front panel MULTI JOG dial or use the remote s cursor keys to highlight CLOCK ADJUST and press the front panel key or...
Page 21: ...nu item LCD BRIGHTNESS to adjust the brightness of the backlight 1 Press the MENU key to access the main menu list 2 Turn the front panel MULTI JOG dial or use the remote s cursor keys to highlight UTILITY and press the front panel MULTI JOG dial or key or the remote s ENTER key or cursor key 3 Turn the front panel MULTI JOG dial or use the remote s cursor keys to highlight LCD BRIGHTNESS and pres...
Page 22: ...nserting a CompactFlash card In order to record or play back on the SS CDR1 a CompactFlash card must be inserted in the front panel CompactFlash card slot TIP You can insert a card at any time regardless of whether the power is on or off and regardless of the current device selection 1 Open the door of the CompactFlash card slot 2 Insert a CF card in the correct orientation Insert the card with it...
Page 23: ...CD Press the EJECT key The disc will be ejected part of the way use your fingers to pull it out the rest of the way Removing a CD Before you perform operations using the SS CDR1 you will need to select the device CD or CF corresponding to the media CD or CF card that you want to use The select ed device is called the current device To select a device press the front panel SELECT key or the remote ...
Page 24: ... between the point you specified and the point at which play back actually begins This chapter explains the functions for playing audio files stored on a CD or CF card The following explanation assumes that a CD or CF card containing an audio file is inserted in the SS CDR1 that the SS CDR1 is powered on and that the current device CD or CF is selected appropriately see Selecting the device on pag...
Page 25: ...LAY key to begin playback NOTE If the CompactFlash card does not contain any audio files that the SS CDR1 is able to play the counter display area track number and time display will show all zeros To stop playback Press the STOP key To pause playback Press the READY key In this manual we ll assume that the play mode is set to CONTINUE continuous playback mode unless otherwise specified Selecting a...
Page 26: ... in which you were prior to searching Time search While the unit is stopped playing or paused you can locate to a specified time in the specified track NOTE You cannot use time search when the play mode is program mode or random mode 1 Use the remote s numeric keys 0 9 to enter the number as follows For WAV or MP3 format Track number three digits Elapsed time from the beginning of the track XXhour...
Page 27: ...ll tracks in the play area will play back in a random order without regard to their track number When all tracks have been played back playback will stop Specifying the playback mode You can easily select the playback mode by using a dedi cated key on the remote To select the playback mode from the SS CDR1 itself use menu mode Using the dedicated key of the remote 1 If the SS CDR1 is stopped or if...
Page 28: ...LLwill appear A maxi mum of 99 tracks can be programmed For WAV files or MP3 files the display will indicate H M Sif the total time of the programmed tracks exceeds 99 hours 59 minutes 59 seconds For an audio CD the display will indicate M Sif the total time exceeds 99 minutes 59 seconds In the case of a CD that contains WAV files or MP3 files recorded by a device other than the SS CDR1 the total ...
Page 29: ...back all tracks in the play area or repeatedly play back a specified region within a track A B Repeat playback Conventional repeat playback If you press the remote s REPEAT key to turn Repeat play back on all tracks in the play area will play repeatedly to do this on the SS CDR1 itself use menu mode NOTE You can use the PLAY menu item REPEAT to turn on Repeat playback from the SS CDR1 itself REPEA...
Page 30: ...ing playback the playback sound may be momentarily interrupted Specifying the Pitch Step You can change the pitch step Pitch steps are the amount of pitch change produced by turning the PITCH knob one step or by pressing the remote s PITCH key once You must make the Pitch Step setting from the SS CDR1 itself this setting cannot be made from the remote 1 Hold down the front panel PITCH knob The pit...
Page 31: ...ey or the remote s CLR ESC key to return to the home screen The Key Control function will be on and the home screen will indicate KEY NOTE The Key Control setting is remembered even when the power is turned off When using the Key Control function the playback sound may appear to quaver This is due to the processing being applied to the playback and is not a malfunction TIP If you turn on both the ...
Page 32: ...in the menu screen refer to Operations in the menu screens on page 18 1 Press the MENU key to access the main menu list screen 2 Select the PLAY menu 3 Select the AUTO CUE item In this state you can turn the Auto Cue function on off 4 Turn the AUTO CUE item ON 5 Press the front panel key or the remote s cursor key In this screen you can adjust the auto cue level 6 Turn the front panel MULTI JOG di...
Page 33: ... JOG dial to turn the setting on off 5 When you ve finished making the setting press the TIME ESC key to return to the home screen NOTE The Auto Ready setting is remembered even if the power is off Call function The Call function returns to the point at which you most recently initiated playback from the pause condition the Call point and pauses there To execute the Call function press the front p...
Page 34: ...ea Using the remote s dedicated key You can switch the Incremental Playback mode on off by pressing the remote s INC PLAY key INC PLAY key When the Incremental Playback mode is on I NC_PLAY will light in the home screen Using the menu to make settings For details on menu operations refer to Operations in the menu screens on page 18 1 Press the MENU key to access the main menu list screen 2 Select ...
Page 35: ...e erased when you perform the following operations Remove the media Switch the current device Switch the play area Switch the play mode Modify the contents of the media by recording edit ing or erasing Use the menu to turn the Resume function on off for details on menu operations refer to Operations in the menu screens on page 18 1 Press the MENU key to access the main menu list screen 2 Select th...
Page 36: ...ill indicate CAN T SELECT and the data will not be loaded If you press the FLASH LOAD key when the play mode is SINGLE the tracks in the play area will be read successively in the same way as for the CONTINUE setting If twenty one or more tracks are registered data for the first twenty tracks from the beginning will be loaded When the data has been loaded the lower right of the home screen will in...
Page 37: ...ou want to use the remaining time in the play area as the trigger 6 Turn the MULTI JOG dial or use the remote s cursor keys to specify the remaining time that will trigger the tally output You can choose from the range of OFFor 1 99 sec onds 7 When you ve finished making settings press the TIME ESC key to return to the home screen NOTE This setting is remembered even when the power is off Example ...
Page 38: ...o files between a CF card and a CD For details refer to Copying files between CD and CF card on page 65 You cannot record in WAV format onto a CD However you can copy WAV files from CF card to CD or play back WAV files from a data CD see Creating a data CD on page 67 6 Recording Using the dedicated remote key to select the source Each time you press the INPUT SEL key you will cycle through the thr...
Page 39: ...xist on an audio CD This means that the first file to be recorded on a CD will determine the file format MP3 or audio CD that can be recorded on that disc NOTE Although you cannot record WAV files on a CD you can use the subsequently described function for copying files from CF card to CD to copy the WAV files see Copying files between CD and CF card on page 65 Recording of MP3 files to CD is poss...
Page 40: ...mpt to record with SRC off an error message FS UNMATCH will appear The sampling rate setting is remembered even when the power is turned off Monitoring the input signal When you press the RECORD key to enter the record ready condition the front panel RECORD key and READY key will light and the input signal will be output from the SS CDR1 s various output jacks headphone analog balanced analog unba...
Page 41: ...nel key or the remote s cursor key to highlight LEVEL 8 Turn the MULTI JOG dial or use the remote s cursor keys to highlight BALANCE and then press the front panel key or the remote s cursor key to highlight the balance value 9 Turn the MULTI JOG dial or use the remote s cursor keys to adjust the balance You can adjust this in a range of L50 C center R50 10 When you have finished making settings p...
Page 42: ... minutes 70 hours 40 minutes 56 hours 00 minutes CD 650 MB 23 hours 00 minutes 11 hours 30 minutes 7 hours 40 minutes 5 hours 45 minutes 4 hours 35 minutes CD 700 MB 24 hours 50 minutes 12 hours 25 minutes 8 hours 15 minutes 6 hours 10 minutes 4 hours 55 minutes MP3 Mono 44 1kHz 48kHz Media Capacity 64 kbps 128 kbps 192 kbps 256 kbps 320 kbps CF card 512 MB 35 hours 20 minutes 17 hours 40 minutes ...
Page 43: ...u finalize the disc using the menu However the disc will not be playable on other devices until you finalize it For details on how to finalize refer to the following section Finalizing a CD As explained above in order for a CD recorded by the SS CDR1 in audio CD format to be playable on another device that CD must be finalized manually In the case of a disc recorded in MP3 format the disc will be ...
Page 44: ...g time display mode is remembered even when the power is turned off For details on the time display during playback refer to Switching the playback time display mode on page 28 The maximum number of recordable tracks is 999 tracks for a CF card total number of WAV tracks and MP3 tracks In the case of a CD a data CD disc containing MP3 or WAV files can have up to 999 tracks and an audio CD disc can...
Page 45: ...nverted to seconds it is equiva lent to 1 00 seconds 1 00 seconds STOP TIME When the signal has remained below the sync level for the length of time you specify here recording will stop and the SS CDR1 will enter record pause mode You can specify this in a range of 5 30 seconds one second steps or INF The default setting is 5 seconds Choose I NFif you do not want recording to stop automatically 7 ...
Page 46: ... below the sync level for the duration specified by STOP TIME default 5 seconds the SS CDR1 will automatically switch to the record ready condition SYNC LEVEL STOP TIME REC ready Time Level NOTE If you set the STOP TIME to I NF the record pause state will not be entered even though the input signal continuingly falls below the sync level To defeat Sync Record press the remote s SYNC REC key When t...
Page 47: ...ed in the screen for detailed settings described below after having stayed below it for two seconds or longer Level Time A_TRACK LEVEL At least 2 sec Track increment DD When recording a digital source CD DAT MD via the DIGITAL IN jack a new track number will be assigned when a track division is detected in the source However when recording an analog source or a digital source other than those list...
Page 48: ...les COMBINE on page 57 Depending on the CompactFlash CF card used on the unit when recording MP3 files incrementing and creating many tracks in a short time period can cause over flow the unit shows the message OVER FLOW on the screen and the unit will stop operat ing To avoid such unexpected results leave a sufficient time gap after the previous track before increment the track number Applying th...
Page 49: ...ollowing choices DATE default setting The date and time of the SS CDR1 s clock will be the file name USER0 1 USER03 The user specified text string eight characters will be the file name To edit and store a text string proceed as follows 1 With one of the choices USER0 1 USER03selected press the key The editing screen will appear 2 Edit the text string as follows To change the editing location curs...
Page 50: ...ume that a CF card a data CD containing WAV MP3 files or a blank CD is inserted in the current device When the play area Play area on page 24 is ALL or FOLDER and the SS CDR1 is stopped playing or paused you can hold down the front panel MENU key or press the remote s FINDER key to access the folder finder screen If the play area is ALL and the SS CDR1 was stopped the finder screen for the root fo...
Page 51: ...rent folder To view the properties of the highlighted file Press the front panel DISPLAY INFO key or the remote s DISPLAY key When you once again press the front panel DISPLAY INFO key or the remote s DISPLAY key the property display will disappear and you will return to the folder finder screen To move the highlighted file CF card only Press and hold the front panel MULTI JOG dial or the remote s...
Page 52: ...o delete all characters following the cursor position Press and hold the front panel TIME ESC key or the remote s CLR ESC key To switch the type of character uppercase lower case Press the front panel DISPLAY INFO key or the remote s DISPLAY key To insert a space Press the CALL key To cancel editing Press the STOP key 4 When you ve finished editing press the front panel MULTI JOG dial or the remot...
Page 53: ...er menu screen 1 Turn the front panel MULTI JOG dial or use the remote s cursor keys to highlight UNDO 2 Press the front panel MULTI JOG dial or the remote s ENTER key A confirmation screen will appear 3 Press the front panel MULTI JOG dial or the remote s ENTER key The folder will be recovered and you will return to the folder finder screen At this time the recovered folder will be highlighted NO...
Page 54: ...new folder deleting a folder can be undone immediately after they are executed This is possible only if the play mode is set to continuous playback CONTINUE NOTE When executing an Undo it does not matter which folder in the folder finder screen was selected before opening the folder menu screen 1 Turn the front panel MULTI JOG dial or use the remote s cursor keys to highlight UNDO A confirmation s...
Page 55: ... the character at the cursor position Turn the front panel MULTI JOG dial or use the remote s cursor keys To delete a character Press the front panel TIME ESC key or the remote s CLR ESC key To delete all characters following the cursor posi tion Press and hold down the front panel TIME ESC key or the remote s CLR ESC key To switch between uppercase and lowercase Press the front panel DISPLAY INFO...
Page 56: ...page 58 You cannot divide an MP3 file 1 Use the PLAY key keys time search function and time skip function etc to locate to the point in the WAV at which you want to divide it and pause at that point Since you can make fine adjustments later the approxi mate location is sufficient 2 Press and hold the front panel MENU key or the remote s FINDER key to access the folder finder screen The screen will...
Page 57: ... display will ask EXECUTE and the four seconds preceding and following the connection point will play repeatedly NOTE If the file has been registered in a playlist the P L I ST ENTRYpopup will appear If a file you are editing was registered in a playlist it will no longer be possible to play that playlist You ll need to re edit that playlist in the playlist finder 6 To execute the Combine operatio...
Page 58: ...TIME ESC key or the remote s CLR ESC key If there is no file operation that can be undone the display will indicate CAN T UNDO Moving or copying a file CF card only You can move a file on a CF card within a folder or move or copy it to a different folder These operations are per formed in the folder finder screen You do not need to enter the file menu screen The following explanations assume that ...
Page 59: ...front panel MULTI JOG dial and keys or the remote s cursor keys to navigate within the folder finder to open the move destination folder When you move the cursor to where the file name is displayed the blinking file to be moved will appear 5 Turn the front panel MULTI JOG dial or use the remote s cursor keys to move the blinking file to the desired location Press the MULTI JOG dial or the remote s...
Page 60: ...ile paused or playing the current track will be highlighted To exit the CD DA finder screen and return to the home screen Press the front panel TIME ESC key or the remote s CLR ESC key Opening the CD DA finder screen Selecting the track to play From the CD DA finder screen here is how to select the track that you want to play 1 Access the CD DA finder screen and highlight the track that you want t...
Page 61: ... remote s CLR ESC key To delete all characters following the cursor position Hold down the front panel TIME ESC key or the remote s CLR ESC key To switch between uppercase and lowercase Press the front panel DISPLAY INFO key or the remote s DISPLAY key To insert a space Press the CALL key To cancel editing Press the STOP key 4 When you have finished editing the text press the front panel MULTI JOG...
Page 62: ...t the SS CDR1 is stopped playing or paused and hold down the front panel MENU key or the remote s FINDER key to access the playlist finder screen Opening the playlist finder screen Navigating in the playlist finder screen The playlist finder screen will show three playlists PLAYL I ST _0 1 PLAYL I ST _03 The number of files tracks registered in each playlist is shown at the right With the playlist...
Page 63: ...TI JOG dial or the remote s ENTER key The folder finder screen will appear 3 Select highlight the file or folder that you want to add For details on navigation in the folder finder screen refer to Navigating in the folder finder screen on page 50 4 Press and hold the front panel MULTI JOG dial or the remote s ENTER key The file or all files in the folder will be added to the playlist NOTE A maximu...
Page 64: ...ess and hold the front panel MULTI JOG dial or the remote s ENTER key The playlist screen will appear In the screen the file to be moved will be blinking 3 Turn the front panel MULTI JOG dial or use the remote s cursor keys to move the file to the desired position in the playlist 4 Press the front panel MULTI JOG dial or the remote s ENTER key The move will be finalized ...
Page 65: ...CDR1 1 Press the MENU key to access the main menu list screen 2 Highlight the CD menu and press the front panel MULTI JOG dial or the remote s ENTER key 3 Highlight the BURN TO CD item and press the front panel MULTI JOG dial or the remote s ENTER key The SS CDR1 will automatically load the CF card While the data is being read the display will indicate MED I A READand a progress bar popup will app...
Page 66: ...e the files press the front panel MULTI JOG dial or the remote s ENTER key A popup will appear 9 If you want to add more tracks choose ADD TRACK and press the front panel MULTI JOG dial or the remote s ENTER key You will return to step 5 If you are finished selecting tracks choose BURN EXECUTEand press the front panel MULTI JOG dial or the remote s ENTER key A confirmation popup will appear 10 Onc...
Page 67: ...to write to the CD As described in Navigating in the folder finder screen on page 50 navigate within the finder to select the desired folder or file If you select a folder all files in that folder will be the source If you want to select multiple folders or files repeat the steps of highlighting the desired folder or file and pressing the CALL key A check mark will be added to the selected file or...
Page 68: ...P TO CF item and press the front panel MULTI JOG dial or the remote s ENTER key Converting and copying audio CD tracks 7 Select the copy destination target If the disc already has a folder structure navigate through the folders as described in Navigating in the folder finder screen on page 50 to select a folder or file The folder or files will be copied following the folder or file you select Copy...
Page 69: ... been writ ten When you are selecting the source material an indication of OVER will appear if the source material you are selecting exceeds the remaining capacity on the CF card or if the number of source tracks exceeds the allowable number of files on the CF card and you will be unable to proceed to step 7 below You will need to de select one or more of your selections until the OVER indication ...
Page 70: ...E You can select multiple files only within the same folder so once you use the CALL key to select the first folder or file you will no longer be able to move to a different folder If you are only selecting one folder or file there is no need to press the CALL key Simply highlight the desired folder or file and proceed to step 5 5 When you have selected all of the files to be copied hold down the ...
Page 71: ... copy desti nation If there is a conflict of names with a file that already exists in the copy destination the following popup screen will appear 8 Once again press the front panel MULTI JOG dial or the remote s ENTER key Writing will begin While the operation is in progress the screen will indi cate RIP and a progress bar will be shown When writing is completed you will return to the CD menu scre...
Page 72: ...addition to these operations you can use the CD MENU to finalize a CD and to copy files between CD and CF card Finalizing is explained in Chapter 6 Recording Finalizing a CD on page 43 For details on copy ing between a CD and a CF card refer to Chapter 10 Copying files between a CD and CF card on page 65 Erasing a track You can erase tracks that have been recorded in audio CD format on a CD RW The...
Page 73: ...screen will appear 5 Once again press the front panel MULTI JOG dial or the remote s ENTER key Disc erasure will begin While the operation is being executed the screen will indicate ERASE and a progress bar will be displayed When disc erasure is complete you will return to the CD MENU screen You can refresh completely erase a CD RW disc In some cases the SS CDR1 will be unable to recognize a disc ...
Page 74: ... remote s ENTER key The settings will be reset 5 Press the TIME ESC key or the remote s CLR ESC key to return to the home screen 12 Other settings Formatting a CompactFlash card If CF is selected as the current device and playback recording is stopped you can format the entire CF card in FAT format Before you use a CF card used by another device with the SS CDR1 you must format it NOTE When you fo...
Page 75: ...ions refer to Operations in the menu screens on page 18 1 Press the MENU key to access the main menu list screen 2 Select the UTILITY menu 3 Select the INFORMATION item Media information will be displayed allowing you to check the overall capacity and the free space Display when the CF device is selected Display when the CD device is selected 4 Press the TIME ESC key or the remote s CLR ESC key to...
Page 76: ...You cannot edit names that include characters other than alphabetic character numeral or symbol characters If even one such character is included the registered name will not be displayed at all Also the following symbolic characters cannot be used on the unit To access the name editing screen RENAME screen move from the folder finder menu to the folder menu or file menu and then select the RENAME...
Page 77: ...SHIFT F1 key To edit mode DELETE CF ERASE TRK CD SHIFT F2 key To ERASE MEDIA CD SHIFT F3 key To edit mode FORMAT CF REFRESH CD SHIFT F4 key To edit mode MOVE CF SHIFT F5 key To edit mode DIVIDE CF SHIFT F6 key To edit mode COMBINE CF SHIFT F7 key The same as the remote s FINDER key SHIFT F8 key To edit mode RENAME CF CD TEXT CD SHIFT F9 key Same as the front panel SELECT KEY or remote DEVICE SELEC...
Page 78: ...te the character at the cursor location Backspace key Delete the character preceding the cursor location Insert key Inserts a character at the cursor location ESC key Cancels editing or title editing and exits menu mode Enter key The same as the ENTER key NOTE When using the keyboard for editing press the desired execution key when the finder screen is displayed Example To execute DELETE Press SHI...
Page 79: ... will appear 4 Make the appropriate setting for each item BAUD RATE Specify the baud rate communication speed Choose from 4800 9600 1 9200 and 38400bps default 1 9200 PARITY BIT Specify the communication parity bit setting Choose from NON EVEN and ODD default NON STOP BIT Specify the communication stop bit setting Choose 1or 2 bit default 1 DATA LENGTH Choose the communication data length Choose 7...
Page 80: ... possible due to system limitations 6 caut i on Wr i teProtec t The media is write protected 7 caut i on NOT EXECUTE Failed to execute the editing operation 8 caut i on CAN T ED I T Editing was not possible due to system limitations 9 caut i on CAN T SELECT Selection execution was not possible due to system limitations 10 caut i on TRK PROTECT Editing was not possible because the track was protect...
Page 81: ...L I Z I NG MED I A Creating data in order to use this media with the SS CDR1 9 RECORD STAND BY Now in record ready condition 10 I NFORMAT I ON WR I T I NG Now writing the recorded data 11 FLASH LOAD I NG Now loading flash start data 12 F s CHANG I NG The system s sampling frequency is being changed because the track s sampling frequency differs from that of the current track ...
Page 82: ... ª Check the connections once again Adjust the recording level A setting you changed is not remembered ª ª The SS CDR1 backs up the settings when you change them This backup may fail if you turn off the power at an inappropriate time so do not turn off the power immediately after changing a setting Noise is heard ª ª Check whether a connection cable might have a bad connection When editing a name ...
Page 83: ...minal output level 4 dBu Maximum output level 20 dBu 1 Output impedance 100Ø Unbalanced RCA pin jack Nominal output level 10 dBV Maximum output level 6 dBV Output impedance 200Ø Phones output Stereo phone jack 1 4 45 mW 45 mW or greater THD N 0 1 or less at 32Ø load Digital input COAXIAL Connector RCA pin jack IEC 60958 3 Consumer S PDIF Input sampling frequencies supported 32 kHz 48 kHz Input imp...
Page 84: ...lia 240 VAC 50Hz Power consumption 17 W U S A Canada 17 W U K Europe Australia Dimensions w x h x d 482 6 x 44 5 x 301 mm 19 x 1 8 x 11 9 in Weight 3 5 kg 7 7 lb If you would like to change the maximum balanced output level please contact the service department Specifications and appearance are subject to change without notice for improvement Please be aware that due to improvements in this produc...
Page 85: ...TASCAM SS CDR1 85 Notes For China ...
Page 86: ...86 TASCAM SS CDR1 Notes ...
Page 87: ...TASCAM SS CDR1 87 Notes ...
Page 88: ...39 Wallace Street Mississauga Ontario L4Z 1Z8 Canada TEAC MEXICO S A De C V Phone 52 555 581 5500 www tascam com Campesinos No 184 Colonia Granjes Esmeralda Delegacion Iztapalapa CP 09810 Mexico DF TEAC UK LIMITED Phone 44 8451 302511 www tascam co uk Suites 19 20 Building 6 Croxley Green Business Park Hatters Lane Watford Hertfordshire WD18 8TE U K TEAC EUROPE GmbH Phone 49 611 71580 www tascam d...