background image

User guide

The Menu

64

IP address administration 
(IP Get M)

Selects the way of administrating the IP address.

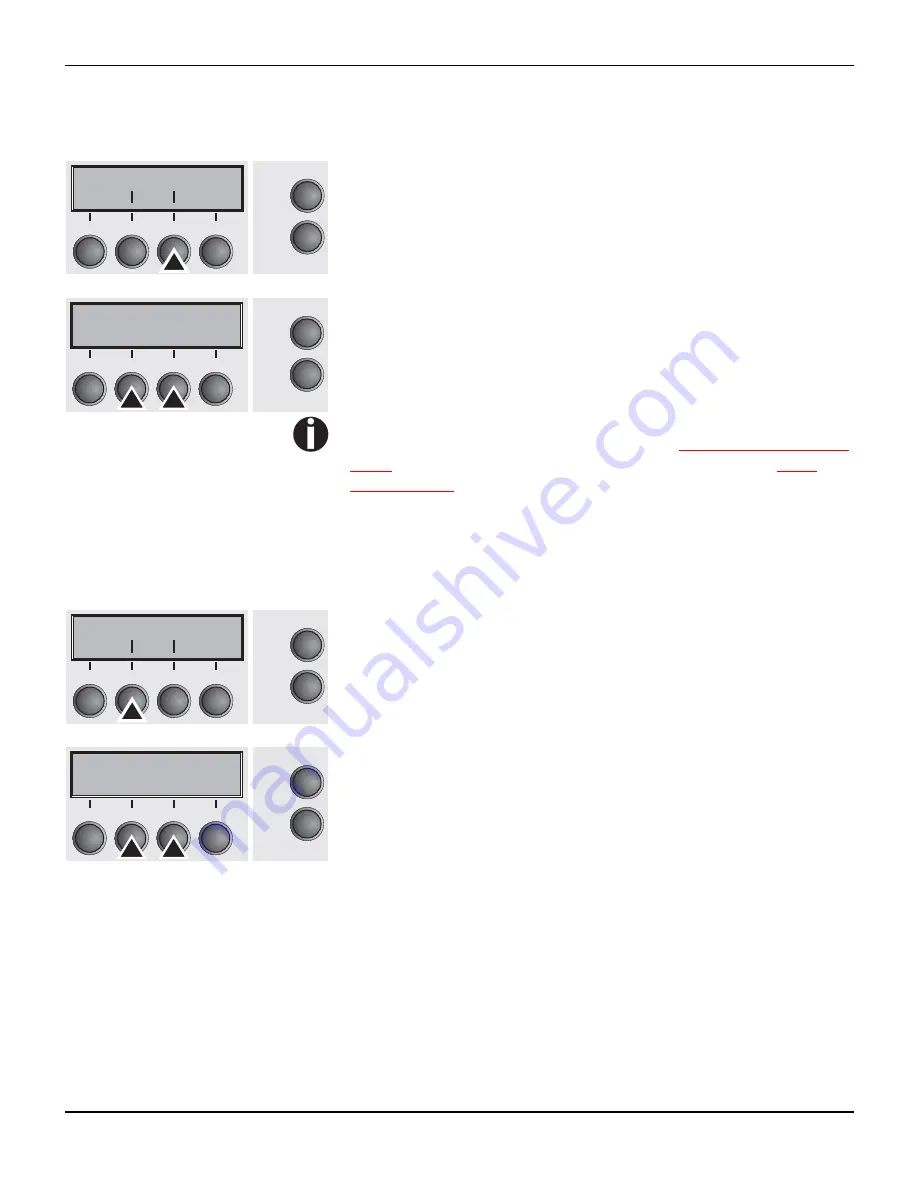
Press IP Get M (3) key.

Use the 

<

 (2) or 

>

 (3) key to select the desired setting.

Setting Options: Static, DHCP, BOOTP
Default Setting: Static

Confirm the setting by pressing the Set key (1). 

The setting Static is the precondition that the values entered in 
the parameter 
IP Addr become valid (see 

Setting IP address (IP 

Addr)

 (page 62). For further informations, refer to the 

Web 

Panel Manual

 on the Online-CD-ROM.

Press the Next key (4) to access the next group of parameters.

Banner page (Banner)

Specifies whether a banner page is to be printed out, when using the 
LPD/LPR protocol.

Press Banner (2) key.

Use the 

<

 (2) or 

>

 (3) key to select the desired setting.

Setting Options: Yes/No
Default Setting: No

Yes: When using the LPD/LPR protocol a banner page will be prin-
ted out in front of every print job, containing the file name and the 
print queue name. The width of the banner page is 8".

Confirm the setting by pressing the Set key (1). 

Press the Next key (4) to leave the parameter group Interf.. Press 
the Next key (4) again to access the next group of parameters.

Subnet

IP Get M

Online

Setup

Back

Next

2

1

3

4

IP Get M=Static*

Online

Setup

Set

<

>

Exit

2

1

3

4

Banner

Online

Setup

Back

Next

2

1

3

4

Banner=No

*

Online

Setup

Set

<

>

Exit

2

1

3

4

Summary of Contents for LA800+

Page 1: ...LA650 LA800 TM User guide Matrix printer...

Page 2: ...ting the ribbon cassette 10 Installing the ribbon cassette the first time 10 Changing the ribbon cassette 15 Printer drivers 20 Installing a printer driver in Windows 95 98 ME 20 Installing a printer...

Page 3: ...The Menu 45 Programming via the control panel 45 Enabling access to menu mode 45 Calling up the menu 45 Menu configurations Macros 46 Menu handling 47 Save settings 47 Selecting the LC display languag...

Page 4: ...Language Language 67 Paper parameters Paper 67 Form length Formlen 68 First printing position FormAdj 69 Print head gap manually Head 70 View and tear position TearView 71 Line length Width 72 Barcode...

Page 5: ...91 Answerback on ENQ Answ_ENQ 91 Setting the IBM mode IBMMode 92 Horizontal spacing of characters CPI 92 IBM character set IBM Cset 92 Code page CodPage 93 IBM Double Height DblHigh 94 Horizontal pit...

Page 6: ...completely printed out at the top 111 Dots within characters are missing 111 Error messages via the display 112 Additional display messages 115 Care and maintenance 116 Replacing the fuse 116 Cleanin...

Page 7: ...Interface Adapter IF Adapter Set RS232 DB9M MMP 138 Protocols 139 Memory mode XON XOFF 139 Memory mode Robust XON XOFF 139 Configuring the serial interface of the PC 140 DOS mode 140 Windows 95 98 ME...

Page 8: ...tically adjusts for different forms thickness The straight paper path is easy to access for reliable forms handling The LA800 LA650 optionally is configured with an optional tractor front A straight p...

Page 9: ...ings such as font character density print head distance print line height and tear off position Chapter 8 The Menu contains all the information necessary for con trolling the printer via the control p...

Page 10: ...User guide Printer at a glance 3 Printer at a glance 1 Soundproofing cover Front cover Power switch Control panel Top cover Interface connectors Power cord connector and fuse Bottom cover...

Page 11: ...User guide Printer at a glance 4 Printer in tractor mode Printer in single sheet mode Tractors Single sheet feeder Rear cover Paper support Paper guide...

Page 12: ...User guide Printer at a glance 5 Paperway Single sheet Tractor 1 Tractor 2 Fanfold paper mode Single sheet mode Standard printer Tractor 1 Single sheet Option Tractor 2 Not available on some models...

Page 13: ...ry cas sette and unpack it Pull the printer out of the card board box towards you and remove the remaining packaging material Check the printer for any visible transport damage and completeness Apart...

Page 14: ...n selecting the printer location observe the following additional instructions Never place the printer in the vicinity of inflammable gas or explosive sub stances Do not expose the printer to direct s...

Page 15: ...nter to the correct position using a pointed object e g screwdriver ball pen or tweezers Make sure that the printer is switched off before setting the correct voltage otherwise severe damage may be ca...

Page 16: ...printer passes through a memory test during the initialization phase In the display appears temporary the mes sage SDRAMTEST XXXXX XX ok If the memory test is successful finished the firmware number a...

Page 17: ...ter checks if a ribbon cassette is installed It also checks during the execution of a print job the operativeness of the rib bon cassette These functions mandatory require the use of the manufacturers...

Page 18: ...y slide the print head carriage to the left stop viewed from the printer front Move the coloured friction tabs to the left and right direction of the arrows as shown in the figure and raise the fricti...

Page 19: ...tilt the ribbon cassette forwards and thread in the ribbon between the coloured insertion ton gue and the ribbon support transparent plastic plate Align and insert the cassette into the guides on the...

Page 20: ...print head carriage back and forth sever al times If the ribbon is correctly seated there must be no perceptible resistance The ribbon should be transported during the travel from left to right If thi...

Page 21: ...User guide Inserting the ribbon cassette 14 Press the friction mechanism down until it clicks into place Close the top cover...

Page 22: ...the use of the manufacturers original ribbon cassettes see Accessories page 143 If other ribbon cassettes were used the message Check Ribbon appears in the display it is impossible to print Before op...

Page 23: ...ser guide Inserting the ribbon cassette 16 Move the coloured friction tabs to the left and right direction of the arrows as shown in the figure and raise the friction mechanism Remove the used cassett...

Page 24: ...ibbon casset te Turn the knob in the direction of the arrow in or der to take up slack of the ribbon Slightly tilt the ribbon cassette forwards and thread in the ribbon between the coloured insertion...

Page 25: ...sette 18 Insert the coloured tension knob into one of the two locations Turn the tension knob to take up slack in the rib bon until it is seated correctly at the bottom in the ribbon support Press dow...

Page 26: ...on is correctly seated there must be no perceptible resistance The ribbon should be transported during the travel from left to right If this is not the case you should check that the ribbon cassette i...

Page 27: ...n the Printer Installation Wizard 6 Specify whether you want to operate the printer as a Local Printer or Network Printer by clicking on the relevant option then press Next For instructions on install...

Page 28: ...r or Network Printer by clicking on the relevant option then press Next For instructions on installing the printer as a network printer please consult the documentation supplied with your network oper...

Page 29: ...it with other network users In this case you must enter an access name which will be displayed to the other network users Then click on Next 14 Specify whether you wish to print out a test page recom...

Page 30: ...the former may overwrite the latter Form settings Windows 2000 NT 4 0 XP In contrast to Windows versions 95 98 ME in which forms are de fined in the printer driver itself Windows versions 2000 NT 4 0...

Page 31: ...nd Faxes to open the print er folder 3 Move the mouse pointer to the printer symbol click on the right mouse key and click on Properties 4 Windows 95 98 ME Click on Graphics Windows 2000 Click on Prin...

Page 32: ...Firmware GEN Character set or font character generator P G Firmware and character set BOO Firmware character set and boot block The number of the currently transferred data block frame is dis played i...

Page 33: ...e link between prin ter and computer is interrupted i e no data can be received and printed In the Setup mode you can either select the printer menu or carry out the so called quick switch function Th...

Page 34: ...e Example The second line informs you which functions are currently assigned to which keys The word or symbol directly above a key tells you the current function of the key In our example key 1 Back s...

Page 35: ...per will be transported to printing position If the printer is set to online mode by pressing the Online key again the printer transports the paper in tear position Offline mode Only in this mode is i...

Page 36: ...to the other menu settings Menu may be depending on the model disabled by the manufacturer Proceed as follows to release this lock temporarily 1 Switch off the printer for approx 5 seconds 2 Switch th...

Page 37: ...printer Load error The printer cannot draw in the loaded paper Load paper from The printer has detected paper end during operation printer was switched on with no paper loaded Loading default Factory...

Page 38: ...If you keep the Setup key depressed while turning on the printer you regain access to the printer menu if you had locked it before with the help of the MenLock function The MenLock function is descri...

Page 39: ...The text Tear paper off appears in the dis play After having torn off the paper press any key If a single sheet is loaded in the printer it is ejected Use one of the marked keys to select the desired...

Page 40: ...r type in the setup menu If you wish to change the paper type in the setup menu proceed as follows Press the Setup key followed by the Paprpath key 3 Select the desired paper type with the key 2 or 3...

Page 41: ...to the section Paper specifications page 125 Fanfold paper Make sure that the printer is set for fanfold pa per printing If necessary change the paper ty pe see Changing the paper path page 32 Raise t...

Page 42: ...ing the perforation holes do not allow excessive slack since in this case the paper will bulge and there may be problems in the feeding process Make sure to align the paper stack in parallel with the...

Page 43: ...ese models Make sure that the printer is set to single sheet mode If necessary change the paper type see Changing the paper path page 32 Press the latch at the middle of the front cover The single she...

Page 44: ...ready status The sheet is automatically loaded when the printer is in online mode Ready and recei ves data from the computer The printer reports a paper out condition by dis playing Load paper from s...

Page 45: ...eypress Paper is transported upwards step by step Long keypress Continuous transport upwards Key 3 Short keypress Paper is transported downwards step by step Long keypress Continuous transport downwar...

Page 46: ...ut opening Make sure that the printer is in online mode Ready If necessary press the Online key Press the Tear 4 key The printer moves the perforation edge of the fanfold paper to the tear edge The di...

Page 47: ...to remove the paper from the printer Other wise the mechanical components may be damaged Make sure that the printer is in offline mode Pause press the On line key if necessary Press the Park 1 key If...

Page 48: ...wards the front see Printer at a glance page 3 The tear edge is located at the front side of the pa per output opening Press the 2 or 3 key to move the perforation to the desired position Confirm the...

Page 49: ...to the position where the bot tom edge of the first printing line A is aligned with the tear edge B of the printer The factory setting for the first printing position TOF is 12 72 4 23 mm This is equ...

Page 50: ...justment AGA page 77 Press the Setup key The printer changes to setup mode Press the Adjust 2 key Press the Head 1 key Use the 2 or 3 key to set the range within which the automatic gap adjustment is...

Page 51: ...it 4 key If you pressed the Font 1 key use the 2 or 3 key to select the desired font Confirm the selection by pressing the Set 1 key You can cancel the selection and leave the setting unchanged by pre...

Page 52: ...rogramming via the interface is lost after you turn off the printer whereas the programming carried out using the control panel is saved and stored even after you turn off the printer Enabling access...

Page 53: ...you used last When you switch on the printer for the very first time macro no 1 is loaded Macro no 1 only remains active until you load another macro The last active macro is stored even after the pri...

Page 54: ...to access the two previous parameter groups in the menu If you want to change a setting e g the line density then press the LPI key LPI lines per inch to access the actual parameter level The current...

Page 55: ...ppropriate setting in the menu see Menu lock MenLock page 66 Press the Next key 4 several times until the display indicates Lan guage Press the Language key 3 The display now changes to Parameter mode...

Page 56: ...d After saving your setting Set the display in our example indicates the following text This setting is retained even after switching off your printer Terminating Setup mode Press either the Setup key...

Page 57: ...le shown here depending on the printer software MENU IBMMode Margin Hvy Form Wrap Paphand PMS EPSMode DECMode Sound CX bid AGA FFmode PapOpt1 Barcode Barmode Width Paper TearView MenLock Language Auto...

Page 58: ...urations using the active paper feed see Menu settings example page 99 Press Print 2 key to start the printout Loading menu configurations Macro A menu is loaded you can choose between four menus see...

Page 59: ...hes between normal and quiet mode printing For all printing modes the print out is made with the bidirectional method in quiet mode printing In the first step the first row of pins is activated during...

Page 60: ...tter print quality which means that the printer works faster but with a slightly lower resolu tion LQ stands for Letter Quality which means that the resolution is higher at the expense of a slightly s...

Page 61: ...4 to access the next group of parameters Selecting start signal for escape sequence ESC Char Selects the start signal for control sequences Setting ESC Only character Escape 27d 1Bh can be used Settin...

Page 62: ...ess Parall 2 if you want to select a emulation for the parallel in terface or Serial 3 if you want to select a emulation for the serial interface of the printer in our example Parall Use the 2 or 3 ke...

Page 63: ...e 2 or 3 key to select the desired setting Setting Options Bidir Unidir Default Setting Bidir Normal internal characters will be printed always bidirectional whereas graphic semigraphic large characte...

Page 64: ...ncide Press Serial 2 key Data transmssion rate Baud Selects the data transmission rate baud rate baud bit per sec ond Press Baud 2 key Use the 2 or 3 key to select the desired setting Setting Options...

Page 65: ...dd parity The selection of MARK or SPACE causes a data byte transmission with parity bit but without checking the received da ta Transmission data with parity bit is always marked with 1 MARK or 0 SPA...

Page 66: ...to access the next group of parameters Signal Processing DTR Defines the conductor to which the DTR signal is connected DTR Data Terminal Ready Press DTR 2 key Use the 2 or 3 key to select the desire...

Page 67: ...by pressing the Set key 1 Press the Next key 4 to access the next group of parameters Interface buffer Buffer Selects the size of the interface buffer Press Buffer 2 key Use the 2 or 3 key to select t...

Page 68: ...by state when the printer stops receiving data Press Timeout 3 key Use the 2 or 3 key to select the desired setting Setting Options 2 sec 30 sec Default Setting 2 sec Confirm the setting by pressing...

Page 69: ...ptions 0 to 255 Default Setting 0 Confirm the setting by pressing the Set key 1 Set the remaining three digit groups in the same way Setting Gateway address Gateway Input of the Gateway address of the...

Page 70: ...2 key This menu level offers the possibility to set the IP address which is divided into four digit groups octet 1 to 4 You can activate octet 3 and 4 by pressing the Next 2 key Press OCTET 1 1 key Us...

Page 71: ...arameters Banner page Banner Specifies whether a banner page is to be printed out when using the LPD LPR protocol Press Banner 2 key Use the 2 or 3 key to select the desired setting Setting Options Ye...

Page 72: ...atic line feed Auto LF Switches the automatic line feed LF on or off after receiving the signal CR carriage return Press Auto LF 3 key Use the 2 or 3 key to select the desired setting Setting Options...

Page 73: ...nt setting the font and the character spacing CPI while access to Menu mode Menu key is disabled If you select MenLock All you can access the Online Offline Load Park Paper and Paper Feed LineFeed For...

Page 74: ...Formlen form length FormAdj first printing position and Head print head gap only if AGA Off sepa rately for each paper source in the current menu Only installed options can be selected Press Paper 2 k...

Page 75: ...ormats Please note that the adjust ment in Lines depends on the selected LPI For example 8 LPI at a selected line number of 96 lines results in a formlength of 12 inches 96 lines 8lines inch 12 inches...

Page 76: ...t correspond to a stan dard format Confirm the setting by pressing the Set key 1 First printing position FormAdj Sets the first print position of a form in n 72 inch separately adjust able for each pa...

Page 77: ...sired setting Setting Options 0 to 100 Default Setting 18 Select the Head 18 parameter for normal paper Use a greater dis tance for thicker paper Recommended values for the print head gap If you chang...

Page 78: ...After printing the print er waits for the given interval to bring the paper once more to the tear off position If the tear off edge is not aligned with the perforation of the paper this can be correct...

Page 79: ...P Large Character Printing Press Barcode 2 key Use the 2 or 3 key to select the desired setting Setting Options On Off Default Setting Off The definition and activation is performed by special sequenc...

Page 80: ...cting the barcode which is already being printed Consequently normal characters can be printed in every line to the right or left of the barcode In unsecured mode the required paper transport for prin...

Page 81: ...2 or 3 key to select the desired setting Setting Options On Off Default Setting Off FFmode On If the paper is positioned in the first printing line TOF form feeds will be ignored FFmode Off Form feed...

Page 82: ...d setting Setting Options Off T1 T2 Default Setting Off If an optional tractor is installed and the Off parameter is activated only the selected tractor is supported either via the menu or an ESC sequ...

Page 83: ...aper jam printing and paper movements stop and an error message PAPER JAM is displayed PMS Off A paper jam will not produce an error message The Paper Motion Sensor PMS detects any paper jam or unin t...

Page 84: ...ilable Confirm the setting by pressing the Set 1 key The printer automat ically leaves test mode and assumes online mode Paper handling Paphand The Paphand group of menus improves the possibilities fo...

Page 85: ...Pagewid key 3 Setting options From 20 to 136 in 1 10 inch steps Default setting 136 10 Zoll 136 characters at 10 characters inch If Head up On the print head moves to the calculated center of the pap...

Page 86: ...nd per foration area u towards the center of the paper while the paper is moving The Pagewid option must be correctly set in this case see Paper width Pagewid page 78 Press the Rightzo key 3 Setting o...

Page 87: ...1 key Change to the next parameter group with the Next key 4 Line wrap Wrap Select the Wrap menu 2 Setting options On Off Default setting On Wrap On If more characters than can be printed are transmi...

Page 88: ...r prints the same line twice at double strike This setting ensures that copy paper produces opti mum results Select the HvyForm menu 3 Setting options On Off Default setting Off With the Copy Draft NL...

Page 89: ...module The print head carriage moves once across the maximum possible printable area of the paper and stores the width measured in this process The measuring process varies depending on the paper sour...

Page 90: ...defect or misinterpretation of the paper width it is necessary to deactivate the APW function APW Off since otherwise the printout will be too narrow or there will be no printout at all In this case...

Page 91: ...printing actually starts Press the Topmrg key 2 Setting options Line 1 to Formlength Default setting Line 1 The setting of this Option depends on the setting of both the vertical pitch and the form l...

Page 92: ...e value for top margin see Setting the top margin Topmrg on page 84 to the value for form length Do not set Topmrg eqal or higher than Botmrg Confirm the setting by pressing the Set 1 key Change to th...

Page 93: ...horizontal spacing of the printed characters used with the DEC protocol Press the CPI key 2 Setting options 5 6 6 65 8 25 8 6 9 10 12 13 3 15 16 5 17 1 18 20 cpi and Proportional Spacing Default setti...

Page 94: ...British French French German German Norw Danish Norwegian Danish DEC Finnish DEC Finnish DEC French Can DEC French Canadian DEC Norw Dan DEC Norwegian Danish DEC Swedish DEC Swedish DEC Dutch DEC Dutc...

Page 95: ...E USA Code Page 860 JIS Roman E France Code Page 861 DEC Norw Dan E Germany Code Page 862 ISO Spanish E United Kingd Code Page 863 DEC Swedish E Denmark 1 Code Page 864 Norw Danish E Sweden Code Page...

Page 96: ...tting by pressing the Set 1 key Deleting sequence or buffer CAN Fkt This option defines the behaviour of the cancel function Press the CAN Fkt key 3 Setting options Abort Sequ Kill Buffer Default sett...

Page 97: ...ing the Set 1 key Initial Report Report This option determines whether the printer sends an initial report to the host or not Press the Report key 3 Setting options Enable Disable Default setting Disa...

Page 98: ...Answerback on ENQ Answ_ENQ This option determines whether the answerback message is sent to the host when the printer receives an ENQ code Press the Answ_ENQ key 3 Setting options Enable Disable Defau...

Page 99: ...the Set 1 key IBM character set IBM Cset This option identifies which kind of character set is to use for En glish IBM standard characters or non English languages IBM ex tended characters Press the...

Page 100: ...w ISO Italian E USA Code Page 437 JIS Roman E France CP 437 Greek DEC Norw Dan E Germany Code Page 850 ISO Spanish E United Kingd Code Page 851 DEC Swedish E Denmark 1 Code Page 852 Norw Danish E Swed...

Page 101: ...l height Confirm the setting by pressing the Set 1 key Change to the next parameter group with the Next key 4 Horizontal pitch on Compress IBMComp This option selects the character density when receiv...

Page 102: ...s printed with or with out a slash Press the Sl Zero key 3 Setting options On Off Default setting Off Confirm the setting by pressing the Set 1 key Change to the next parameter group with the Next key...

Page 103: ...defines the style which is applied to the character set Press the EPS Cset key 3 Setting options Graphic Italic DLL Default setting Graphic Graphic The character sets are not altered Italic The Italic...

Page 104: ...O Latin 9 Su Code Page 860 German E USA Code Page 861 ISO Italian E France Code Page 862 JIS Roman E Germany Code Page 863 DEC Norw Dan E United Kingd Code Page 864 ISO Spanish E Denmark 1 Code Page 8...

Page 105: ...s printed with or with out a slash Press the Sl Zero key 3 Setting options On Off Default setting Off Confirm the setting by pressing the Set 1 key Change to the next parameter group with the Next key...

Page 106: ...User guide The Menu 99 Menu settings example...

Page 107: ...data transmission from the computer to the printer The extended menu contains three test functions ASCII 80 ASCII 136 H Dump Enter advanced menu mode by pressing the key Online while switching on the...

Page 108: ...t to change the configuration for the test print out To do this press the key Setup The printer then changes to Setup mode and the first of the main levels is then displayed Program your printer in th...

Page 109: ...sed to determine and set the optimal print head gap see the section Setting the print head gap page 43 Exiting Rolling ASCII test mode The self Rolling ASCII test mode test mode can only be terminated...

Page 110: ...prox 1 second and then auto matically changes to display ASCII 80 ASCII 136 Press the key Next 4 the display shows the next menu level If you press the key H Dump 2 you select the H Dump mode and Offl...

Page 111: ...enu 104 Terminating Hex Dump Hex Dump mode can only be terminated by switching off the printer If you want to stop the Hex Dump printout before switching off the printer press the key Online and then...

Page 112: ...ing the key Online while switching on the printer and keep the key pressed until Testmode appears on the display The display shows Test mode for approx 1 second and then auto matically changes to disp...

Page 113: ...n This setting is not reset by loading the default factory settings Confirm your settings by pressing the Set key 1 Settings for paper with dark back Pap back Select the Pap back 3 menu Setting option...

Page 114: ...a simple operat ing error and a major malfunction This chapter provides information on the rectification of faults with out the assistance of specially trained personnel Follow the advice and tips in...

Page 115: ...t to open the printer You might suffer an electric shock The display is lit but the printer does not print 1 Check that the printer is Online If the displays shows Offline then press the key Online Tr...

Page 116: ...eeder If necessary drive the remaining paper manually to the park position with the key Paper jam fanfold paper 1 Open the top cover If a paper jam should occur then remove the jammed paper by tearing...

Page 117: ...on Single sheets page 36 Pay attention to the following points Set single sheet feed to the corresponding paper width Insert the paper straight as far as possible Adjust the print head gap to the pape...

Page 118: ...nnected to the com puter and to the printer 2 Check that the proper emulation and the correct character set country CG table or character set is selected in the Setup menu 3 Check the length of the in...

Page 119: ...s blocked by a foreign object Whether the paper is damaged Whether the tractors are closed and locked Whether the paper is too tight or loose Whether the paper is within the specified range Details se...

Page 120: ...Note down the display mes sage Contact your dealer Transmission error from computer to printer via the optional serial interface Compare the interface configu ration of your printer with the settings...

Page 121: ...ical service The printer prints at lower speed No action required When this message comes up even in a cold printer please contact your technical service The ribbon misses is damaged and blocked or a...

Page 122: ...ired Functions which have no meaning in this emulation have been selec ted For this function please switch to the appropriate emulation in the menu see Selecting Proto col emulation page 55 You are in...

Page 123: ...e printer especially the sliderails and shafts Replacing the fuse The printer is provided with a line fuse accessi ble from the exterior Press the fuse cover slightly inwards with a screwdriver and tu...

Page 124: ...ing agent and a soft lint free cloth Do not use abrasive cleaners Never use solvents Cleaning the interior Remove paper and dust with a soft brush Check that any paper has been removed from the tracto...

Page 125: ...whether the ribbon is worn or damaged The ribbon must be replaced if it is frayed see Inserting the ribbon cassette page 10 and Error messages via the display page 112 Cleaning the upper friction Cle...

Page 126: ...00 12 0 12 x 10 1000 15 0 08 x 08 1000 15 0 12 x 08 571 17 1 12 x 12 667 20 0 12 x 10 CPQ Copy Print Quality 300 10 0 24 x 12 360 12 0 24 x 10 450 15 0 16 x 08 450 15 0 24 x 08 260 17 1 24 x 12 300 20...

Page 127: ...mm max 2 43 mm Fonts Standard High Speed Draft DPQ Copy Draft Courier Roman Sans Serif OCR A B Gothic Prestige Orator Souvenir all resident in NLQ und LQ DLL is standard Barcodes Standard 18 see Barc...

Page 128: ...h 100 DC LA800 50 000 pages month DPQ 600 pages hour 10 000 h 100 DC Mains voltage USA Canada 120 V 10 60 Hz 2 Europe 230 V 10 50 60 Hz 2 Power consumption LA650 at 100 throughput 65 VA when idling 2...

Page 129: ...Service life Print head Ribbon 500 mio DPQ 12 x 12 matrix 20 mio characters DPQ Environmental conditions Operation Temperature Rel humidity Climate Storage Temperature Rel humidity Climate Transport T...

Page 130: ...c IEEE Std 1284 1294 Voltage supply of external devices on pin 18 U 5 V 10 I 0 5 Amax Interface connections Printer side Amphenol 57 40360 36 pin or compatible Cable side Amphenol 57 30360 25 pin or c...

Page 131: ...n rate 600 bauds to 19 200 bauds Signal status OFF Mark log 1 3 V to 15 V ON Space log 0 3 V to 15 V Connection cable Length up to 15 m Interface connections ITT Cannon connector series DB 25 S Transm...

Page 132: ...should be as soft as possible A wavy binding edge may amper the smooth feeding of these sets Multi part forms must be loaded with the bound top edge down Multi part forms should be tested for suitabil...

Page 133: ...rier IBM OCR B OCR A Prestige Script Orator ISO USA ASCII 42 X X X X X X X X X X X ISO UK British 41 X X X X X X X X X X X ISO France French 52 X X X X X X X X X X X ISO Germany German 4B X X X X X X...

Page 134: ...Epson IBM New Hebrew A5 X X X X X X X X X X X Epson IBM D Hebrew A4 X X X X X X X X X X X CP437 Latin US 80 X X X X X X X X X X X CP850 Latin 1 82 X X X X X X X X X X X CP851 Greek 88 X X X X X X X X...

Page 135: ...X X DEC ISO Latin 1 Supplem 63 X X X X X X X X X X X DEC ISO Latin 2 Supplem B1 X X X X X X X X X X X DEC ISO Latin Greek Supp B2 X X X X X X X X X X X DEC ISO Latin Hebrew Sup B3 X X X X X X X X X X...

Page 136: ...t Copy and 15 cpi Epson style Greek characters look the same for all LQ fonts ID for ESC R ESC High Speed Draft Draft Copy Roman Sans Serif Courier incl Courier IBM OCR B OCR A Prestige Script Orator...

Page 137: ...be implemented and shown in the menu and can be selected via the menu or with the ESC R command Codepages 210 and 220 cannot be selected with ESC t com mands in Epson emulation these commands are not...

Page 138: ...SC decimal 27 or hexadecimal 1B followed by one or more charac ters which represent commands to the printer Please note that this escape character has nothing to do with the ESC key on your com puter...

Page 139: ...escape sequence List of available barcodes Please note that within the Barcode environment the barcode commands have priority in case of conflicts with the emula tion Additional information is provide...

Page 140: ...y the printer If the printer is configured to use both interfaces simultane ously it monitors both interfaces for incoming data As soon as the printer recognizes a signal it switches to the respective...

Page 141: ...data input is blocked until the data buffer is empty This guarantees data transmission in blocks of 1 KB Connector assignment Transmission length max 2 0 m Connector no Direction Printer PC Signal 1 S...

Page 142: ...r common grounding Connector assignment Transmission length max 15 m Type RS232C interface Synchronization Asynchronous Transmission rate 600 Baud to 19 200 Baud Signal status OFF log 1 3 V to 15 V ON...

Page 143: ...DY is active at pin 4 Input signals Output signals PC AT 9 pin Printer 9 pin RxD 2 3 TxD TxD 3 2 RxD CTS 8 4 DTR RDY SG 5 5 SG DSR 6 DTR 4 PC AT 25 pin Printer 9 pin FG 1 FG TxD 2 2 RxD RxD 3 3 TxD CT...

Page 144: ...lex Supported operating systems Windows XP Windows Server 2003 Windows 2000 Windows NT Linux Unix Sun Solaris Supported protocols SNMP SMTP TCP IP FTP lpr lpd Port 9100 Designation of IP address DHCP...

Page 145: ...that the ferrit bead always points in direction to the printer Adapter RS232 D Sub9 MMJ Serial connector D SUB9 male 9 pins Modular connector DEC MMJ female 6 pins Internal wiring MMJ Cable Length 3 m...

Page 146: ...results in stopping the data transmission When the FIFO buffer is empty again the interface signals READY level 0 12 V and XON hex 11 dec 17 Data transmission can be continued In addition the READY s...

Page 147: ...s must be modified to use other values Windows 95 98 ME Click on the Start button in the Windows taskbar Move the mouse to Settings and click on Control Panel Click on System followed by Device Manage...

Page 148: ...the network and or make any changes The assumed address space corresponds to the TCP IP adress class C 192 168 1 xxx The subnet mask to be used is 255 255 255 0 The address of the router or gateway is...

Page 149: ...52 Printer pedestal A cabinet to be used as a printer stand and for storing fanfold paper stacks Part no 061 910 Paper output tray An optional accessory for the printer stand useful for optimum out pu...

Page 150: ...ccessories 143 Accessories Ribbon cassette Ribbon cassettes are available in the following versions Programming manuals The available programming manuals are enclosed on this CD ROM Name Part no Ribbo...

Page 151: ...LF 65 Automatic paper motion sensor PMS 76 Automatic paper width detection APW 82 AutoTear 71 AutoTra 75 AutoView 71 Available barcodes 132 Available character sets and fonts 126 B Banner 64 Banner p...

Page 152: ...Adj 69 Format 58 Forml 68 Fuse Replacing 116 G Gateway 62 General print problems 108 Graphic options 24 H Head 70 Head up 78 Hex Dump 103 HvyForm 81 I I O 57 Increasing the printhead gap Head up 78 In...

Page 153: ...7 Data format 58 Data transmission rate 57 Ethernet interface 62 First printing position 69 Form feed mode 74 Form length 68 Horizontal spacing of characters DEC mode 86 Horizontal spacing of characte...

Page 154: ...77 Paper parameters Paper 67 Paper specifications Standard printer 125 Paper transport 38 Paper type Changing 32 Paper with dark back setting 106 Paperways 5 Paphand 77 Papier einlegen 34 PapOpt 75 P...

Page 155: ...e Serial 57 Serial interface V 24 RS232C 135 Setting and avtivating options PapOpt 75 Setting Gateway address 62 Setting IP address 62 Setting line spacing LPI 54 Setting Subnet mask 63 Setting the fi...

Page 156: ...115 Error messages via the display 112 General print problems 108 Problems with the print quality 111 U Unpacking the printer 6 Upper friction Cleaning 118 UserChr 88 V View position AutoView 71 Volt...

Page 157: ...ttp www tallygenicom de ITALY TallyGenicom S R L Via Borsini 6 I 20094 Corsico MI Italia Tel 39 02 48608 1 Fax 39 02 48601 141 http www tallygenicom it CANADA TallyGenicom 125 Traders Boulevard 9 Miss...

Reviews: