background image

DOC Class B Notice

This digital apparatus does not exceed Class B limits for
radio noise emission for a digital apparatus as set out in
the Radio Interference Regulations of the Canadian
Department of Communications.

Shielded Cables 

Connections between the COMET notebook and periph-
erals must be made using shielded cables in order to
maintain compliance with FCC radio frequency emission
limits.

The connection of unshielded equipment interface cable
to this equipment will invalidate the FCC Certification of
this device and may cause interference levels that exceed
the limits established by the FCC for this equipment. It is
the responsibility of the user to obtain and use a shielded
equipment interface cable with this device. If this equip-
ment has more than one interface connector, do not leave
cables connected to unused interfaces.

Changes or modifications not expressly approved by the
manufacturer could void the user's authority to operate
the equipment.

vi

COMET User’s Guide

Summary of Contents for COMET12

Page 1: ...COMET12 User s Guide...

Page 2: ...er Service 7 00 AM to 6 00 PM PST Tel 1 800 734 7030 Fax 760 930 0762 E mail support tadpole com Government Support Tadpole Computer Inc 21355 Ridgetop Circle Ste 150 Dulles VA 20166 Phone 703 433 115...

Page 3: ...reproduced stored in a retrieval system or transmitted in any form or by any means electronic mechanical photo copying recording or otherwise without the prior written permission of Tadpole No patent...

Page 4: ...any time without notice and without obligation of Tadpole to noti fy any person of such revision or changes Environmental Statement Tadpole Computer Inc supports the concept of an envi ronmentally re...

Page 5: ...quipment generates uses and can radiate radio frequency energy and if not installed and used in accordance with the instructions may cause harmful interference to radio and television reception Howeve...

Page 6: ...its The connection of unshielded equipment interface cable to this equipment will invalidate the FCC Certification of this device and may cause interference levels that exceed the limits established b...

Page 7: ...FCC to operate this equipment Avis Le present appareil numerique ne met pas de bruits radio electriques depassant les limites applicables aux appareils numeriques de la classe B prescrites dans le Reg...

Page 8: ...ipment do not expose the COMET notebook to rain or moisture Do not immerse the COMET notebook in water If water has entered the COMET notebook cabinet do not use the notebook until it has been inspect...

Page 9: ...Sie auf keinen Fall Ihre COMET Notebook mit Trockenbatterien Primarzellen zu betreiben oder solche mit dem Netz Ladegerat zu laden Versuche dieserArt konnen Personen oder Sachschaden zur Folge haben W...

Page 10: ...s voltage points or short out parts that could result in a fire or electrical shock Keep liquids of any kind away from the notebook 6 This notebook should only be connected to theAC power source indic...

Page 11: ...explosion s il y a remplace ment incorrect de la batterie Remplacer uniquement avec une batterie de meme type ou d un type recommande par le constructeur Mettre au rebutles batteries usagees conforme...

Page 12: ...zur Zerstorung des Gerates fuhren sich der Gefahr eines Stromschlages aussetzen oder das Gerat in Brand setzen 5 Das Gerat darf nur an vorschriftsmassige Steckdosen mit der auf dem Gerat angegebenen...

Page 13: ...igen Kundendienst bei folgen den Storungen 1 Netzkabel ist defekt oder stark abgenutzt 2 Flussigkeit ist in das Gerat gelangt 3 Das Gerat war Regen oder Leitungswasser ausgesetzt 4 Das Gerat ist herun...

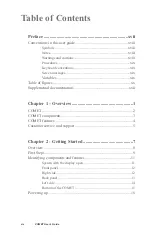
Page 14: ...es xx Supplemental documentation xxii Chapter 1 Overview 1 COMET 2 COMET components 3 COMET features 4 Customer service and support 5 Chapter 2 Getting Started 7 Overview 8 First Steps 9 Identifying c...

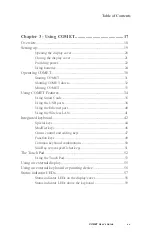
Page 15: ...the Ethernet port 40 Using the Wireless LAN 41 Integrated keyboard 42 Special keys 44 Modifier keys 46 Cursor control and editing keys 47 Function keys 49 Common keyboard combinations 50 Sun Ray serv...

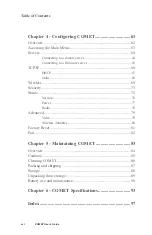
Page 16: ...ireless 69 Security 73 Status 75 Version 76 Power 77 Radio 78 Advanced 79 Video 79 Wireless Tunables 80 Factory Reset 81 Exit 82 Chapter 5 Maintaining COMET 83 Overview 84 Cautions 85 Cleaning COMET 8...

Page 17: ...Preface...

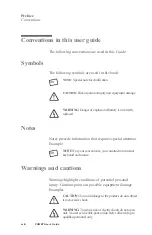
Page 18: ...tion that requires special attention Example NOTE For your convenience you can attach an external keyboard and mouse Warnings and cautions Warnings highlight conditions of potential personal injury Ca...

Page 19: ...creen messages Screen messages appear in Helvetica type bounded by rules Example COMET Keyboard Present Ethernet address x x xx x x xx Host ID xxxxxxxx Variables Variables appear as a lower case x For...

Page 20: ...battery connector bay 26 Figure 3 6 Expansion battery connector exposed 26 Figure 3 7 Expansion battery lock in the open position 27 Figure 3 8 Expansion battery aligned in place 28 Figure 3 9 Expans...

Page 21: ...gure 4 8 Enter WEP key hex prompt 72 Figure 4 9 The Security menu 73 Figure 4 10 The Change Password screen 74 Figure 4 11 The Status Menu screen 75 Figure 4 12 The Version screen 76 Figure 4 13 The P...

Page 22: ...b site at http www tadpolecomputer com html support You will also find additional documentation at the fol lowing url ftp ftp tadpole com support Comet Documentation Supplemental documentation is also...

Page 23: ...Chapter 1 Overview...

Page 24: ...hin client The Sun Ray Server With the release of Sun Ray Server Software 3 0 Sun Ray Servers can be Solaris or Linux based The Sun Ray Server manages user authentication and user sessions that run on...

Page 25: ...it for damage Here are the items you should find in your shipping carton Figure 1 1 COMET components If either the shipping carton is damaged or the COMET components are missing or damaged please cont...

Page 26: ...h2 wayscrollbutton SmartLithium Ion2 2Ahbatterypack offlinechargetime 2 5hrs OptionalSmartLithium Ion3 0Ahexpansionbatterypack UniversalPowerAdapter COMETisfullycompatiblewithSunRayServerSoftware2 0or...

Page 27: ...may contact Tadpole s Customer Service and Support staff using the contact information found on page ii Before you call make a note of the serial number as it appears on the bottom of the COMET as sho...

Page 28: ...this page blank 6 COMET User s Guide...

Page 29: ...Chapter 2 Getting Started...

Page 30: ...l introduction to get you started The next chapter Using COMET on page 17 describes more detailed informa tion about these features A few minutes spent on these two chapters will ensure you get the mo...

Page 31: ...tage points of humidity you will need to stabilize the notebook s temperature Let your COMET adjust to room temperature before proceeding 2 Install the COMET Lithium Ion battery into the battery bay w...

Page 32: ...r adapter The battery need not be installed for AC operation For more detailed instructions on the AC adapter see Providing power on page 22 4 Open the COMET display Open the COMET display screen by s...

Page 33: ...ng components and features of the COMET 1 Case Latch 5 Keyboard 2 Display 6 Touch Pad 3 Power button 7 Touch Pad Left Middle and Right Buttons 4 Status Indication LEDs Figure 2 3 COMET components Gett...

Page 34: ...Microphone 3 Volume Dial 2 Headphone SPDIF out Figure 2 4 COMET front panel Right side Identify the following ports on the right side of the COMET 1 Unused 3 USB 2 Smart Card Slot Figure 2 5 COMET rig...

Page 35: ...llowing ports on the back panel of the COMET 1 AC Power Input 4 Status Lights 2 USB 5 VGA Monitor 3 Battery Pack Figure 2 6 COMET back panel Getting Started First steps Chapter 2 Getting Started COMET...

Page 36: ...de Identify the following ports on the left side of the COMET 1 Kensington Lock 3 10 100Base T Ethernet 2 Unused 4 Unused Figure 2 7 COMET left side Getting Started First steps 14 COMET User s Guide 1...

Page 37: ...s 5 Serial number 2 Battery pack 6 Door for expanded battery 3 Battery release lock 7 Access Cover Do Not Remove 4 Battery release latch 8 Mini PCI cover Figure 2 8 Bottom of COMET Getting Started Fir...

Page 38: ...your Sun Ray Server Figure 2 9 COMET power switch 2 COMET will first attempt to locate servers using the Ethernet port and then if none are found and if wireless networking is enabled it will look for...

Page 39: ...Chapter 3 Using COMET...

Page 40: ...pter provides more detailed information about the tasks described in Chapter 2 Getting Started A few minutes spent here will help you get the utmost ben efit from your COMET Using COMET Overview 18 CO...

Page 41: ...ree of obstructions allowing you to open the display screen completely without hindrance Adequate ventilation is required for the COMET Do not cover or block the ventilation fans or slots on the case...

Page 42: ...lay cover and gently raise the cover to an upright position as shown in the illustration below Figure 3 1 Opening the display cover You can adjust the screen up to 30 degrees from vertical for a bette...

Page 43: ...orward and down 2 Carefully press the top of the cover down toward the key board until the case latch clicks into its closed position If the cover is closed while the COMET is still running the LCD go...

Page 44: ...accidentally WARNING Use only the suppliedAC adapter with the COMET Do not use anAC adapter designed for use with another product 3 Plug the connector from theAC adapter into theAC Power Jack as show...

Page 45: ...the AC adapter Unplug the AC cable from the AC outlet Then slide the connector from the AC adapter out of the power input socket on the COMET Using COMET Setting up Chapter 3 Using COMET COMET User s...

Page 46: ...he backlight is described on page 79 Installing the battery To install the battery 1 Install the COMET Lithium Ion battery into the battery bay which is located on the back edge of the COMET Push it i...

Page 47: ...down the COMET according to the instructions in Shutting COMET down on page 32 2 Turn the COMET over 3 Toremovethebattery performthefollowingthreesteps a slidethebatterylockbuttontotheright b pressthe...

Page 48: ...pansion battery connector bay on the bottom of COMET Lift and rotate the cover snapping it into the cover indentation to the expose the connector Figure 3 5 Cover for the expansion battery connector b...

Page 49: ...cking screwsonthebackedgeoftheexpansionbatterypackare alignedsothattheraiseddotsonthescrewsareoppositethe Unlockicon Figure 3 7 Expansion battery lock in the open position Using COMET Setting up Chapt...

Page 50: ...ry pack sliding it towards the front edge of the system When the expansion battery is attached it slides down into place if oriented as it is in the photo The bottom edge in the photo is the front of...

Page 51: ...apter to recharge the battery It takes about 2 5 hours to recharge a new battery when the COMET is turned off After fully charging the expansion battery you can operate the COMET for 4 to 8 hours in c...

Page 52: ...ure before powering up This is particularly important when the notebook is brought from a very cold environment into a warm room In such cases moisture can condense on and inside the notebook and caus...

Page 53: ...an IP address or use DHCP which provides automatic IP address resolution Optional information detailed may be needed for advanced settings detailed in the Chapter 4 Configuring COMET Starting the COM...

Page 54: ...capability to power down you may simply press the power button NOTE Any open processes files will remain open and tie up server resources so you may want to save your work and quit any open applicati...

Page 55: ...dures 1 Disconnect all cables and connectors including theAC adapter cable from the COMET 2 Fold the display cover down and close and latch the case 3 You can now move the COMET to a new location reco...

Page 56: ...ection contains operational tips and other information unique to the COMET feature set For more detailed information on a listed feature refer to COMET Specifications on page 93 Using COMET Operating...

Page 57: ...g Smart Cards Your COMET thin client notebook features one Smart Card slot as shown in Figure 3 10 Figure 3 10 Smart Card slot Using COMET Using COMET features Chapter 3 Using COMET COMET User s Guide...

Page 58: ...e right side of the COMET as shown in the following illustration 2 Hold the Smart Card with the chip side up 3 Carefully slide the card into the socket 4 If you encounter too much resistance do not fo...

Page 59: ...12 and the following instructions for removing a Smart Card 1 Grasp the exposed edge of the Smart Card 2 Pull out as shown to remove Figure 3 12 Removing a Smart Card Using COMET Using COMET features...

Page 60: ...e COMET fully supports USB keyboards and mice Check with your server administrator to see what addi tional USB peripherals may be supported for your COMET thin client Using COMET Using COMET features...

Page 61: ...orts located on the right side and back panel of the system as shown in the figures below Figure 3 13 Right side USB ports Figure 3 14 Back panel USB port Using COMET Using COMET features Chapter 3 Us...

Page 62: ...etwork 1 Set it on a work surface near the Ethernet twisted pair cable or transceiver MAU 2 Attach a twisted pair cable to one of the COMET s 10 100 Base T Ethernet LAN port Figure 3 15 RJ 45 Ethernet...

Page 63: ...may not be turned on at the factory To turn on the wireless card press the Function F2 keyboard combination For more information about configuring the wireless capabilities please refer to Chapter 4...

Page 64: ...102 key keyboard including an embedded keypad and a full array of special function keys This sec tion covers the COMET s keyboard and identifies several keys that are commonly used when working with e...

Page 65: ...his section identifies some of these keys and dis cusses their functions when used with either the Operating System Software or other application soft ware such as word processors spread sheet applica...

Page 66: ...tion key F1 in your word processor or spread sheet program but want to cancel the command so that the computer will ignore the func tion key just press Esc Enter While using application software the p...

Page 67: ...Lock key engaged if you want to generate the symbols and punctuation marks above the number keys you must still use the Shift key Note that when the Caps Lock key is engaged the Caps Lock indicator co...

Page 68: ...brightness Menu Stop Refer to the user s manual of the software you are using for details on how to use the Menu Stop key which is the key above the End key in the lower right of the key board Ctrl Re...

Page 69: ...arent when using application software such as word processors spread sheet applications and databases In addition while using your operating system software OS several of these keys play an important...

Page 70: ...insert and character overtype Delete This key is used for editing text at either the OS command prompt or the text within a document Pressing the Delete key will remove any characters to the right of...

Page 71: ...tions these keys perform vary with respect to the software in use When using an external keyboard the Fn key can be simulated by pressing the left Ctrl left Alt keys Refer to the appropriate software...

Page 72: ...ey Combinations Definitions Opens GNOME terminal help if server is a JDS Release 2 unit Toggles Radio on off for the wireless card Toggles Mute on and off Raises sound volume Lowers sound volume Incre...

Page 73: ...x Kills the session Ctrl Alt Delete 2x Kills the process that has taken control of the X server Stop A Resets the COMET Stop M Opens the OSD Main Menu for COMET settings Stop N Display the unit s MAC...

Page 74: ...sitive pointing device that provides all the features of a mouse Please refer to Figure 3 17 and the following sections for the touch pad s operating instructions Figure 3 17 The Touch Pad Using COMET...

Page 75: ...tion below as a review The touch pad buttons have essentially the same function as mouse buttons Clicking these buttons makes selections drags objects or performs a variety of other functions dependin...

Page 76: ...an also be launched by using Single tapping Once the cursor has been moved to the object you want to select lightly single tap on the pressure sen sitive touch pad This single tapping will select the...

Page 77: ...m the monitor to the COMET s external 15 pin VGAvideo port Figure 3 18 External monitor port When you start your notebook with an external display device such as an external monitor or projector attac...

Page 78: ...imply connect the keyboard or pointing device to one of the USB ports on COMET You do not need to power down your COMET before connecting or disconnecting these devices when using the USB ports Figure...

Page 79: ...ower center portion of the display both sides and the upper left portion of the keyboard as shown in Figures 3 20 and 3 21 These indicators inform you of the COMET s current operating status at a glan...

Page 80: ...the duration the closer the battery is to full charge Amber blinking The battery is discharging A fully charged battery has a long duration between blinks As the battery discharges the LED blinks more...

Page 81: ...Smart Card LED This LED is lit when a Smart Card is inserted Caps Lock LED This LED is lit when the keyboard is in Caps Lock mode All characters typed in this mode will be in upper case Number Lock LE...

Page 82: ...this page blank 60 COMET User s Guide...

Page 83: ...Chapter 4 Configuring COMET...

Page 84: ...h allows the user or an administrator to configure an array of COMET features NOTE The Stop key is the Menu key which is located above the End key It is the second key from the bottom on the right sid...

Page 85: ...ure 4 1 On Screen Display Pressing Esc will exit the Main Menu If changes to set tings have been made the COMET will reset when exit ing the menu When the system is back up the new set tings will be a...

Page 86: ...irst accessed the default selection is Servers To go to the Servers sub menu press Enter At the Enter Server IP 1 prompt enter the IP address of the Sun Ray Server to which you want to connect and pre...

Page 87: ...red the information for your servers you are prompted with a Save Changes screen Select Yes or No as appropriate If you select Yes you are given a confirmation screen stating Changes saved as shown be...

Page 88: ...in the illustration below use the down arrow to navigate to TCP IP in the menu When it is highlighted press Enter Under TCP IP there are 2 submenus DHCP and Static Figure 4 4 TCP IP DHCP submenu 66 CO...

Page 89: ...ry is optional If you do not enter a value and press Enter the factory default of 1500 is left unchanged After you have entered the information you are prompt ed with a Save Changes screen Select Yes...

Page 90: ...are prompt ed with a Save Changes screen Select Yes or No as appropriate If you select Yes you are given a confirma tion screen stating Changes saved Selecting No at the Save Changes screen or selecti...

Page 91: ...enabled the COMET will first search for an Ethernet connection for 10 seconds before switching over to wireless Which is why Ethernet cables need to be removed before trying to connect to a server usi...

Page 92: ...Stop Wor press Stop Mand select Wireless from the Main Menu 2 At the Enable wireless network Prompt selectYes and press Enter to navigate between selections you can use either the Tab key or the left...

Page 93: ...etwork and press Enter Figure 4 6 Enter SSID network name prompt 4 At the Enable WEP encryption Prompt answer as appropriate for your network and press Enter Figure 4 7 Enter WEP encryption prompt Cha...

Page 94: ...tion screen stating Changes saved Selecting No at the Save Changes screen or selecting Ok at the Changes saved screen returns you to the Main Menu When you exit the Main Menu via Exit or pressing the...

Page 95: ...ly be accessed with the entering of the password To go to the Security submenu as shown below use the down arrow to navigate to Security in the menu When it is highlighted press Enter Figure 4 9 The S...

Page 96: ...are prompted to repeat the password Do so and press Enter Figure 4 10 The Change Password screen At the Password changed window press Enter to return to the Main Menu The password will go into effect...

Page 97: ...the Status Menu which gives access to firmware version information battery status and wire less radio information Figure 4 11 The Status Menu screen Navigate to the selection you want and press Enter...

Page 98: ...een displays the hardware version of the COMET the firmware version of the COMET and the MAC Address You can also access this by pressing Stop V Figure 4 12 The Version screen Configuring COMET Status...

Page 99: ...related to the battery Figure 4 13 The Power Status screen NOTE Battery status is also indicated by the Power LED The faster the Power LED flashes the lower the battery charge is Configuring COMET St...

Page 100: ...play message will read Wireless not active If wireless is active the OSD shows the following The SSID of the access point to which the COMET has connected The bandwidth frequency and signal strength o...

Page 101: ...t will not turn off the backlight If you are running on battery and the COMET is going to be inactive you will want to use the Blanking feature of the Video Settings submenu 1 Highlight Blanking and p...

Page 102: ...Wireless Tunables selected is shown below Figure 4 16 The Advanced Menu The Wireless Tunables submenu allows the user to adjust the values for Fragmentation Threshold and RTS CTS Threshold Configurin...

Page 103: ...down arrow to navigate to Factory Reset on the second page of the Main Menu When it is highlighted press Enter Figure 4 17 The Factory Reset submenu option On the Factory Reset menu the user is prompt...

Page 104: ...exit To exit the menu system use the down arrow to navigate to Exit on the second page of the Main Menu When it is highlighted press Enter Figure 4 18 The Exit option Users can also exit the menu sys...

Page 105: ...Chapter 5 Maintaining COMET...

Page 106: ...view It is important to maintain the COMET This chapter pro vides information for cleaning packing and storing the notebook and battery use and maintenance 84 COMET User s Guide Maintaining COMET Subt...

Page 107: ...ht dadurch die Garantie CAUTION Changes or modifications to the COMET not expressly approved by Tadpole could void your authority to operate COMET If the product does not operate normally adjust only...

Page 108: ...Avoid getting any liquid directly on the COMET Moisten a lint free cloth with cleaner and use the damp cloth to clean the case 5 Use cotton tipped swabs moistened with cleaner to clean key tops slots...

Page 109: ...ET in the original shipping container CAUTION Damage caused by shipping the COMET notebook in containers other than the original shipping con tainer is not covered by the warranty Keep and use the ori...

Page 110: ...e the battery see the section on Battery use and maintenance on page 90 Do not store the COMET for extended periods with the battery installed 2 Disconnect all cables and pack the COMET as described i...

Page 111: ...such cases moisture can condense on and inside the notebook and can cause problems Allow at least two hours for the notebook temperature to stabilize after bringing it from a very cold or very warm en...

Page 112: ...ower simply plug in the AC adapter and restart to resume your session in the same state as it was before shutdown NOTE Battery status is indicated by the Power LED The faster the Power LED flashes the...

Page 113: ...one that is fully charged Replacing batteries When lithium ion batteries reach the end of their service life they indicate their impending failure by providing shorter and shorter intervals of servic...

Page 114: ...92 COMET User s Guide this page blank...

Page 115: ...Chapter 6 COMET Specifications...

Page 116: ...n BATTERY Internal Battery Pack Smart Lithium Ion 2 2Ah battery pack offline charge time 2 5hrs Optional Expansion Battery Pack Smart Lithium Ion 3 0Ah battery pack AC POWER ADAPTER Universal Power Ad...

Page 117: ...01 4 NOM UL 1950 SAFETY CSA C22 2 No 950 Sun Ray Server Requirements SOFTWARE Sun Ray Server Software 3 is the recommended software for COMET clients however all mod els are supported on versions 2 an...

Page 118: ...96 COMET User s Guide this page blank...

Page 119: ...Index...

Page 120: ...external display xv 55 external keyboard xv xviii 49 56 external monitor xx 3 5 55 F function keys xv 42 45 49 K keyboard xiv xv xviii xix xx 4 16 20 21 31 41 42 43 44 45 46 47 48 49 50 51 52 53 56 57...

Page 121: ...U USB xv xx 4 12 13 38 39 56 94 V ventilation x 19 VGA 13 55 W Warning viii xi xviii 10 22 Wireless LAN xv 41 Index Index COMET Product Family User s Guide 99...

Page 122: ...Index 100 COMET User s Guide...

Reviews: