18
Navigating the De
vic
es Scr
een
Navigating the Devices Screen
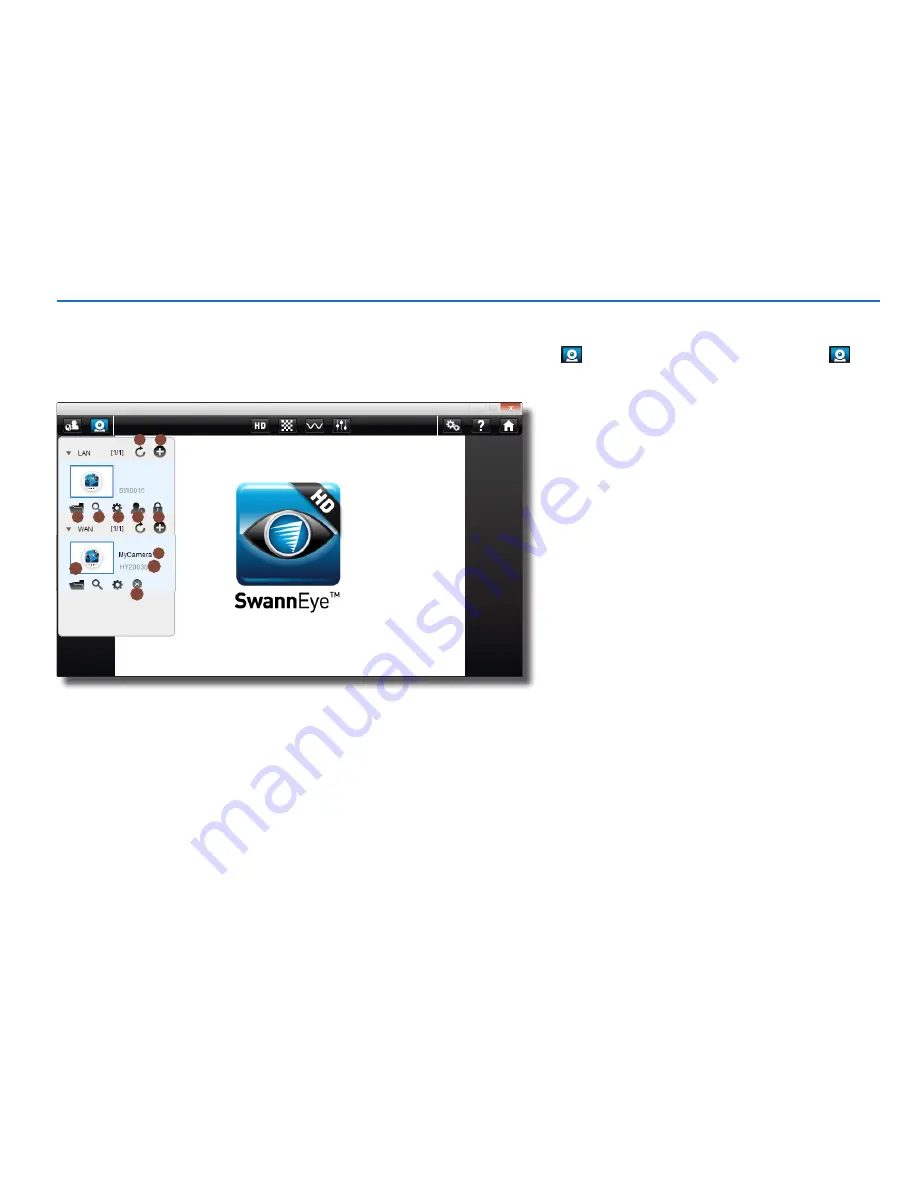
After signing in to your SwannEye account, you can access your camera under
Devices
at the left side of the screen. The
Devices
area
shows you the camera(s) that are registered to your account (under “WAN”) and also the cameras that are connected to the same wired or
wireless network (under “LAN”) as your computer.
1
2
3
4
5
6
7
10
11
8
9
1. Refresh Device:
Re-scans the connection to all cam-
eras on your list.
2. Add Device:
Allows you add additional cameras to your
list.
3. Open Folder:
Quick access to the local recordings fold-
er. The location of the local recordings folder can be set in
the “
Program Settings
” menu via the Live View Interface.
4. Remote Record:
Allows you to search and play back
motion-detection events that are recorded to the camera’s
micro-SD memory card.
5. Set Attribute:
Access the
Camera Settings
screen
where you can configure local name, date and time for
the camera, as well as set up various options for video,
audio, motion detection and network.
6. Set Administrator:
Allows you to change the
administrator username and password.
7. Set Video Password:
Allows you to set a password to
view an encrypted live stream from the camera.
8. Camera Name:
The display name of the camera, which can be customised in the
Camera Settings: Name
tab.
9. Camera ID:
The unique electronic ID (EID) of the camera.
10. Delete Device:
This option will delete your current account, as well as the camera(s) that you have registered. If you choose this option, you
will need to register a new account.
11. Play:
Press this button to view a live video from your camera. If you have more than one camera: in quad mode, click a screen then click play
on the camera to start it in that section of the screen.


