14
Navigating the App Int
erf
ac
e
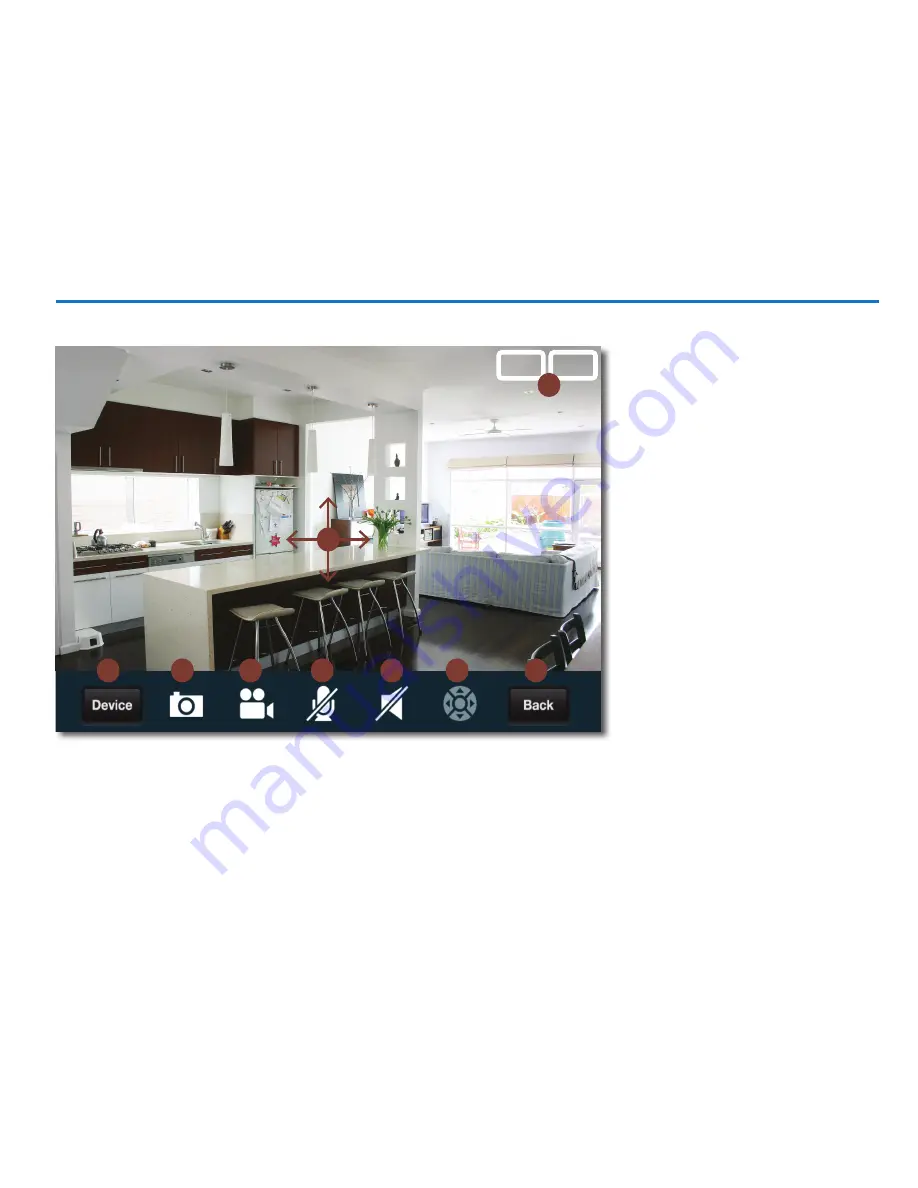
1. Device:
This brings up the device list,
where you can control and alter the camera(s)
associated with your account.
2. Image Capture:
Instantly takes a snapshot
and saves it to the photo gallery.
3. Record:
Initiates video recording. The
capture quality will be at the same quality
and frame rate as the live stream that you are
viewing. Videos will be saved to the internal
storage located on your mobile device.
4. Enable/Disable Microphone:
This will
enable or disable the microphone on your
mobile device. While enabled, it acts as an
intercom, allowing sound captured by your
mobile device to be heard at the camera
if speakers are connected. (
Feature is only
available on models with intercom function.
)
5. Enable/Disable Speaker:
While disabled,
no audio will be heard on your mobile device.
When enabled, the live video stream will
include the audio that is captured by the
camera’s microphone.
6. Preset Points:
Allows you to have up to four
(4) different preset positions. To save the location, tap
Set as
. To go to the saved location, tap
Goto
. (
Feature is only available on Pan & Tilt
supported models.
)
7. Back:
Returns to the account login screen.
8. HD/SD:
Display the live video stream in either High Definition (720p) or Standard Definition (480p or below).
9. Pan & Tilt:
You can use a swiping motion to pan or tilt the camera. Swipe your screen in the direction that you would like to view the live video
stream to move the camera. (
Feature is only available on Pan & Tilt supported models.
)
HD
SD
1
2
3
4
5
6
7
8
9
Navigating the App Interface


