6. ROUTES
6-16
6.13
SAR Operations
The SAR (Search And Rescue) feature facilitates search and rescue, and MOB (Man
Over Board) operations. This feature requires several installation menu changes and
requires a qualified technician to make the necessary menu changes. To active this
feature, contact your local dealer.
1. On the plotter display, tap the location where you want to start SAR operations.
the pop-up menu appears.
2. Tap [New SAR Pattern]. The SAR pattern menu appears with the selected loca-
tion set as the start point. To change the start point, go to step 3. To keep the cur-
rent start point, skip to step 5.
3. Tap [Commence Search Point] to show the software keyboard.
4. Input the coordinates for the starting location, then tap [
].
5. Tap [SAR Track Spacing Setup]. The software keyboard appears.
6. Set the distance between the SAR tracks, then tap [
].
7. Tap [Starboard] or [Port] to select the direction in which to start the SAR pattern.
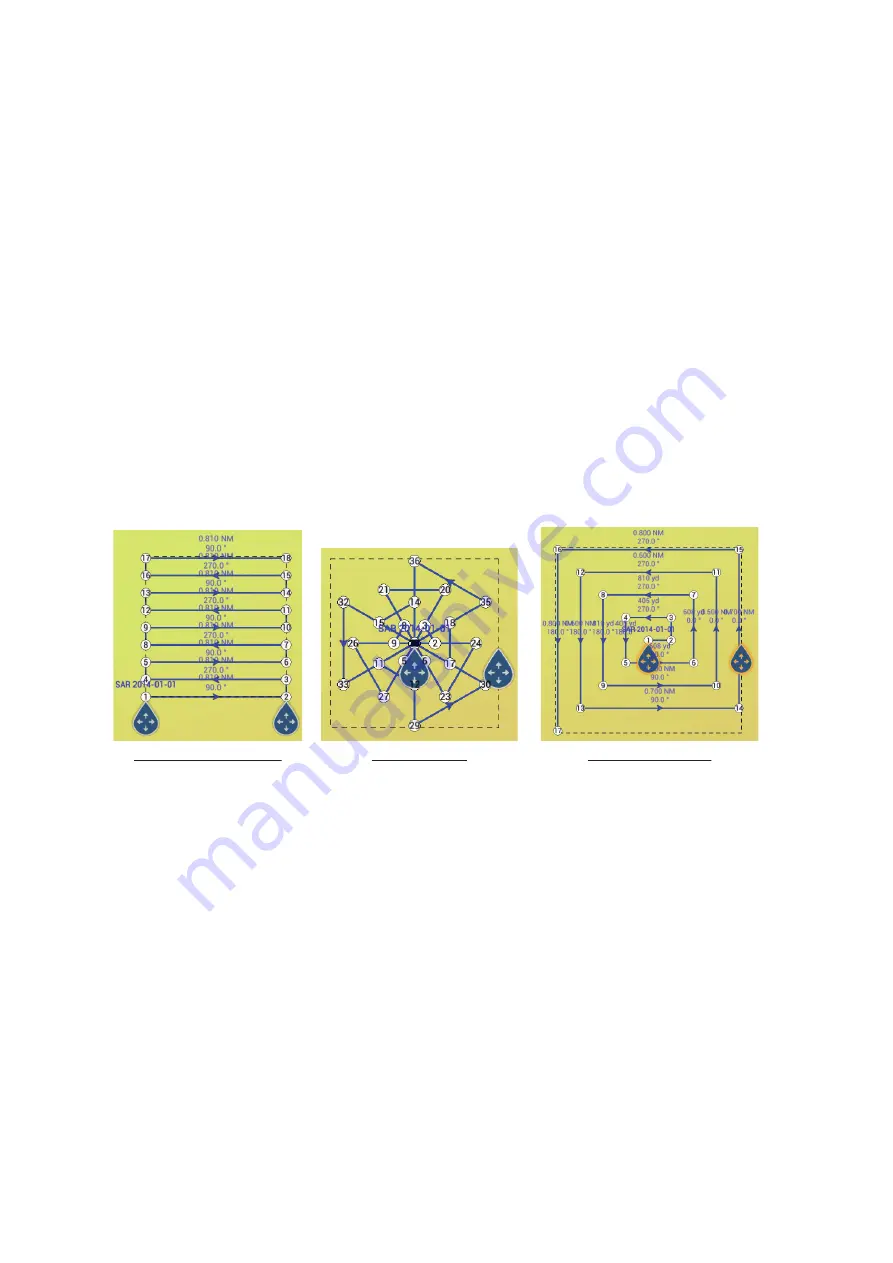
8. Tap the type of pattern you want to use. The following figures show examples for
each of the patterns.
9. Adjust the following items as required.
• Drag the SAR area on the screen to change the search location.
• Drag the outer edges of the SAR area to change the search area size
• Tap a location on the screen to change the heading in that direction.
10. Tap [End SAR] to finalize the SAR area. The confirmation message "DO YOU
WANT TO START NAVIGATION?" appears.
11. Tap [OK] to start SAR operations, or [Cancel] to cancel the search. If you select
[Cancel], the selected SAR pattern is still saved and remains on the screen.
To delete the SAR pattern
, tap [Home]
[Lists]
[Routes] to show the Routes
list, tap the SAR pattern, then tap [Delete] in the route options.
Parallel/Creeping Line
Sector Search
Expanding Square
Summary of Contents for SMD12
Page 57: ...1 SYSTEM INTRODUCTION 1 40 This page is intentionally left blank ...
Page 60: ...2 ENGINE DISPLAY 2 3 Triple engines display Quad engines display ...
Page 87: ...2 ENGINE DISPLAY 2 30 This page is intentionally left blank ...
Page 117: ...3 PLOTTER 3 30 This page is intentionally left blank ...
Page 129: ...4 3D DISPLAY OVERLAYS 4 12 This page is intentionally left blank ...
Page 169: ...6 ROUTES 6 20 This page is intentionally left blank ...
Page 207: ...7 RADAR 7 38 This page is intentionally left blank ...
Page 255: ...10 FILE OPERATIONS 10 8 This page is intentionally left blank ...
Page 267: ...11 CAMERA VIDEO FUSION Link 11 12 This page is intentionally left blank ...
Page 297: ...13 AIS DSC MESSAGE 13 14 This page is intentionally left blank ...
Page 315: ...15 MAINTENANCE TROUBLESHOOTING 15 6 This page is intentionally left blank ...


