Susteco BIGHANNA T120 Operation Manual Download Page 111


MAINTENANCE AND CLEANING MODEL T240  

The recommendation is to perform a competent check-up daily under normal operation conditions, 

which can be done when the food waste is fed into the machine together with sawdust or pelletised 

sawdust. This does not take more than a few minutes checking the basic function of the composter, 

the biological process and empty the compost bin if necessary. 

8.2.1


CHECK-UP DAILY - T240 

The daily operation of Big Hanna Composter includes feeding food waste and sawdust/wood pellets into 

Big Hanna and clean up accidental spill when feeding food waste into Big Hanna. At the same time the 

following should be checked:  


WHEN FEEDING FOOD WASTE NOTE THAT CYLINDER MOTOR AND FAN IS WORKING 


NOTE TEMPERATURE ON TOUCH SCREEN 


If the temperature in the hot zone has dropped significantly check moisture, colour, smell, filling 

level of material inside cylinder and airflow to and from cylinder. Add pellets/sawdust, empty 

cylinder, clear ventilation and/or adjust settings accordingly. 


EMPTY BAG OR BIN ON OUTLET IF NECESSARY 


Press the ‘no emptying’ button. This button stops the cylinder from rotating while the 

bag/bin is exchanged preventing spill on the floor beneath the outlet pipe.  


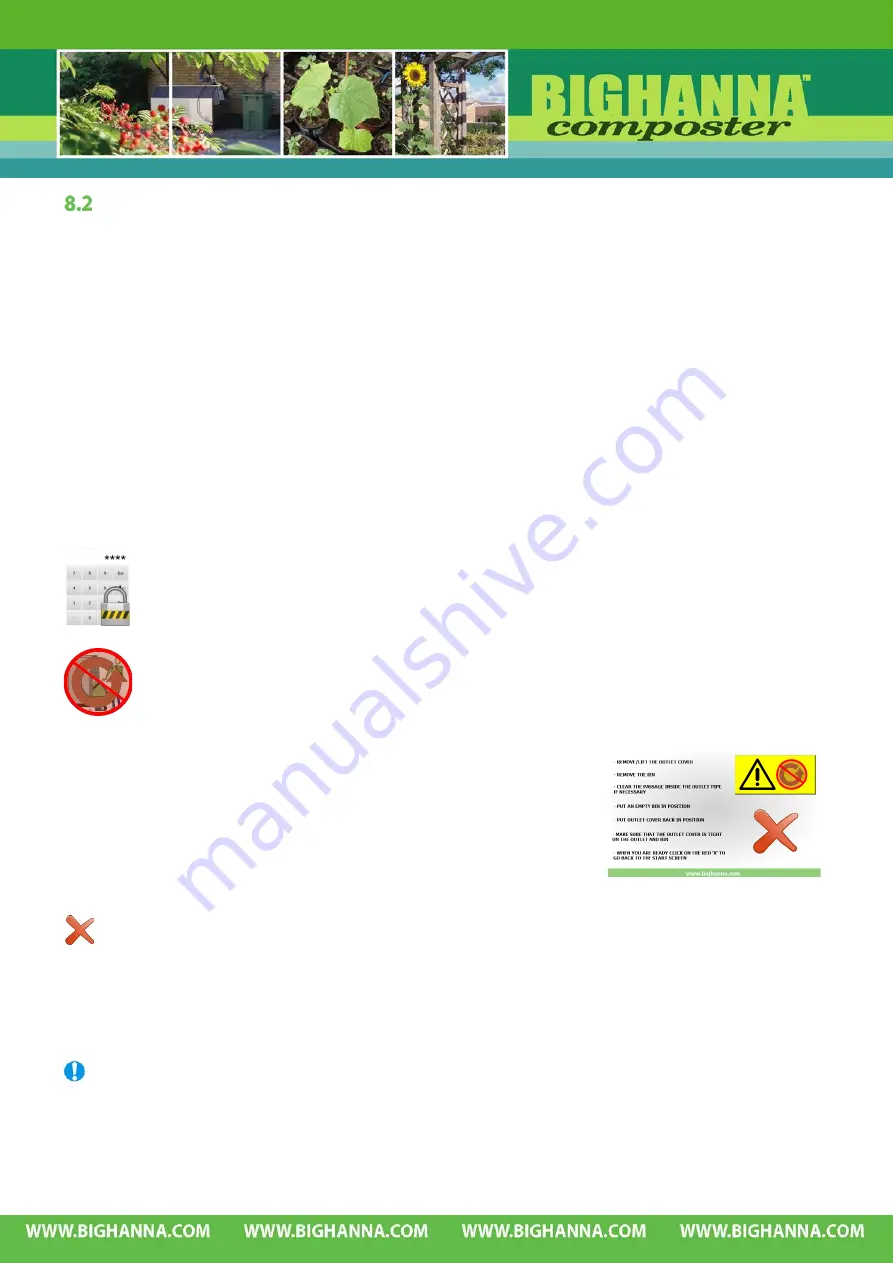
Follow the instructions on the screen when changing the bin:  


Remove the outlet cover (if appl.) 


Remove the bin/bag 


Clear the passage inside the outlet pipe if necessary 


Put an empty bin/bag in position 


Put outlet cover back in position (if appl.) 


Make sure the outlet cover/bag is tight on the outlet 


When you are ready click on the red ‘X’ to go back to the start 

screen 

The red exit ‘X’ symbol must be pressed in order to return to the start screen so that the cylinder 

can rotate according to settings again.  


It is important to return to the start screen once the bag/bin is exchanged making it possible for 

the cylinder to run according to settings.  


Note! The function of stopping the cylinder from rotating while the bag/bin is exchanged is in no 

way connected to the safety system.  


LOCKOUT / TAGOUT BEFORE REMOVING BOLTED COVERS. 

When changing the bin a small portion of already processed compost material should be recycled, fed 

in through the in-feed hopper in order to support the biological process. 

Press the numeric key pad, enter the 

pin code and access ‘basic’ level.


Summary of Contents for BIGHANNA T120

Page 1: ...8 433 76 Jonsered Sweden Tel 46 31 694103 E mail admin susteco se SUSTECO ABBig_Hanna_Operation_T60 T240_14008_Susteco_uk_en Let your food waste grow OPERATION MANUAL MODELS T60 T120 T60_40L T120_40L...

Page 2: ...the Big Hanna Composter shall ensure that all employees are informed about all relevant contents in this manual before usage This manual shall be stored in a manner so that it is kept safe for the lif...

Page 3: ...DUE TO SPILLAGE 1 7 4 PEST CONTROL 1 7 5 OPERATIONAL RISKS INVOLVING MACHINERY 1 7 6 OPERATIONAL TRAINING 1 10 1 SECONDARY TREATMENT OF THE COMPOST MATERIAL 1 11 1 MEASUREMENT ANALYSIS COMPOST MATERI...

Page 4: ...S AND COMPOST WITH SCALES CONNECTED TO THE TOUCH PANEL OPTIONAL 3 8 1 ALARM INFEED IN CONVEYOR HAS AUTOMATICALLY REVERSED 2 TIMES BUT IS STILL UNABLE TO RUN ALARM INFEED 3 8 2 ALARM INFEED IN CONVEYOR...

Page 5: ...TIONS 4 3 2 TEMPERATURE SENSORS 4 4 1 MOISTURE THE THEORETICAL BACKGROUND 4 4 2 MOISTURE THE PRACTICAL TEST 4 4 3 MOISTURE SENSORS 4 4 4 ABSORBENT MATERIAL TWO MAIN FUNCTIONS 4 4 5 SAWDUST 4 4 6 WOOD...

Page 6: ...2 INCORRECT C N BALANCE 6 7 1 BLOCKAGE IN VENTILATION SYSTEM SMELL OF AMMONIA 6 7 2 MATERIAL IS NOT AERATED ENOUGH SMELL OF AMMONIA 6 8 1 TOO MUCH WATER IN THE MATERIAL 6 8 2 LACTO BACTERIA 7 INTEGRAT...

Page 7: ...IS LEVELLED 9 2 9 INSPECT BOTH FRONT AND BACK END OF THE CYLINDER ADJUST ENDS IF NECESSARY 9 2 10 CHANGE SEALS ON INSPECTION DOORS AND INLET HOPPER IF WORN 9 2 11 GREASE BEARINGS ON SHREDDER 9 2 12 C...

Page 8: ......

Page 9: ...ine to internet can be found in a separate manual Note Machines can be ordered according to customer s specification and pictures and description in this manual may not apply directly in these circums...

Page 10: ...r and the exclusive liability of the manufacturer 4 The Customer must make a claim in writing to Susteco AB or the Distributor that the Composter is defective within a reasonable time after he she has...

Page 11: ...tability Directive and the Low Voltage Directive The following standards has been used where applicable EN ISO 12100 2011 Safety of Machinery General principles for design Risk assessment and risk red...

Page 12: ...is taken from operation must be indoors frost free and in a dehumidified climate 1 6 3 LIMITATIONS IN SIZE OF MATERIAL AND CAPACITY The Big Hanna Composter is designed for food waste sawdust pellets...

Page 13: ...iscarded material from industries directly associated with the raising of animals such as those wastes produced by livestock farming manure milk etc meat production and animal testing animal bodies an...

Page 14: ...be cleared from materials that may damage the equipment or disturb the biological process Where the Big Hanna Composter is used the above limitations is rarely a problem and the sorting of food is do...

Page 15: ...ag of salt would effectively kill the biological process Adding sauces or other liquids organic or not will affect or kill the biological process Food waste which has been soaked in detergent fluid or...

Page 16: ...od waste collection routines how old the collected food waste is fungus and mould and how contaminated it may be by glass or needles etc to mention a few variations Also note in your own risk assessme...

Page 17: ...ones used when working with the compost since there is a risk for re contaminating the compost 1 7 3 SLIPS AND TRIPSDUE TO SPILLAGE Accidental spillage of food waste around the machine can cause slip...

Page 18: ...r Mobile or wireless router Log in via computer phone or tablet and email alarms SMS alarms Energy meter Hopper fed 40Linlet auger feeder Shredder Bin tipper bin lift Sliding hatch Measurements Length...

Page 19: ...otal kWh day incl 40L hopper fed inlet and shredder 1 5 1 76 Standard models Other electrical supply can be specified at order for example 1 phase The electrical consumption is calculated for indoor i...

Page 20: ...on in volume of the waste material that is put into the composter by 80 90 and a reduction in weight by 70 80 these figures may vary depending on the specific food waste fed in and does not constitute...

Page 21: ...ral the more meat and fish that is added to the composter the more smell the decomposing process produces In order to minimize the smell the composter is equipped with a ventilation system that sucks...

Page 22: ...trical cabinet can be opened 1 13 2 SAFETY EQUIPMENT WARNING THE CYLINDER ROTATES ON A TIMER FUNCTION WHEN REMOVING THE BOLTED COVERS OR THE HOOD THE POWER SUPPLY MUST BE SWITCHED OFF AT THE MASTER SW...

Page 23: ...OPEN When any of the inspection door s on the cylinder is opened there is a small warning sign flashing on the touch screen When the inspection door s is closed this warning sign disappears There is...

Page 24: ...ULATIONS FAILURE TO OBSERVE THIS PRECAUTION COULD RESULT IN BODILY INJURIES WARNING CAPACITOR CIRCUIT ON SOME MOTORS WARNING MOTOR FOR CYLINDER IS EQUIPPED WITH A BRAKE SECURING THE CYLINDER POSITION...

Page 25: ...STER HAZARDOUS OR CONTAMINATED WASTE MAY UNDER NO CIRCUMSTANCES BE PUT INTO CYLINDER DO NOT STERILIZE THE FOOD WASTE BEFORE FEEDING IT INTO THE COMPOSTER AS THIS WILL SERIOUSLY INHIBIT THE BIOLOGICAL...

Page 26: ...DOING WORK WITH THE BIG HANNA COMPOSTER MAKE SURE THE COMPOSTER IS EMPTYING MATERIAL REMOVE ANY BLOCKAGE AT THE OUTLET ANY LEAKAGE FROM THE FRONT GABLE MUST BE CHECKED ONCE A MONTH BY REMOVING THE FR...

Page 27: ...grees Temperature requirements when installed without a heater optional 10 C up to 50 C In areas where the temperature does not drop below 10 C there is no need for a heater since the biological heat...

Page 28: ......

Page 29: ...IC OR LOCAL REGULATIONS FAILURE TO OBSERVE THIS PRECAUTION COULD RESULT IN BODILY INJURIES READ ALL SAFETY MEASURES IN CHAPTER 1 14 ELECTRICAL PARTS 2 1 1 MODELS T60 AND T120 Art no Name A Electrical...

Page 30: ...inder B Lower electrical cabinet 110250 Gearbox and motor in conveyor 110120 Magnetic contact inspection door position 110390 Fan incl housing eu 110131 Magnetic safety switch 110410 Motor for fan eu...

Page 31: ...One copy is placed inside the respective cabinets where it should always be available Note Machines can be ordered according to customer s specification and pictures and description in this manual ma...

Page 32: ......

Page 33: ...l process require 24 7 operation and should never be turned off at the main switch unless it its serviced repaired or taken out of service The blue reset button on the electrical cabinet has three mod...

Page 34: ...he air going in to the cylinder in blue towards the end of the cylinder Optional sensors for measuring CO2 humidity and temperature in air from cylinder in blue close to the fan and moisture sensor fo...

Page 35: ...Hanna Home enter password and access Operator Tools and Big Hanna At the bottom of most screens there are navigation arrows taking you to the next screen arrow in right hand corner or to the previous...

Page 36: ...lways available by pressing the waving Big Hanna man without entering any pin code or password On 7 screens only The Big Hanna man gives information about Daily check up Weekly check up Good Biologica...

Page 37: ...er A smaller amount of compost is also discharged when cylinder is rotating clockwise Opens a screen for registering weight volume of food waste and wood pellets or similar Starts cylinder rotation co...

Page 38: ...rger surface on the waste material to work on By cutting the material the quality of the outgoing compost material will be improved Citrus fruits have to be cut before being put into the composter bec...

Page 39: ...y Mater Bi biodegradable and compostable bags certified OK Compost HOME will fully decompose and will not create problems with the in conveyor Other types will have to be tested by user of Big Hanna C...

Page 40: ...drained thoroughly The problem with how to drain the food waste can easily be solved by putting two buckets into each other and drill holes in the bottom of the upper bucket The food waste material is...

Page 41: ...stalled optional weight registration is always active Starts infeed conveyor and cylinder rotation clockwise in order to feed in food waste from the hopper into the cylinder A smaller amount of compos...

Page 42: ...ood waste that is fed in on the numeric key pad that appears Confirm with enter Press the pellets symbol and enter the weight volume of pellets that is fed in on the numeric key pad that appears Confi...

Page 43: ...waste pellets and compost respectively When the number that you want to register is visible to the right of the food waste pellets and compost choose action Register weight volume feed in material in...

Page 44: ...to be cleared manually Clean the infeed hopper and the in conveyor Once the blockage has been cleared the infeed can be used again without resetting any fuse inverter From this alarm screen it is poss...

Page 45: ...conveyor Once the blockage has been cleared the infeed can be used again without resetting any fuse inverter Note that this ALARM needs to be acknowledged in the ALARM list in order to turn off the Al...

Page 46: ...n without resetting any fuse inverter From this alarm screen it is possible to navigate to the manual run shredder screen pressing the symbol with the shredder and two arrows on the alarm screens Use...

Page 47: ...al getting stuck in the shredder If necessary run the shredder in reverse and thereby loosen any material that is stuck If the blockage is not solved by reversing it the shredder needs to be cleared m...

Page 48: ...her start the cylinder rotation cycle or just registering the weight volume and go back to the start screen 3 9 1 REGISTRATION OF WEIGHT VOLUME OF COMPOST If registration of weight volume is activated...

Page 49: ...e outlet and bin When you are ready click on the red X to go back to the start screen The red exit X symbol must be pressed in order to return to the start screen so that the cylinder can rotate accor...

Page 50: ...n the image of an unlocked pad lock is visible as long as the login is active Press this symbol to log out Colour Login User Access level Green Operator Operator Blue Tools Tools and Operator Grey Big...

Page 51: ...y hour Food waste compost log Number of rotations Wait time Filling level Infeed time Fan Heater Optional Alarm log Log file temperatures Log file Food waste compost Log file Alarms Energy consumption...

Page 52: ...width can be adjusted by pressing and dragging it NUMBER OF ROTATIONS In this menu you set the number of rotations the cylinder does when it rotates after the wait time period Choose 1 2 3 4 or 5 on t...

Page 53: ...s of wait time is recommended See more information 4 3 1Function of Wait time number of rotations FILLING LEVEL When adjusting the filling level you can choose how full the composter should be by choo...

Page 54: ...de the machine have more material in the cylinder and empty less often increase the value i e from 5 to 8 Choose filling level using the slider Check the outlet pipe regularly If the material in the c...

Page 55: ...0 where the ventilation pipes needs to be checked through the ventilation caps on the front and rear end The fan is the lungs of the Big Hanna if the biological process does not get the right amount o...

Page 56: ...mation about ventilation and airflow in the installation manual HEATER OPTIONAL If a heater is installed this is turned on and set using this menu The function of the heater is to make sure the incomi...

Page 57: ...tor disappears when all alarms are both acknowledged and have returned to inactive status Mark an Alarm and Acknowledge Selected or Acknowledge All Alarms using the Alarm Menu See Chapter 10 Mechanica...

Page 58: ...6 T7 T8 T9 T10 Air Temperature Rotations Wait time h Wait time min Filling Level Fan on off Fan speed Heater on off Heater setting and kWh There are two available log files One with all logged paramet...

Page 59: ...cards One USB stick SD card should always be in the touch panel Click on the USB symbol for downloading to a USB stick and the SD card symbol for downloading to a SD card There will be a short message...

Page 60: ...be found in Machine Specification Individual setup of the network will be required Contact your distributor for advice IMPORT OF CSV FILES TO EXCEL csv files are comma separated values and these file...

Page 61: ...stration function red light will turn green Click on the unit which should be used The active choice is turned to green The picture to the right shows when registration of weight is activated in lbs 3...

Page 62: ...n Machine Specification If adjustments are necessary contact your distributor for advice before proceeding 3 31 4 CONFIGUARTIONOF SHREDDER REVERSE FUNCTION The function of the shredder motor trying to...

Page 63: ...ick The folders and files must be placed directly to the root folder of the USB stick Turn off the electical supply and put in the USB stick Turn on the electrical supply and wait until the questions...

Page 64: ...not use any other tools or keys as this may damage the locking mechanism Remove the cotter pin locking the toggle fastener and unlock the door item 7 in above drawing Remove the inspection door on th...

Page 65: ...on and Nitrogen C N Heat Moisture in balance If the decomposing process lacks oxygen there will be a fermentation process When the cylinder rotates all material inside the cylinder is provided with ox...

Page 66: ...changed In some installations the fan should be still during the wait time however this is very rare The oxygen supply to the material is regulated by the fan but more importantly by the number of rot...

Page 67: ...ish and meat it is necessary to add more sawdust pelletised sawdust in order to restore the carbon nitrogen balance in the Composter However this tends to lead to dehydration of the material inside th...

Page 68: ...s put into the composter is cut in small pieces 2 3 cm giving the micro organisms a larger surface on the waste material to work on By cutting the material the quality of the outgoing compost material...

Page 69: ...rcumstances should be put into the composter is Crepe paper Steel wool Leather Cigarette Treated wood Soft plastic Diapers String Cat sand Ashes Rubber Bags from Branches Textiles vacuum cleaner MATER...

Page 70: ...he following phase most of the reduction is taking place and the maturation at the end will ensure that the material is fully composted when leaving the cylinder The compost that comes out of the Big...

Page 71: ...the front of the composter If the material inside the composter does not reach the filling level of 60 70 the temperature will rarely be more than 50oC The filling level should be about 60 70 to achie...

Page 72: ...ERATURE SENSORS Model T60 and T120 Model T240 The three temperature sensors that are installed in the composter show the temperature on the touch screen The temperature should be used as an indication...

Page 73: ...linder with sawdust or pelletised sawdust has the correct moisture level or is too wet Unlock the inspection door on the hood and remove the door Use the squared pin key to open the inspection door on...

Page 74: ...AIN FUNCTIONS TO ABSORB UNNECESSARY WATER TO ADD CARBON TO THE BIOLOGICAL PROCESS The waste material usually contains too much water for the decomposing process to function properly Therefore an absor...

Page 75: ...the dosage is not nearly as high as when using sawdust or wood chips For restaurants the recommendation is to use wood pellets because of their absorbent quality The recommended amount of wood pellets...

Page 76: ...material can be put into the Big Hanna if it is drained thoroughly The problem with how to drain the food waste can easily be solved by putting two buckets into each other and drill holes in the botto...

Page 77: ...240 Pellets 10 15 kg 15 20 kg 15 20 kg Manure 100 litre 200 litre 400 litre Compost 100 litre 200 litre 400 litre 5 1 2 ABSORBENT MATERIALDURING START UP The required amount of absorbent material duri...

Page 78: ...of horse manure and or a batch of composted material to get a really good start up Model T60 T120 T240 Pellets 10 15 kg 15 20 kg 15 20 kg Manure 100 litre 200 litre 400 litre Compost 100 litre 200 lit...

Page 79: ...5 C T2 Mesophilic phase Lower moisture Temperature 25 40 C T3 Maturation phase Low moisture Temperature 20 C B Compost is automatically emptied from cylinder The temperatures in the three measuring po...

Page 80: ...5 3 1 START UP SCHEDULE MODEL T60 RESTAURANT WASTE...

Page 81: ......

Page 82: ...5 3 2 START UP SCHEDULE MODEL T120 RESTAURANT WASTE...

Page 83: ......

Page 84: ...5 3 3 START UP SCHEDULE MODEL T240 RESTAURANT WASTE...

Page 85: ......

Page 86: ......

Page 87: ...If the temperatures have dropped looking back one week Add luke warm water Increase Waiting time Lower number of rotations MEDIUM MOISTURE 40 70 Could be caused by too much material lower input of foo...

Page 88: ...If necessary add more lukewarm water until the proper moisture content is reached When the moisture content is better choose an increased wait time and lower number of rotations for a couple of days 6...

Page 89: ...ood waste should be lowered temporarily so that the biological process has time to recover If possible feed small amounts of food waste many times per day Lower input of food waste 6 5 2 INCORRECT C N...

Page 90: ...over bag is in position and that the fan is working Remove and clean the ventilation filter and check the airflow Check that the airflow is functioning well through the biofilter if installed Note Wit...

Page 91: ...n functioning properly and ventilation being kept clean the biological process will not work Clean ventilation regularly If the temperature is very low and moisture content very high it may be necessa...

Page 92: ...rial inside and introduce good bacteria which will replace the lacto bacteria Rotate the cylinder and mix the material thoroughly Open the inspection door again to inspect the compost material If nece...

Page 93: ...hat the airflow is functioning well through the biofilter if installed Note Without the fan functioning properly and ventilation being kept clean the biological process will not work Clean ventilation...

Page 94: ......

Page 95: ...features designs components and specifications GENERAL LAYOUT MODEL T60 AND T120 Food waste and pellets or sawdust is added through the inlet The material is mixed inside the cylinder when it is rota...

Page 96: ...Motor cylinder 110235 9 Heater option 10 Holder for sensor tube front and back 11 Air inlet to cylinder 12 Output pipe Note when ordering spare parts for Big Hanna Composter state Model machine numbe...

Page 97: ...chain T60 110340 Duplex chain T120 Art Nr Name 111110 Foot 110970 Wheel incl axle 125X35 111220 Temperature tube and sensor position inside cylinder Temperature sensors are marked T1 T2 and T3 Art Nr...

Page 98: ...cl gasket 6 Holder for inspection door on cylinder 7 Toggle fastener 110760 8 Cotter pin 110780 Art Nr Name 110650 Gasket for inspection door on cylinder 110700 Insulation for cylinder and inspection...

Page 99: ...al cabinet 110730 Key for electrical cabinets 110235 Motor cylinder 110390 Fan 110131 Magnetic safety switch 110141 Magnetic safety switch key 110120 Magnetic contact inspection door position 110170 H...

Page 100: ...e made to the sewage by using 50 75 or 110 pipes There is a connection in the drain pipes underneath the infeed hopper that can be used for cleaning if water is accumulating in the hopper The drainage...

Page 101: ...en the shredder rotates the shredded material is fed in to the cylinder Art Nr Name 110022 Shredder knife 110023 Shredder rotor 110030 Shredder drive belt 110040 Wheel for drive belt small PL28 110050...

Page 102: ...op button 6 Touch panel 7 Reset Button 8 Ventilation cleaning point front 110510 9 Ventilation filter 110090 10 Fan 110390 11 Upper electrical cabinet 12 Lower electrical cabinet 13 First inspection d...

Page 103: ...with touch panel 5 Lower electrical cabinet 6 Main switch 7 Air outlet from cylinder 8 Fan 110390 9 First inspection door on cylinder 10 Second inspection door on cylinder 11 Supporting wheels 110990...

Page 104: ...omposter state Model machine number article number and detailed name from Machine specification 19 Ventilation cleaning point back 20 Output pipe 21 Outlet cover 200110 22 Bin 18 Holder for sensor tub...

Page 105: ...110 Foot 110970 Wheel incl axle 125X35 110990 Wheel incl axle 200 Art Nr Name 110210 Motor Cylinder 110280 Sprocket duplex cylinder 110281 Sprocket simplex cylinder 111290 Bearing bracket 110340 Duple...

Page 106: ...6 Access point for cleaning 7 Motor 8 Seal 9 Pipe in to cylinder Temperature tube and sensor position inside cylinder Temperature sensors are marked T1 T2 and T3 Art Nr Name 111231 Temperature sensor...

Page 107: ...110140 3 Magnetic safety switch on hood 110130 4 Lock on inspection door on hood 5 Inspection door on cylinder incl gasket 6 Holder for inspection door on cylinder 7 Toggle fastener 110760 8 Cotter p...

Page 108: ...electrical cabinet 110250 Gearbox and motor in conveyor 110120 Magnetic contact inspection door position 110390 Fan incl housing eu 110131 Magnetic safety switch 110410 Motor for fan eu 110141 Magnet...

Page 109: ...ying button This button stops the cylinder from rotating while the bag bin is exchanged preventing spill on the floor beneath the outlet pipe Follow the instructions on the screen when changing the bi...

Page 110: ...ial inside cylinder and airflow to and from cylinder Add pellets sawdust empty cylinder clear ventilation and or adjust settings accordingly IF A BIOFILTER IS INSTALLED EMPTY THE BIOFILTER USING THE B...

Page 111: ...ECESSARY Press the no emptying button This button stops the cylinder from rotating while the bag bin is exchanged preventing spill on the floor beneath the outlet pipe Follow the instructions on the s...

Page 112: ...eck moisture colour smell filling level of material inside cylinder and airflow to and from cylinder Add pellets sawdust empty cylinder clear ventilation and or adjust settings accordingly INSPECT THE...

Page 113: ...g the front side panels Use the hood lifting tool to remove the mid section panel Ease the panel next to the front panel 2 3 cm sideways Remove the front side panel using the hood lifting tool Remove...

Page 114: ......

Page 115: ...OR SERVICING THE MACHINE LOCKOUT TAGOUT BEFORE REMOVING BOLTED COVERS ANNUAL SERVICE CHECK LIST Check function of emergency stop and safety switches on all doors Check all warning labels Clean ventila...

Page 116: ...onnected to a safety plc WARNING INFEED HOPPER LID When the infeed hopper lid is opened there is a small warning sign flashing on the touch screen When the lid is closed this warning sign disappears T...

Page 117: ...ll piping leading from front end to the fan from number 6 to 8 9 2 4 CHANGE VENTILATIONFILTER IF WORN Change ventilation filter if worn Article no 110090 9 2 5 TEST FUNCTION OF HEATER AND INSPECT FORW...

Page 118: ...CYLINDER IS EQUIPPED WITH A BRAKE SECURING THE CYLINDER POSITION THE CYLINDER WILL MOVE IF THE BRAKE IS DISCONNECTED THE CYLINDER FILLED WITH MATERIAL HAS A CONSIDERABLE WEIGHT AND CAN CAUSE FATAL AC...

Page 119: ...9 2 8 CHECK THAT MACHINEIS LEVELLED 1 Locking nut 2 Adjusting nut Machine must be balanced at bottom plate lengthways also making sure that the beams supporting the wheels are parallel 2 1 T240...

Page 120: ...ADJUST ENDS IF NECESSARY Model T60 and T120 front view Model T60 and T120 rear view There are two adjusting bolts on each end for models T60 and T120 Model T240 front view Model T240 rear view There...

Page 121: ...ER IF WORN 9 2 11 GREASE BEARINGS ON SHREDDER Art Nr Name 110650 Gasket for inspection door on cylinder 110710 Adhesive for gasket 110690 Gasket infeed hopper lid Art Nr Name 110022 Shredder knife 110...

Page 122: ...stance between the knife and the rotary knife should be 1 mm If the distance is more than 5 mm the knife should be adjusted using the bolts on each side Art Nr Name 110030 Shredder drive belt 110040 W...

Page 123: ...ode etc It does not reset the fuse and does solve the actual problem This has to be done for each fuse fault respectively in the electrical cabinet If the fault has not been taken care of the alarm te...

Page 124: ...ed alarms exist Flashing green when there are only active acknowledged alarms 10 4 1 ALARM LOG Alarms must be acknowledged using this menu Alarm is active The source of the alarm remains i e fuse is b...

Page 125: ...re Emergency stop Cylinder is not rotating according to settings Cylinder motor fuse tripped Cylinder motor inverter fault Fan motor fuse tripped Fan motor inverter fault In conveyor has automatically...

Page 126: ...e Alarm Indicator which is visible in the left hand upper corner on all screens Use the ALARM button to go to alarm log menu Normally the cylinder rotates one full revolution always returning the insp...

Page 127: ...ck connection from switch to terminals If none of the above measures solves the problem Exchange the switch and magnet If this does not solve the problem exchange the cables Test by rotating the cylin...

Page 128: ...nowledged in the ALARM list in order to turn off the Alarm Indicator which is visible in the left hand upper corner on all screens Use the ALARM button to go to alarm log menu This alarm is connected...

Page 129: ...e Alarm Indicator which is visible in the left hand upper corner on all screens Use the ALARM button to go to alarm log menu When the thermal relay or fuse for the cylinder motor has tripped the probl...

Page 130: ...ight amount of oxygen the result will be bad smell Pay attention to if the fan is vibrating or making a noise Check the ventilation pipes and clean if necessary see 9 2 3 ALARM FAN MOTOR FUSE TRIPPED...

Page 131: ...d makes two more attempts of feeding the food waste into the cylinder before giving the alarm This alarm text is connected to the parameter Threshold Current and defines threshold current in relative...

Page 132: ...eds to be cleared manually Clean the infeed hopper and the in conveyor Once the blockage has been cleared the infeed can be used again without resetting any fuse inverter Note that this ALARM needs to...

Page 133: ...ble in the left hand upper corner on all screens Use the ALARM button to go to alarm log menu From this alarm screen it is possible to navigate to the manual run infeed screen pressing the symbol with...

Page 134: ...edding the food waste before giving the alarm This alarm text is connected to the parameter Threshold Current and defines threshold current in relative to rated motor current to be used in comparisons...

Page 135: ...er is needed Problem can be caused by food waste material getting stuck in the shredder If necessary run the shredder in reverse and thereby loosen any material that is stuck If the blockage is not so...

Page 136: ...screens Use the ALARM button to go to alarm log menu From this alarm screen it is possible to navigate to the manual run shredder screen pressing the symbol with the infeed and two arrows on the alarm...

Page 137: ...Dismantle the front panel and inspect the heater If there is any damage on the heater or the fuse trips repeatedly contact service personnel or order a replacement heater Note that this ALARM needs to...

Page 138: ...E If possible level the material inside the cylinder Switch of the electrical supply Remove the covers where appropriate Place support under the cylinder allowing the wheel to be removed without the c...

Page 139: ...e away the M12 that has been holding the axle Clear away all old parts Put in the socket which is 25 mm x 50 mm where the old axle where positioned Take the new wheel and put in the stub shaft so that...

Reviews: