6-18
FatTwin F628G3-FT+/FTPT+ User's Manual
6-12 Installing Internal GPUs
Each node supports up to three (3) internal GPUs with optional internal rear fans.
There are a variety of internal GPUs supported by the F424AG chassis. For the
most up-to-date list of compatible GPUs, visit the Supermicro web site at
www.
supermicro.com
.
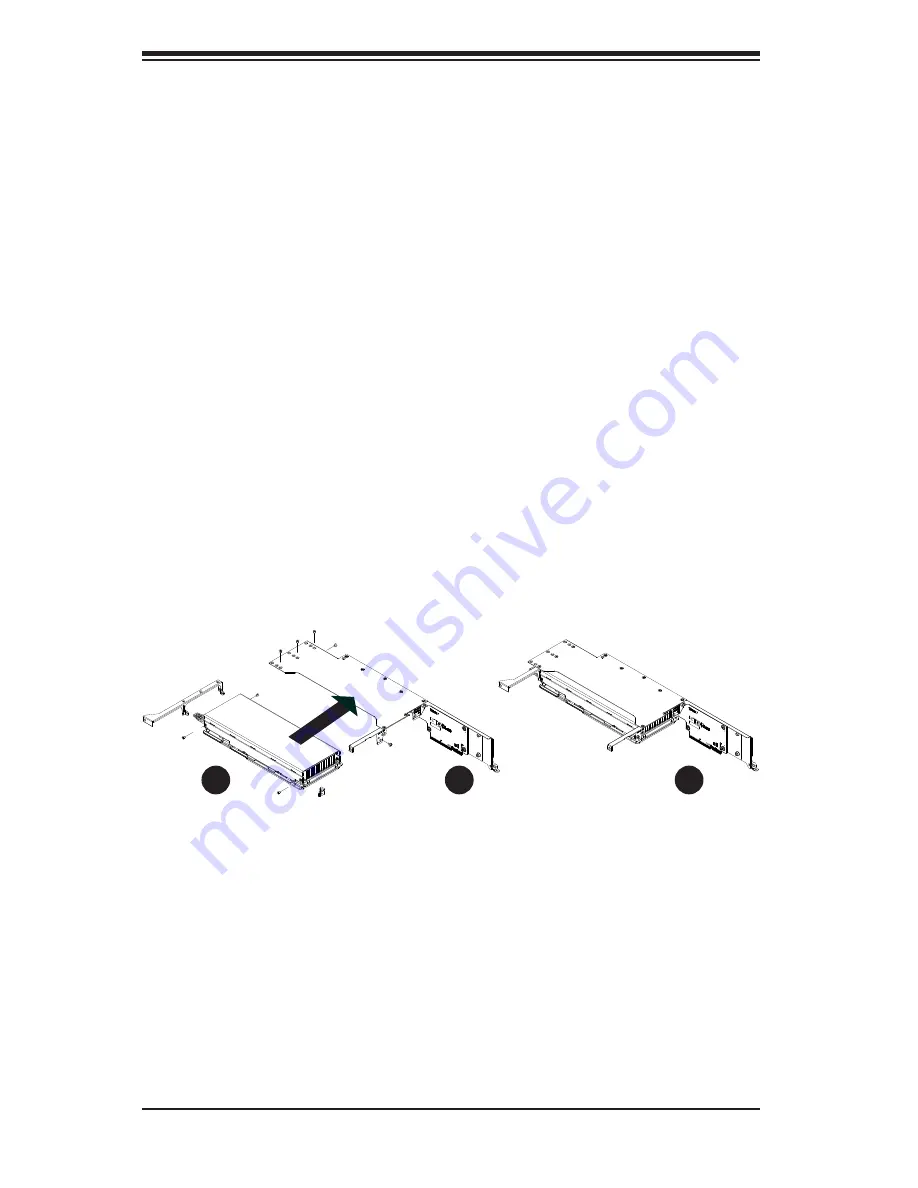
Installing a Front Nvidia GPUs/Intel Xeon Phi into the GPU
Bracket
Installing a Front Nvidia GPUs/Intel Xeon Phi into a Bracket
1. Remove the power cord from the rear of the node as described in Section
6-3. Remove the node from the chassis as described in Section 6-4. Place
the node on a fl at, stable surface and remove the node cover as described in
Section 6-7.
2. Secure both mounting brackets with three screws.
3. Insert the Nvidia GPUs/Intel Xeon Phi into the GPU bracket and secure with
fi ve screws.
4. Confi rm that the Nvidia GPUs/Intel Xeon Phi is securely mounted in the GPU
bracket
Figure 6-18: Installing the Nvidia GPUs/Intel Xeon Phi into the Bracket
1
2
1
3
1
4
Installing a Front Nvidia GPUs/Intel Xeon Phi into the
Node
Installing a Front Nvidia GPUs/Intel Xeon Phi into a Node
1. Confi rm that the Nvidia GPUs/Intel Xeon Phi has been correctly installed in
the GPU bracket as described in the previous section.
2. Position the GPU bracket in the node as illustrated below.
3. Secure the GPU bracket to the node as shown using the four screws
provided.
4. Proceed to the next section to install the rear GPUs.
Summary of Contents for FatTwin F628G3-FT+
Page 1: ...FatTwin F628G3 FT F628G3 FTPT USER S MANUAL Revision 1 0...
Page 5: ...v FatTwin F628G3 FT FTPT User s Manual Notes...
Page 10: ...x Notes FatTwin F628G3 FT FTPT User s Manual...
Page 20: ...1 10 FatTwin F628G3 FT FTPT User s Manual Notes...
Page 30: ...2 10 FatTwin F628G3 FT FTPT User s Manual Notes...
Page 34: ...FatTwin F628G3 FT FTPT User s Manual 3 4 Notes...
Page 156: ...7 50 FatTwin F628G3 FT FTPT User s Manual Notes...


