6-6
FatTwin F617H6-FTL+/FTPTL+ User's Manual
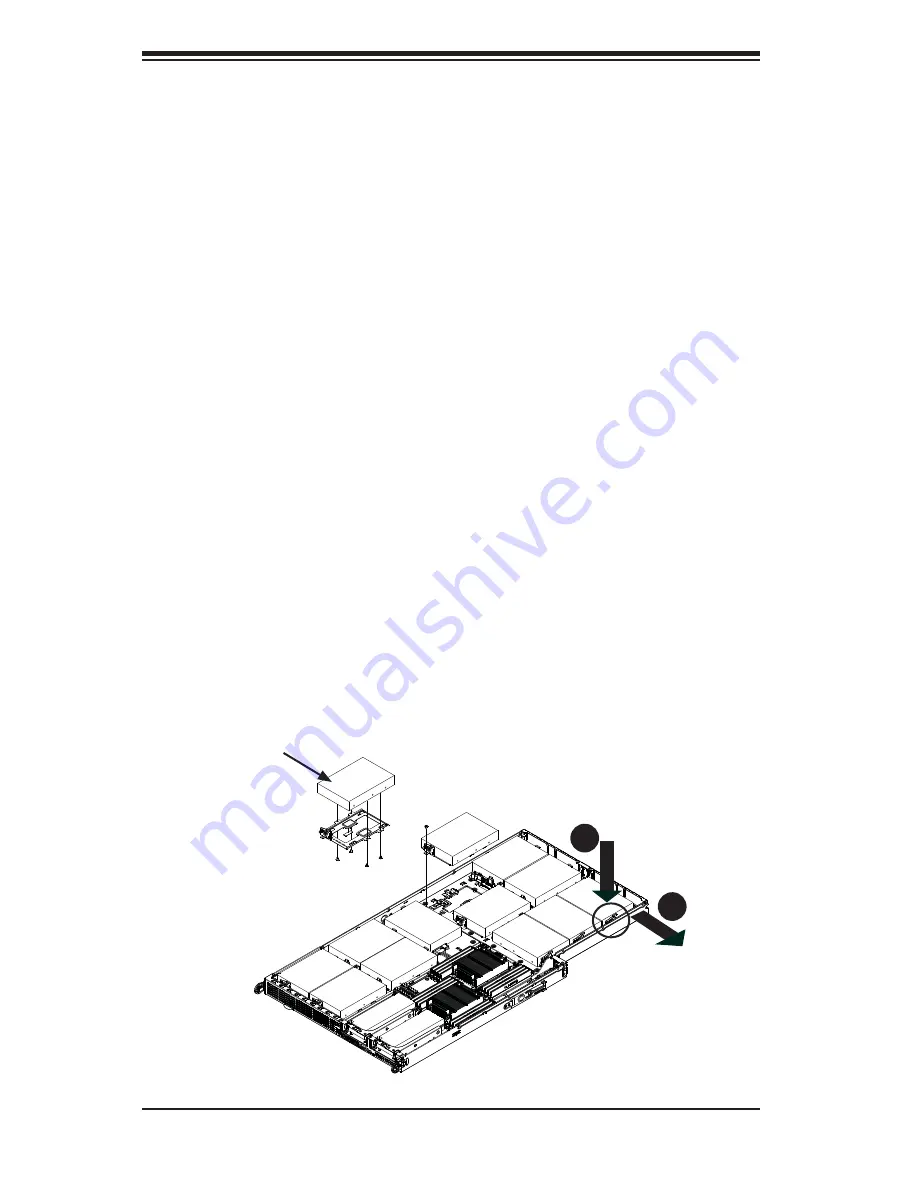
Figure 6-4: Installing 3.5" Hard Drives in the Node
Replacing Fixed 3.5" Hard Drives
Replacing a Fixed 3.5" Hard Drive
1. Power down the node with the operating system and remove the cord from
the rear of the power supply as described in Section 6-3. Remove the node
from the chassis as described in Section 6-4. Remove the node cover as
described in Section 6-5.
2. Remove the screw securing the hard drive tray to the fl oor of the node and
set it aside for later use.
3. Press the latch on the HDD tray.
4. Shift the tray toward the dirction of the latch.
5. Lift the hard drive up and out of the node.
6. Remove the four screws securing the hard drive to the hard drive tray and set
them aside for later use.
7. Remove the hard drive from the tray and replace it with a new hard drive.
8. Align the mounting holes in the hard drive with those in the the hard drive tray
and secure the hard drive using the screws previously set aside.
9. Place the hard drive and tray in the node and secure the tray to the fl oor of
the node with the mounting screw previously set aside.
Caution: Enterprise level hard disk drives are recommended for use in
Supermicro chassis and servers. For information on recommended HDDs,
visit the Supermicro Web site at
http://www.supermicro.com/products/nfo/fi les/
storage/SAS-CompList.pdf
3.5" HDD
4
3
Summary of Contents for FatTwin F617H6-FTL+
Page 1: ...SUPER USER S MANUAL Revision 1 1a FatTwin F617H6 FTL F617H6 FTPTL...
Page 5: ...v FatTwin F617H6 FTL FTPTL User s Manual Notes...
Page 10: ...x Notes FatTwin F617H6 FTL FTPTL User s Manual...
Page 20: ...1 10 FatTwin F617H6 FTL FTPTL User s Manual Notes...
Page 30: ...2 10 FatTwin F617H6 FTL FTPTL User s Manual Notes...
Page 34: ...FatTwin F617H6 FTL FTPTL User s Manual 3 4 Notes...
Page 86: ...5 32 FatTwin F617H6 FTL FTPTL User s Manual Notes...
Page 106: ...6 20 FatTwin F617H6 FTL FTPTL User s Manual Notes...


