Maintenance
19
AVOID ASPHYXIATION.
Be sure the work area is well ventilated.
AVOID INJURY.
Disconnect gas lines only when the compressor is stopped.
Disconnecting the cold head while it is cold can create excessively high internal
pressure as the gas warms. Material failure and uncontrolled pressure release
can cause serious injury.
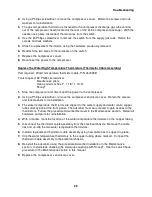
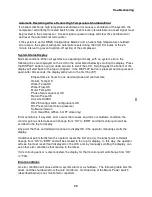
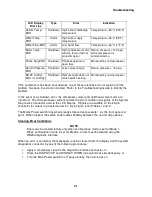
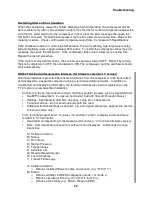
Gas cleanup is required if the compressor’s interior has been opened to the atmosphere or the
equalization pressure is 1.4 bar (20 psig) or lower. Gas cleanup is performed with the
compressor disconnected from the other system components.
NOTE
If the compressor’s interior has been exposed to the atmosphere for an extended
period, gas cleanup may not suffice to guarantee system gas purity. Contact a
Service Center.
1.
Disconnect the gas lines from the compressor. Plug the disconnected gas line couplings.
2.
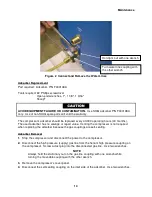
Locate two adapter fittings P/N 255919B2. Be sure their valves are closed. Attach them to
the supply and return Aeroquip couplings on the compressor.
3.
Connect a charge line to the pressure regulator of a helium gas cylinder containing 99.999%
pure helium gas with a dew point less than -62° C (-80° F) at 20.7 bar (300 psig). Adjust the
gas cylinder pressure regulator to 0.35 bar (5 psig).
4.
While connecting the charge line to the adapter fitting on the compressor’s return coupling,
thoroughly purge the charge line from the regulator. It is important to remove all air
contaminants to prevent them from entering the system.
5.
Adjust
the
pressure regulator
to
15.2 bar (220 psig). Open the valve
on the
adapter fitting
and charge the compressor to 15.2 bar (220 psig).
6.
Close the valve on the adapter fitting used for charging.
7.
Run the compressor for at least 30 minutes to heat the oil to operating temperature.
Stop the compressor.
8.
Open the vent valve on the supply coupling of the compressor. Watch the compressor’s
pressure gauge. When the pressure falls to 0.35 to 0.7 bar (5 to 10 psig), close the vent
valve. Open the charge valve to increase the pressure to 15.2 bar (220 psig). Close the
charge valve.
9.
Start the compressor
10.
After running 30 to 45 seconds, stop the compressor. Open the vent valve and vent the
compressor to 0.35 to 0.70 bar (5 to 10 psig). Close the vent valve.
11.
Repeat steps 8, 9 and 10 ten (10) times, and then go to Step 12.
12.
Open the charge valve on the adapter fitting. Charge the compressor to the equalization
pressure. Close the charge valve.
Summary of Contents for F-70H
Page 2: ......
Page 8: ...4 This page is intentionally blank...
Page 10: ...6 This page is intentionally blank...
Page 12: ...8 This page is intentionally blank...
Page 14: ...10 This page is intentionally blank...
Page 28: ...24 This page is intentionally blank...
Page 40: ...Troubleshooting 36 Figure 4 F 70H Compressor Wiring Diagram...
Page 41: ...Troubleshooting 37 Figure 5 F 70H Compressor Wiring Schematic...
Page 42: ...Troubleshooting 38 Figure 6 F 70L Compressor Wiring Diagram...
Page 43: ...Troubleshooting 39 Figure 7 F 70L Compressor Wiring Schematic...

