


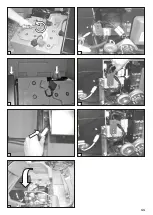


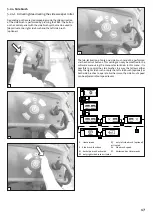


Step 1
Open the transport box.
Step 2
Disassemble the side door.
Step 3
Open the main cover and remove it by lifting it out
of the holding brackets.
Step 4
Assemble the batteries (see 4.5.2).
Step 5
Connect the batteries to the main harness (see
4.5.2).
Step 6
Reassemble the main cover.
Step 7
Assemble the side broom(s) (see 4.5.4)
The suction sweeper is ready for use now.
Step 8
Move the sweeper out of the transport box by using
a ramp.
Optional case:
The suction sweeper is equipped with batteries.
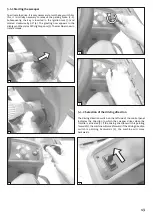
Step 1
Open the transport box.
Step 2
Open the side door.
Step 3
Open the main cover and fix it by the cover holder
.
Therefore the cover has a fixing hole on its bottom.
Step 4
Place the cover holder inside this fixing hole of the
cover
.
Step 5
Connect the positive pole of the battery to the main
harness.
Step 6
Close the main cover.
Step 7
Assemble the side broom(s) (see 4.5.4)
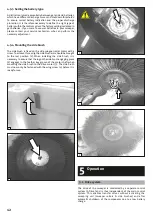
Move the sweeper out of the transport box by using a ramp. See
picture below.
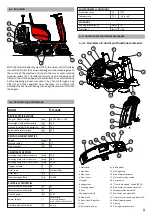
A Home screen
3 Timer
B Warning indicator
4 Machine run-time counterr
C Service information
5 Warning symbol for electrical
problems
1 Selected sweeping mode
6 Error description
2 Battery level indicator
7 Time until the next maintenance
C
A
SIDE BRUSH
B
3
2
5
1
6
7
4
P
P
4.3.2.4 Main menu overview
In the main menu, all machine parameters can be modified, in
order to always adjust the machine optimally to the sweeping
environment. To return to the main menu from the home screen, it
is sufficient to press the menu selection knob once. By turning the
menu selection knob, it is now possible to navigate through the
menu items.
The main menu items are differentiated in categories with and
without a sub-menu:
Ÿ
Access to menu items with a sub-menu is obtained by pressing
the menu selection knob. Here, it is now possible to adjust
various settings. To return to the main menu, the "Back" screen
should be selected in the sub-menu.
Ÿ
For menu items without a sub-menu, the settings can be
modified directly by pressing the menu selection knob.
A detailed description of the different setting options can be
found in Chapter 6 ("Operation").
A Home screen
G Filter vibrator mode
D Sweeping mode selection
H Timer functions
E Side brush functions
I Settings (password protected)
F Work headlight on/off
A
D
E
F
G
H
I
P
P
P
P
P
$
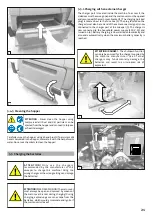
WARNING - The sweeper must not be
unloaded from the pallet using a forklift! This
will cause damage to the machine! The risk of
injury from tipping loads and of damage to
the machine will also increase!
WARNING - Just use a continuous solid ramp. The
ramp has to be designed to drive with front and
rear wheels on it. In case of nonobservance
damages on the sweeper´s mechanical parts can
occur.
Standard case:
The standard version of the suction sweeper is delivered
without batteries or charger.
7
Unloading the machine
4.4
Summary of Contents for TT 1200
Page 1: ...Operating Manual GB htttp www stolzenberg de TT 1200...
Page 2: ...2...
Page 9: ...8 13 12 9 7 9 10 11...
Page 11: ...10 11 12 9 13 14 11 8...


