Coloring the varnish. . . . . . . . . . . . . . . . . . . . . . . . . . . . .12
More finish coats . . . . . . . . . . . . . . . . . . . . . . . . . . . . . . . .12
Level sanding . . . . . . . . . . . . . . . . . . . . . . . . . . . . . . . . . . .13
Attach the fingerboard . . . . . . . . . . . . . . . . . . . . . . . . . .13
Final-finish the neck . . . . . . . . . . . . . . . . . . . . . . . . . . . . .14
Re-install the tailgut saddle. . . . . . . . . . . . . . . . . . . . . .14
Fitting the tuning pegs . . . . . . . . . . . . . . . . . . . . . . . . . .14
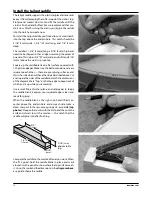
Slot the nut . . . . . . . . . . . . . . . . . . . . . . . . . . . . . . . . . . . . .15
Install the soundpost . . . . . . . . . . . . . . . . . . . . . . . . . . . .15
Fit the bridge . . . . . . . . . . . . . . . . . . . . . . . . . . . . . . . . . . .16
Install the tailgut . . . . . . . . . . . . . . . . . . . . . . . . . . . . . . . .17
Install the fine tuner . . . . . . . . . . . . . . . . . . . . . . . . . . . . .17
Install the chinrest . . . . . . . . . . . . . . . . . . . . . . . . . . . . . .18
String the violin . . . . . . . . . . . . . . . . . . . . . . . . . . . . . . . . .18
Kit parts list . . . . . . . . . . . . . . . . . . . . . . . . . . . . . . . . . . . . .2
Recommended tools and supplies . . . . . . . . . . . . . . .2
Install the purflings. . . . . . . . . . . . . . . . . . . . . . . . . . . . . .3
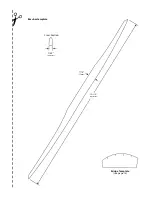
Install the bass bar . . . . . . . . . . . . . . . . . . . . . . . . . . . . . .4
Attach the top . . . . . . . . . . . . . . . . . . . . . . . . . . . . . . . . . .5
Prepare the neck . . . . . . . . . . . . . . . . . . . . . . . . . . . . . . . .6
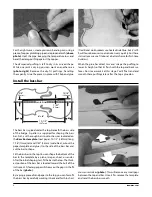
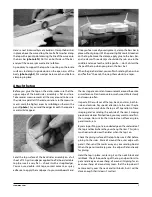
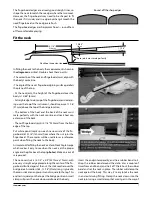
Fit the neck . . . . . . . . . . . . . . . . . . . . . . . . . . . . . . . . . . . . .7
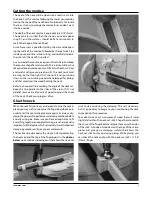
Cutting the mortise . . . . . . . . . . . . . . . . . . . . . . . . . . . . .9
Glue the neck . . . . . . . . . . . . . . . . . . . . . . . . . . . . . . . . . . .9
Install tailgut saddle. . . . . . . . . . . . . . . . . . . . . . . . . . . . .10
Install the endpin . . . . . . . . . . . . . . . . . . . . . . . . . . . . . . .11
Wood and finish preparation . . . . . . . . . . . . . . . . . . . .11
Applying varnish . . . . . . . . . . . . . . . . . . . . . . . . . . . . . . . .11
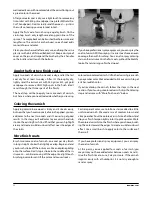
Apply the first two finish coats. . . . . . . . . . . . . . . . . . .12
Table of contents
important for you to “dry run” the fitting, gluing, clamping
and finishing operations before trying them for real.
You’ll need a flat work surface, approximately 2' x 4' or big
enough for your violin.
Be safe when using tools, glues, and finishes. Wear eye
protection and gloves when needed, and always use
proper ventilation.
Welcome to the world of violin building! The violin you’re
about to build has a quality spruce top with curly maple sides
and back. This kit is designed for the beginner and intermedi-
ate builder, with enough of the difficult work already done
to give you a great head start. The fine handwork is left to
you, with the help of these instructions.
Please read these instructions before starting on your violin,
so you’ll understand the process and how the parts fit. It’s
Violin Kit Instructions
Summary of Contents for 5342
Page 1: ...Violin Kit 5342 Assembly Instructions www stewmac com ...
Page 2: ......
Page 9: ... ...
Page 10: ......
Page 23: ......


