stewmac.com
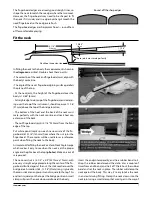
the violin body. (This is not the line you will cut on — it is
only recording the proper angle.)
Next, draw a line indicating how much wood to take off
the bottom of the heel where it will meet the heel cap.
Keep in mind that indicates a 15/64" (6mm) gap between
the fingerboard and the top (see
diagram
, previous page).
You want to reduce enough wood from the heel to lower
the fingerboard to this height (5/32" (4mm) in the case of
the violin in these photos).
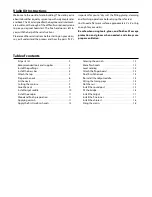
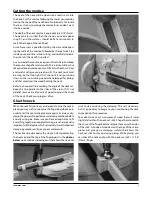
Before unclamping, trace along both sides of the heel with
pencil to draw the shape of the heel onto the violin body.
This marks the area where you will cut a mortise, or pocket,
for insetting the heel into the body.
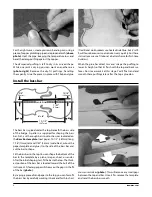
Remove the neck and mark the wood to be cut away from
the heel. The white marks you made on the fingerboard
indicate where the heel will be flush with the sides. You will
be insetting approximately 3/16" of wood (about 5mm) into
the mortise you make in the body, so leave that much wood
for the neck joint. Staying parallel to the angle line you traced
onto the heel, mark the wood to be cut away from the heel.
Also mark the wood to be cut away from the base of the heel,
where it meets the end cap (5/32" (4mm) in our case).
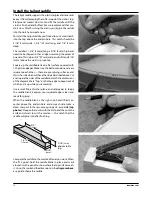
In the
photo below
, the pencil-darkened area marks the
wood to be cut away. Remove the wood from the heel with a
thin saw or with chisels and files. (Removing the fingerboard
at this stage makes the cutting easier.)
the neck-set stick (which must remain on center). A wedge
of wood placed under the fingerboard will allow you to
change the neck angle. Slide the wedge in or out to tip the
neck if needed.
The neck
pictured above
needs to be lowered by about
5/32" (4mm) at the heel and also at the bridge position. This
means we’re dropping the neck down onto the body.
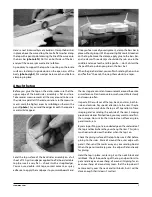
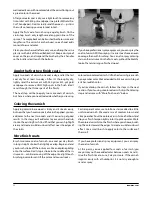
With the rubber bands holding the neck in place, align the
neck so that it centers on the top’s centerline. A feeler gauge
placed under the bass or treble side of the neck heel may be
handy for making fine adjustments in the neck angle
(photo
below)
. The neck needs to be very accurately aligned for
the next step.
At this point, the neck is nicely aligned, but its heel isn’t flush
against the sides it will be glued to (it’s resting against the
overhanging edges of the top and back). The next step is
to draw a line on the heel of the neck that is parallel to the
sides of the violin. Place a small block of wood or Plexiglas
(about 3/16" (4.8mm) thick) on the violin next to the neck
heel and use it as a straightedge to trace a pencil line onto
the neck
(photo top right)
. This line records the angle that
you’ll follow when you trim the end of the neck heel to match
8
Summary of Contents for 5342
Page 1: ...Violin Kit 5342 Assembly Instructions www stewmac com ...
Page 2: ......
Page 9: ... ...
Page 10: ......
Page 23: ......


