stewmac.com
the rims to get a consistent measurement around the entire
circumference. Don’t remove too much wood. Work slowly
and measure often.
Inspect all the surfaces of the top, back, and rims, both in-
side and outside. Pay special attention to the rims: they’re
much easier to work while the top is off. Spend lots of time
scraping and/or sanding the outside of the rims. Scraping
produces a cleaner finished look; you may want to sand first,
then scrape. Now is also the time to clean off excess glue,
pencil marks, etc.
By carving or filing, put a rounded edge on the underside of
the top and back where they overhang the rims. This job is
much easier to do now than later when the top’s on.
Check the gluing surface of the top to be sure it’s flat before
gluing to the sides. Mark all around the outer edge with
pencil, then sand the marks away on your sanding board.
When the pencil marks are gone, the edge is flat and ready
for gluing.
Hold the top in place, centering it on the neck block and
tail block. Check the overhang of the top, and position it to
get a relatively even overhang all around. (Aligning for an
even overhang all around may mean that the top doesn’t
center exactly over the neck and tail blocks, but it will be
close enough that it doesn’t matter.)
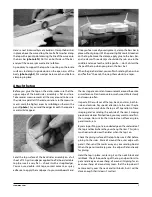
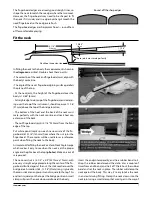
Before you glue the top on the violin, make sure that the
upper edge of the back/sides assembly is flat and true.
Take several measurements all the way around to be sure
the sides are parallel. If there are variations in the measure-
ments, mark the highest areas by scribbling on them with a
pencil
(photo)
. As you sand the edges smooth, these pencil
marks will disappear.
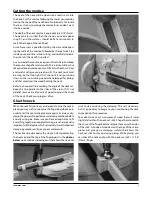
Sand the top surface of the back/sides assembly on a full
sheet of 150-grit sandpaper applied to a flat board or table
top (be sure it is very flat — check it with a straightedge).
You can use double-stick tape, contact cement, or spray
adhesive to apply the sandpaper to your workboard. Sand
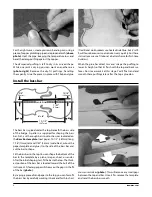
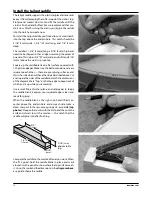
Here’s a neat trick used by many builders. Clamp the bass bar
in place above the curved top, then roll a flat washer along
the top with a pencil point drawing the line of the curve onto
the bass bar
(photo left)
. Do this on both sides of the bar,
and you’ll have a very accurate line to follow.
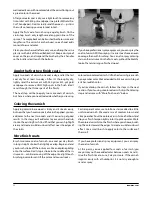
A good way to support the top when working on the inside
surface is to clamp it upside down on the open rims of the
body
(photo right)
. Put wedges below each end before
clamping in place.
Once you feel sure of your alignment, clamp the bass bar in
place without gluing it. With a pencil, lightly mark its location
on the top. Remove the clamps, apply glue to the bass bar,
and re-clamp. Three clamps should do the job: one in the
middle, and one at each end. Be gentle — don’t distort the
shape of the top when you glue in the bass bar!
When the glue has dried, you can finish sanding the bass bar
and “feather” the ends, thinning them down to a taper.
Attach the top
5
Summary of Contents for 5342
Page 1: ...Violin Kit 5342 Assembly Instructions www stewmac com ...
Page 2: ......
Page 9: ... ...
Page 10: ......
Page 23: ......


