background image

5

2018 Stenograph, L.L.C. All Rights Reserved.

5

Luminex Captioner/Student User Guide

Chapter 1 Setting up your Writer

When copying or running a Luminex Captioner/Student Edition Utility, the User Account Control

message box may display. The User Account Control (UAC) is a security feature prompting you for

permission to run the displayed program name or service being accessed. To use the Luminex

Captioner/Student Edition utilities, you must choose Continue in the UAC message box. The User

Account Control is an important feature of Windows 7 and higher. Stenograph does not recommend

disabling it.
1. Turn your computer On. Ensure it is fully booted.

2. Turn your Luminex Captioner Student Edition On.

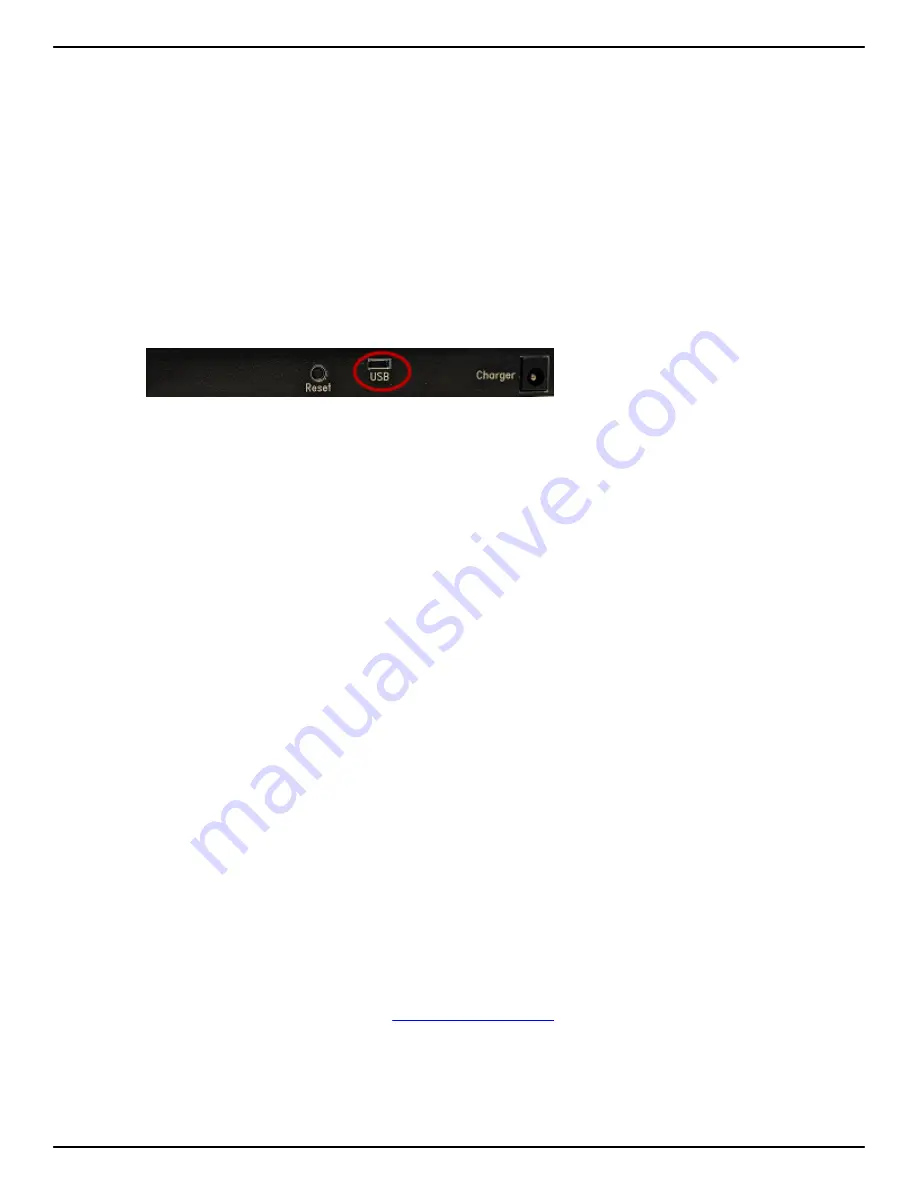
3. Connect the appropriate end of the micro USB cable to the USB port on the Luminex

Captioner/Student Edition and the other end to a USB port on your computer.

4. On your computer, with the Stenograph Writer Utility dialog box displayed, double click the Install

USB Drivers button. 
The Windows Security screen may display, prompting you to install the Stenograph L.L.C. Ports
(COM & LPT) virtual serial driver. Click the option, 

Always trust software from “Stenograph”

and then click 

Install

. If a second prompt displays for the Stenograph USB Writer driver, click

Install

.

5. The Luminex Captioner/Student Edition driver installation begins.

6. Once the drivers install, the Stenograph Writer Drivers Setup Complete dialog box displays. press 

Enter

 (Finish).

Luminex Captioner Student Edition Technical Support

If you encounter a problem you cannot solve, a Luminex Captioner/Student Edition Support Specialist

is available to assist you at:

1.800.323.4247 or 1.630.532.5100, touch 2, then 2

8:00 a.m. to 6:00 p.m. (CT)

Monday through Friday

Excluding Stenograph Holidays

To assist the Specialist, have the Luminex Captioner/Student Edition with you, know your customer

number and know your  Luminex Captioner/Student Edition serial number. The serial number is

located on the bottom of the writing machine. Be prepared to describe your question or problem in

detail. 
Additional Help topics are available at 

www.stenograph.com

. Click Support, Solution Center.

To order accessories, visit www.stenograph.com.

Summary of Contents for Luminex Captioner Student Edition

Page 1: ......

Page 2: ...arty nor used by the recipient except under the terms and conditions of the purchase agreement between the customer and Stenograph This device complies with Part 15 of the FCC Rules Operation is subject to the following two conditions 1 this device may not cause harmful interference and 2 this device must accept any interference received including interference that may cause undesired operation Ch...

Page 3: ...ng so you don t have to worry about leaving the writer plugged into an electrical outlet for extended periods of time EasyLock LMX V2 tripod positioning with a positive locking mechanism provides smooth and easy setup Simply open and set the tripod on the floor and place your machine on it according to the instructions in this guide The design of the tripod assures a smooth even writing platform f...

Page 4: ... a comfortable chair conducive to correct posture Adjust the height of the shorthand machine appropriately for your body Position the shorthand machine comfortably close to you Place the tripod between your knees Do not sit sidesaddle Minimize the use of the shorthand machine on surfaces other than the tripod stand At Your Computer Place the monitor screen perpendicular to the window to help avoid...

Page 5: ...ew Battery Voltage Levels 10 Low Battery Warnings 11 Battery Gauge 11 Tilting Screen Battery Messages 12 Communication Port 12 Powering the with the USB Cable 12 Updating With the USB Cable 13 Connect for Writing Realtime 13 USB Communications 13 USB Virtual Serial Port Communications 14 Touch Sensors Function Keys 15 Keyboard Depth and Tension Control 16 Adjust Depth of Stroke 16 Adjust Keyboard ...

Page 6: ...ory Files 27 Read Steno Notes from Memory 28 Memory Full 29 Erase Memory Files 30 Options 30 Prompt to End a Job Option 31 Routine Care 31 Scroll 32 Search 33 Serial Protocol 33 Status 34 Steno Test 34 Test Mode 35 Tilting Screen Appearance 36 Time and Date 37 USB Communication Option 38 Chapter 5 Troubleshooting 39 Appendix A Updating Captioner Student Software 40 Appendix B Captioner Student Edi...

Page 7: ...LockTM Z12 tripod 110 220 AC adapter charger Micro USB cable 6 ft Optical quality spray cleaner and cleaning cloth Promotional insert The Luminex Captioner Student Edition provides you with the following features Full Color High Resolution LCD screen which pivots a full 180o Six capacitive touch sensors The first one on the left turns the Luminex On and Off View steno notes Realtime ready through ...

Page 8: ...syLock LMX V2 tripod designed with three straight legs tilting mechanism and constructed of high gauge aluminum to provide a lightweight but strong and stable stand for your Luminex Captioner Student Edition The EasyLock LMX V2 tripod fully extends to 27 5 inches When folded the tripod is 12 5 inches long Attaching the Tripod The Luminex Captioner Student Edition uses only the EasyLock Z12 tripod ...

Page 9: ...ripod As you loosen the thumb lock support the weight of the Luminex Captioner Student Edition with your hand 3 Adjust the Luminex Captioner Student Edition to the desired height 4 Tighten the thumb lock knob Tilting the Luminex Captioner Student Edition The EasyLock LMX V2 tripod has a built in tilting mechanism Once the Luminex Captioner Student Edition is secured on the tripod tilt the writing ...

Page 10: ...n turns On A black dot in the lower right corner of the Status LCD indicates the Luminex Captioner Student Edition is On A row of running blocks indicates the batteries are charging If you plug your Luminex Captioner Student Edition in to charge and only the black dot displays on the Status LCD the batteries are charged Charging is not necessary and no charging occurs Install the Luminex Captioner...

Page 11: ...ows Security screen may display prompting you to install the Stenograph L L C Ports COM LPT virtual serial driver Click the option Always trust software from Stenograph and then click Install If a second prompt displays for the Stenograph USB Writer driver click Install 5 The Luminex Captioner Student Edition driver installation begins 6 Once the drivers install the Stenograph Writer Drivers Setup...

Page 12: ...banks of keys Number Bar the long solid bar at the top of the keyboard Upper Bank the row of 10 keys just below the number bar Lower Bank the remaining consonant keys located below the Upper Bank Vowel Keys the four keys at the front of the keyboard The Upper and Lower banks of keys to the left of the asterisk are the Initial keys These consonants are generally used to begin a word The Upper and L...

Page 13: ...hile the machine shorthand writer may write words exactly as they are spelled R E D or SH O P they often are writing the words or syllables as they phonetically hear them For example in two strokes they may write courthouse K O R T H O U S or workhorse WORBG HORS The writer may also record an entire phrase in just one stroke state your name ST A U R PL or could you tell us KOUTS The machine automa...

Page 14: ...arging Although you can use the Luminex with the AC adapter charger Stenograph recommends that you fully charge the battery before first time use The main battery fully charged operates all the features on the Luminex Captioner Student Edition for approximately 12 hours The charging time for the main battery is approximately 5 6 hours The main battery provides a FailSafe mode if the charged level ...

Page 15: ...ouch the On Off sensor until you heard a beep Although the Titling screen turns off the Luminex remains On while charging as indicated by the black dot on the Status LCD If you plug your Luminex Captioner Student Edition in to charge and only the black dot displays on the Status LCD the batteries are charged Charging is not necessary and no charging occurs View Battery Charging Status The Tilting ...

Page 16: ...atteries are fully charged a plug icon replaces the battery icon until you disconnect the AC adapter charger Battery Charging Battery Fully Charged When the main battery is charging the Status LCD displays black bars in running sequence from left to right The black bars are not visible when you are writing but redisplay when you close the job When the Luminex Captioner Student Edition is finished ...

Page 17: ...low to red indicating a drop in battery voltage The Luminex Captioner Student Edition displays warnings messages on the tilting screen and will beep to indicate the battery voltage is getting low Battery Danger Battery Low Battery Danger Battery Low Battery Danger Recharge Battery Now Battery Battery Dead Switching To FailSafe Once the Luminex Captioner Student Edition switches to FailSafe mode th...

Page 18: ...r the USB realtime cable between the writing machine and the computer To use the micro USB cable for realtime writing or reading notes from Memory you must install the Luminex Captioner Student Edition USB driver on your computer The USB port is clearly marked on the back of the writing machine Powering the with the USB Cable When the Luminex is connected to your computer for realtime via the micr...

Page 19: ...ition USB driver on your computer 1 Ensure your Luminex Captioner Student Edition and computer are turned On and are fully booted 2 Each end of the USB cable has a different connection plug Insert the appropriate end of the micro USB cable into the USB port on the back of the Luminex Captioner Student Edition and the other end into a USB port on the computer 3 Start your CAT software 4 Set your re...

Page 20: ... becomes inactive if you disconnect the USB cable and remains inactive even if you reconnect the cable For example let s say you disconnect the USB cable to simulate reporting a bench conference and then you reconnect the cable when finished The current realtime does not reconnect It is necessary to open a new realtime file on your CAT system If you leave the USB realtime connection active when yo...

Page 21: ...ial port connection it is important that you complete the following steps in order This ensures your computer shuts down properly a Touch End on the Luminex Captioner Student Edition to close the file If the option Prompt to confirm ending job is active touch End again at the prompt b Close and save the realtime file c Unplug the USB cable from your computer and the Luminex Captioner Student Editi...

Page 22: ... Tension Control There are two thumbwheels on the Luminex Captioner Luminex Captioner Student Edition one on each side of the keyboard that control the keyboard depth and keyboard tension The depth of stroke adjustment wheel on the left determines the height of the number bar and all the steno keys This affects how far the keys go down when you press them There are ten different positions for the ...

Page 23: ...cated on the back of the Luminex Captioner Student Edition to the right of the micro USB port Like other computer equipment the Luminex Captioner Student Edition can seem unresponsive when it receives a series of commands it does not recognize If the Luminex Captioner Student Edition appears unresponsive press the Reset button on the back of the Luminex Captioner Student Edition When you press the...

Page 24: ...ged in for a long time the clapping motion stops however the battery is fully charged A single black rectangular block displays when you press a key There is a corresponding block for each letter on the keyboard Which block displays depends on the key stroked For example if you pressed FPLT four blocks would display on the Status LCD Stroking the number bar along with a key displays the sign on th...

Page 25: ...s menu bar from which you select options or perform an action warning messages such as Low Battery You can adjust the brightness and font size on the Tilting screen Adjusting the brightness can reduce battery usage See the Tilting Screen Appearance section more information about brightness and font size settings ...

Page 26: ...o outlines display on a seven inch color non glare Tilting screen View steno outlines in Vertical Note format Realtime ready through USB or virtual serial port Adjustable digital clock with month date and time Adjustable beeper volume Set the Tilting screen brightness and font size Date and timestamp note files Search for the last StenoMark or steno string Scroll forward and backward in a file Acc...

Page 27: ...ll move the highlight up and down in the steno notes More access the second Writing menu Touching More on the First Writing menu displays the Second Writing menu The second Writing menu includes features that allow you to Keyboard make adjustments to your steno keyboard Status Luminex Captioner Student Edition status information Display adjust Tilting screen steno note font size and backlight leve...

Page 28: ...month date and time format For example 20180815 142341 August 15 2018 at 2 23 41 p m Job files are stored in folders identified by year and month For example 201808 August 2018 By default the newest file is listed first 7 To turn the Luminex Captioner Student Edition Off at the Opening menu touch the Off sensor until you hear the beep Beeper Volume The Luminex Captioner Student Edition has a beepe...

Page 29: ...ay Strokes per minute SPM option 3 Touch the Change sensor to toggle the option between Yes and No Yes is the default 4 To display the Opening menu touch OK More Quit Electronic Marks Use the Mark function to electronically mark locations in your steno notes The mark is commonly known as a StenoMark You can use the Search feature to locate the Marks in the file To mark your steno notes 1 From the ...

Page 30: ...nsion see Keyboard Depth and Tension Control Keyboard Adjustments 1 Using Case CATalyst or the TrueView utility review the TrueStroke data for recent jobs to help diagnose keystroke issues See TrueView for more information 2 Make adjustments to the keyboard depth of stroke and tension control settings See Keyboard Depth and Tension Controls for details 3 Turn on CNN or the equivalent and write aga...

Page 31: ... the Split Stack Adjustment option first Set the Split Stack Adjustment option to Balanced before changing the Transition Time setting It is strongly recommended that you select a small increment and assess the change Increase the transition time setting when split steno outlines continue to show in your steno notes or Lower the transition time setting when stacked steno outlines continue to show ...

Page 32: ...en Each individual bar indicates the point the key must reach or move slightly past in order to register as a stroke The number below each key is the current setting Zero is the factory default 4 Press and release the steno key you want to adjust When you press a key you will notice a blue bar expanding up and that blue bar must go past the white line before you release the key The gray vertical b...

Page 33: ...minex Captioner Student Edition uses Memory to store steno notes and timestamp files Steno note files stored in Memory remain even when you turn the Luminex Captioner Student Edition Off There is 12 000 strokes of Memory on the Luminex Captioner Student Edition or approximately 50 pages If the Memory becomes full while writing realtime the realtime display on the Luminex Captioner Student Edition ...

Page 34: ...f steno notes from a Stentura and have installed the Luminex Captioner Student Edition USB driver on your computer See the section on installing the USB drivers for instructions on loading the driver To read steno notes via USB cable 1 Ensure your Luminex Captioner Student Edition and computer are turned On and are fully booted 2 Each end of the USB cable has a different connection plug Insert the...

Page 35: ... are turned On and are fully booted 2 Each end of the USB cable has a different connection plug Insert the appropriate end of the micro USB cable into the USB port on the back of the Luminex Captioner Student Edition and the other end into a USB port on the computer 3 Turn your computer On and start your Read program This is a virtual serial port communication via the USB cable It is necessary to ...

Page 36: ...ning menu touch Memory Erase All 2 The Luminex Captioner Student Edition prompts you with a confirmation message to delete all the files in Memory 3 Do one of the following Touch Yes to erase all the files When the Luminex Captioner Student Edition completes erasing the Memory files touch OK to return to the Opening menu To keep the current files and not erase the Memory touch No To return to the ...

Page 37: ...h the Up Down sensors as necessary to highlight the Prompt to end job option 3 Touch the Change sensor to toggle the option between Yes and No Yes is the default setting 4 To display the Opening menu touch OK More Quit Routine Care Although little maintenance is required for your Luminex covering it when not in use is suggested Daily Monthly Cover the Luminex when it is not in use Clean the tiltin...

Page 38: ...t use a soft brush to lightly brush the grit away before using the cleaner and soft cloth 1 Use mild soap and water or multipurpose cleaner using a soft cloth 2 Apply sparingly and avoid contact with the tilting screen and the cleaner 3 If using a spray bottle spray the mild soap and water on a soft cloth and wipe the body of the writer Never use cleaning products that contain ammonia ethyl alcoho...

Page 39: ... in the file 3 Continue writing or touch Quit The First Writing menu and your current writing position display Search for Steno Strokes 1 From the First Writing menu touch Search Steno The Enter Steno To Search For field displays 2 Write the steno strokes for which you want to search If you make a mistake touch Clear and then write the new strokes 3 Touch OK The Luminex Captioner Student Edition h...

Page 40: ...Keyboard type and Serial Protocol The amount of space remaining in Memory Whether or not the AC adapter charger is charging Main Battery status See Battery for more information Check Status Information To check status information Before Writing From the Opening menu touch Status To return to the Opening touch OK While Writing Realtime From the Writing menu touch More Status To return to the Writin...

Page 41: ...ner Student Edition must be connected to the computer for realtime writing A testing facility may request this mode when you take a certification test or if you were providing captioning services in a secure location and you were not allowed to leave the area with steno files on your writer To turn Test Mode On or Off 1 Connect the Luminex Captioner Student Edition to your computer for realtime wr...

Page 42: ...reen Backlight Level Adjust the brightness of the Backlight on the Tilting screen to accommodate your viewing preference Decreasing the brightness reduces the amount of the power required to display the screen which can reduce battery consumption Optionally setting the Backlight to automatically dim after a period of inactivity also reduces battery consumption Dimming options allow you to customiz...

Page 43: ... Do one of the following If no job is open on the writer return to the Opening Menu by touching OK More Quit During a job simply continue writing The First Writing menu displays Time and Date The Time function allows you to change the time and date on your Luminex Captioner Student Edition It is important to maintain date and time accuracy in the event you need to locate a file in Memory 1 From th...

Page 44: ... Communication option only affects realtime communication via USB Virtual USB serial port communication is not available To change the USB Communications option 1 From the Opening Menu touch Setup Options 2 Use the Up Down sensors to highlight the USB Communication Writer will Reset if Changes option 3 Touch Change to switch to Mira Emulation or Standard Standard is the default selection The messa...

Page 45: ...Captioner Student Edition USB driver see install USB drivers for instructions USB Realtime Connection Appears Unresponsive If you leave the USB realtime connection active when you take a break the realtime screen on the CAT system may not display the new steno strokes when you resume writing This is a function of the USB port power management settings when it remains idle for a period of time Powe...

Page 46: ...te file to download and choose Save Target as The Save As dialog box displays 4 The File name field displays the name of the selected file to download Do not alter this name 5 Select a location on your computer where you want to place the download file and select Save Stenograph recommends saving the file to your Desktop 6 The File Download dialog box displays until the download completes copying ...

Page 47: ...are 13 When the update is complete the Luminex Captioner Student Edition reboots and displays the Opening menu Your computer displays the message Successfully Updated the Luminex Click OK to Exit 14 Click OK and in the Luminex Captioner Student Edition Update dialog box on your computer click Quit You can delete the update file ...

Page 48: ...the following message do one of the following To run the Writer Utility Setup select Run The Stenograph Utility Setup screen displays follow the prompts to install the utility To Save the setup file to your hard disk select Save Once the writer utility setup exe is downloaded do one of the following to install the setup Once the download is complete do one of the following To install the Writer Ut...

Page 49: ...oke data Steno X ray2 generated by the Luminex Captioner Student Edition TrueStroke data is gathered while writing realtime connected via the USB cable to Case CATalyst V13 or higher TrueStroke Data contains information about timing the direction of travel and the velocity for each steno key in each steno outline This allows you to examine a steno outline to determine the cause for a stroke to reg...

Page 50: ...n your computer 6 Navigate to the location where you installed the Stenograph Utility files At the Stenograph Writer Utility dialog box click the Writer Utilities Splash Loader and more option double click the Utilities and Splash Photos folder and then double click the GetSupportInfo exe The GetSupportInfo dialog box displays 7 You need to specific a location for the log files to be copied to you...

Reviews: