


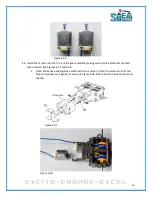


45
Installing Your Switch
6.
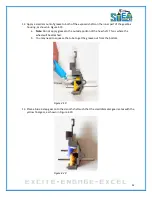
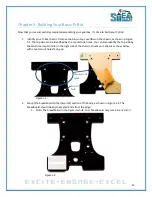
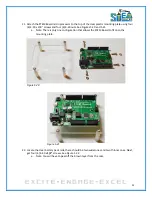
Locate the bag with the following items, as shown in Figure 5.5:
a.
Switch with soldered wires
b.
Flat and locking washers
c.
Two (2) matching nuts
d.
Note: Pay careful attention to how the nuts and washers are arranged in the proper
order for installation in Figure 5.6.
e.
Arrange your switch so that it is in the OFF position. This is when the lever is pointing
away from the side with empty terminal, as shown below.
Figure 5.5
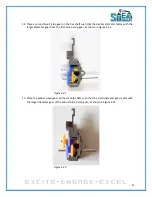
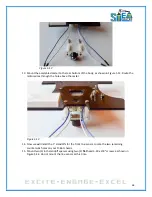
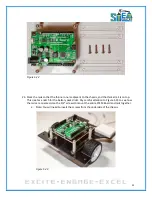
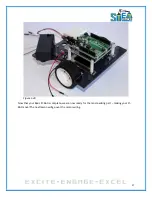
7.
Install the switch such that the toggle is on the top of the body and the wires are on the
underside of the chassis, as shown in Figure 5.6. One nut and the flat washer should be installed
on the top of the switch. One nut and the locking washer should be on the underside of the
chassis.
a.
Arrange the switch so that the OFF position points towards the backend of the chassis
(towards the breadboard side).
Figure 5.6
Summary of Contents for Pi-Bot v2.00
Page 67: ...67 Figure 6 15 ...
Page 78: ...78 UltraSonicSensorTestwithLED Program ...
Page 80: ...80 ObstacleAvoidance Program ...
Page 82: ...82 ObstacleAvoidancewithLED Program ...
Page 83: ...83 ObstacleAvoidancewithLED Program CONTINUED ...
Page 90: ...90 Download and run the following program LineFollowing Program ...
Page 91: ...91 LineFollowing Program CONTINUED ...
Page 94: ...94 AdvancedLineFollowing Program CONTINUED ...
Page 95: ...95 AdvancedLineFollowing Program CONTINUED ...
Page 96: ...96 AdvancedLineFollowing Program CONTINUED ...
Page 110: ...Appendix B Complete Pi Bot Wiring Schematic ...


