


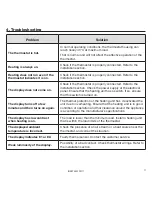

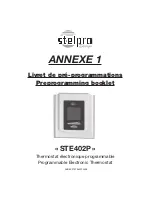


3
INSSTE402P0711
Thermostat mounting and connection
1.
Cut off power supply on lead wires at
the electrical panel in order to avoid
any risk of electric shock;
2. Ensure that the air vents of the thermostat are
clean and clear of any obstruction;
3. Make the required connections using the following
figures by selecting the proper type of installation (2
wires or 4 wires), and using solderless connectors.
For connections with aluminium wires, you must use
CO/ALR connectors. Please note that this thermostat
does not have polarity, which means that any wire
can be connected to the other;
Two-wire installation
Four-wire installation
4. Using a screwdriver, loosen the screw retaining
the mounting base and front part of the thermo-
stat. Remove the front part of the thermostat from
the mounting base by tilting it upward;
5. Align and secure the mounting base to the con-
nection box using the two screws supplied;
6 . Reinstall the front part of the thermostat on the
mounting base and tighten the screw at the bot-
tom of the unit;
7. Turn on the power;
8. Set the thermostat to the desired setting (see the
following section). Important: you must activate
the Fan mode when the heating unit is equipped
with a fan; failure of the heating unit could occur
if not doing so.


