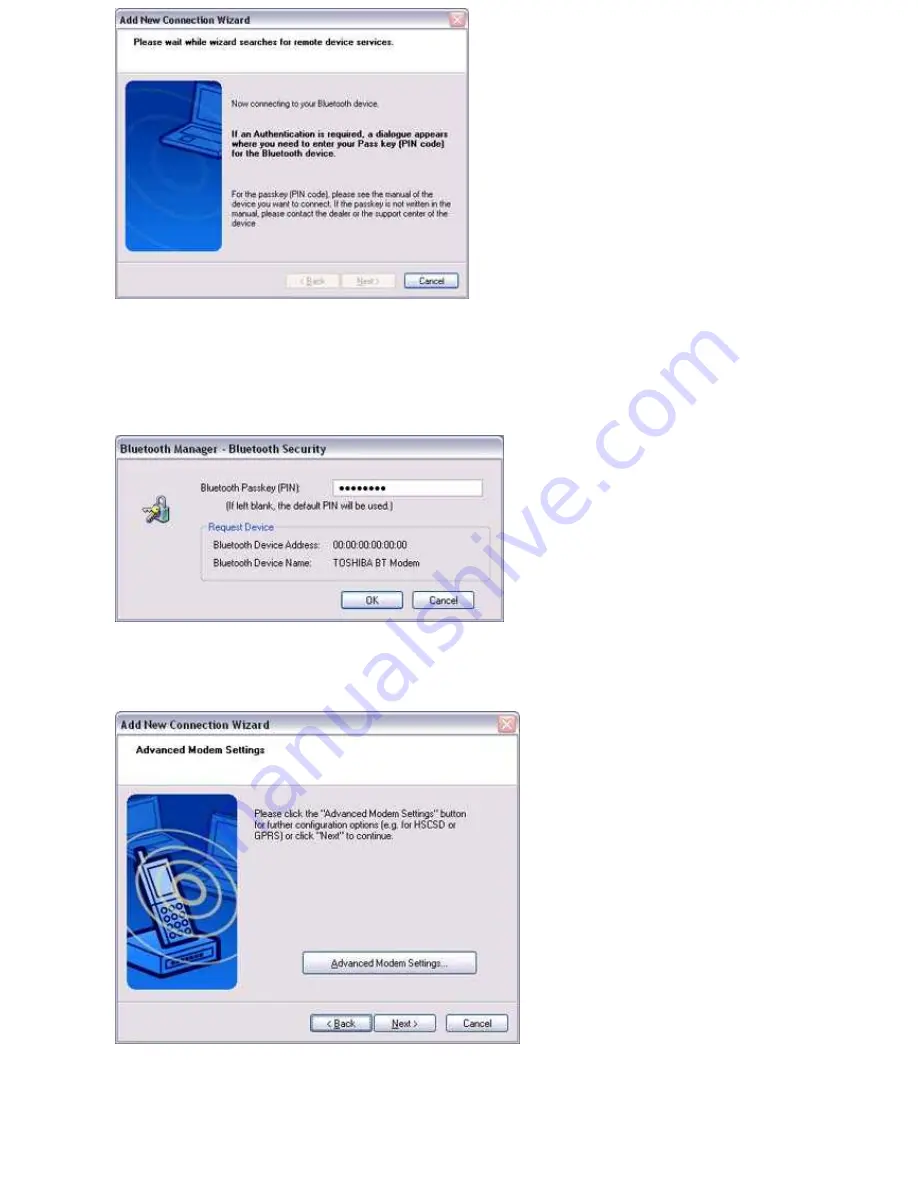
Once a service has been detected successfully, connection to the device and COM port creation will be performed automatically, after
which the [Add New Connection Wizard (Modem Settings)] window will appear.
5.
If you are connecting to a wireless modem station for the first time, enter the passkey for the modem station under [Bluetooth
Passkey (PIN code)], and then click on the [OK] button
Once the program has finished searching for the devices, the [Add New Connection Wizard (Device Selection)] window will appear.
6.
Click on the [Next] button
Certain modems require you to configure initialization commands separately.
Please click on the [Additional initialization Command Settings] button, enter the initialization commands in the following window, and
then click on the [OK] button.
Page 408
Summary of Contents for VGN-BX563B - VAIO - Pentium M 1.73 GHz
Page 10: ...Relatedtopics Exchanging files with PCs and PDAs Page 10 ...
Page 54: ...Click on the Yes button in the disconnection confirmation dialog boxthat appears Page 54 ...
Page 67: ...Page 67 ...
Page 81: ...An image of the received faxwill be displayed Related topic Sending a fax Page 81 ...
Page 95: ...An image of the received faxwill be displayed Related topic Sending a fax Page 95 ...
Page 112: ...Page 112 ...
Page 139: ...Please click on the OK button to close the message and repeat the procedure Page 139 ...
Page 157: ...Page 157 ...
Page 197: ...An image of the received faxwill be displayed Related topic Sending a fax Page 197 ...
Page 218: ...An image of the received faxwill be displayed Related topic Sending a fax Page 218 ...
Page 223: ...Please click on the OK button to close the message and repeat the procedure Page 223 ...
Page 231: ...Click on the Yes button in the disconnection confirmation dialog boxthat appears Page 231 ...
Page 254: ...Page 254 ...
Page 294: ...Page 294 ...
Page 301: ...Page 301 ...
Page 327: ...Page 327 ...
Page 361: ...Page 361 ...
Page 366: ...The mouse will be connected Page 366 ...
Page 370: ...The new icon will appear Page 370 ...
Page 372: ...Page 372 ...
Page 378: ...Page 378 ...
Page 404: ...Page 404 ...
Page 427: ...Click on the Yes button in the disconnection confirmation dialog boxthat appears Page 427 ...
Page 440: ...Page 440 ...
Page 454: ...An image of the received faxwill be displayed Related topic Sending a fax Page 454 ...
Page 468: ...An image of the received faxwill be displayed Related topic Sending a fax Page 468 ...
Page 485: ...Page 485 ...
Page 512: ...Please click on the OK button to close the message and repeat the procedure Page 512 ...
Page 530: ...Page 530 ...
Page 570: ...An image of the received faxwill be displayed Related topic Sending a fax Page 570 ...
Page 591: ...An image of the received faxwill be displayed Related topic Sending a fax Page 591 ...
Page 596: ...Please click on the OK button to close the message and repeat the procedure Page 596 ...
Page 604: ...Click on the Yes button in the disconnection confirmation dialog boxthat appears Page 604 ...
Page 627: ...Page 627 ...
Page 667: ...Page 667 ...
Page 674: ...Page 674 ...
Page 700: ...Page 700 ...
Page 738: ...Page 738 ...


