Using a Bluetooth
TM
wireless technology-compatible camera
[BIP]
By connecting a Bluetooth
TM
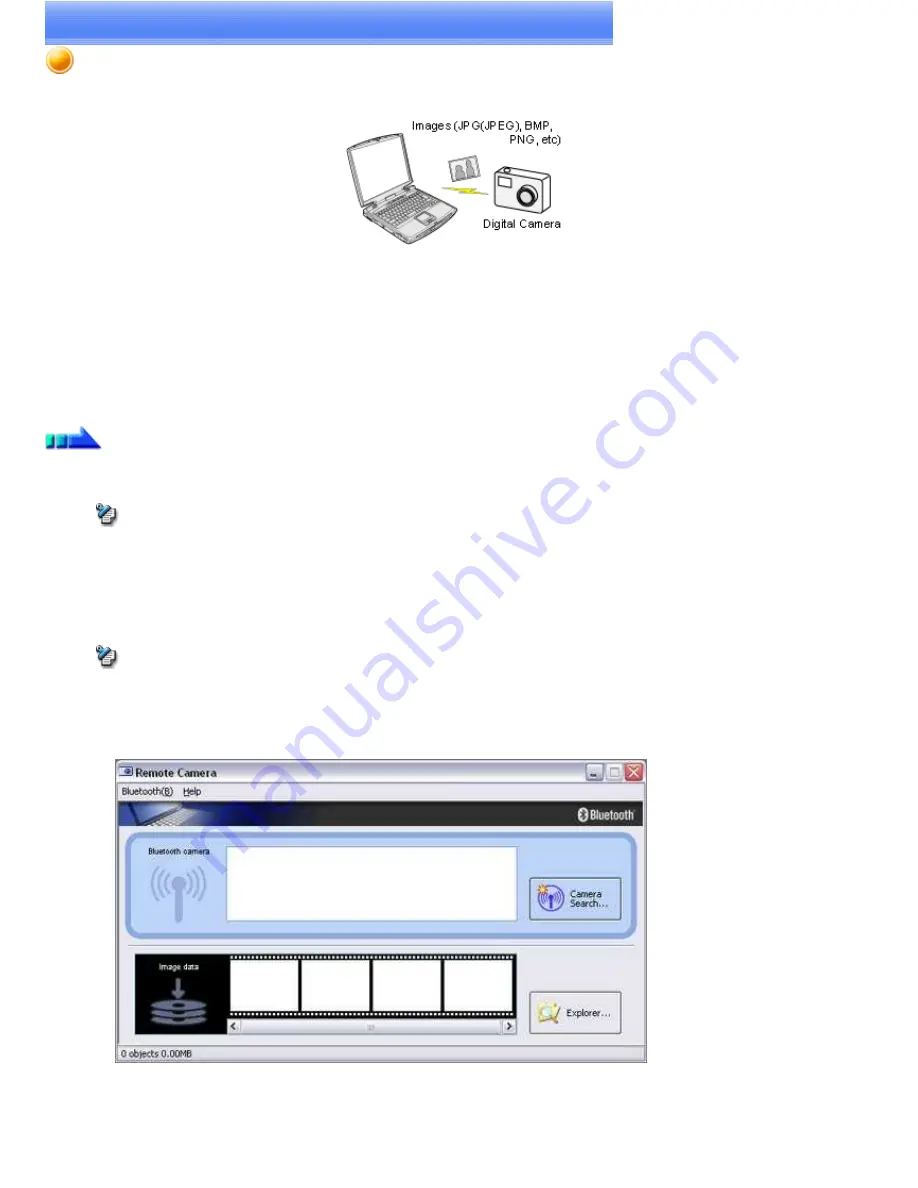
wireless technology-compatible digital camera to your PC, you will be able to operate the camera shutter from the PC
and transmit captured images to it as well.
→
Connecting the camera
→
Taking pictures
→
Viewing images saved on your PC
Connecting the camera
Use the "Remote Camera" tool in the Bluetooth
TM
Utility to connect the camera to your PC.
Procedure
1.
Click on [Start ]→[All Programs]→[Bluetooth]→[Remote Camera]
Note
o
In Windows 2000, click on [Start]→[Programs]→[Bluetooth]→[Remote Camera].
2.
Turn on the camera, and set it to be connectable via Bluetooth
TM
wireless technology
Note
o
Different cameras are operated in different ways, depending on the manufacturer and model used. Please refer to the instruction
manual for further details on how to operate your camera.
3.
Click on the [Camera Search...] button
The camera will be detected and its icon displayed.
Page 158
Summary of Contents for VGN-BX563B - VAIO - Pentium M 1.73 GHz
Page 10: ...Relatedtopics Exchanging files with PCs and PDAs Page 10 ...
Page 54: ...Click on the Yes button in the disconnection confirmation dialog boxthat appears Page 54 ...
Page 67: ...Page 67 ...
Page 81: ...An image of the received faxwill be displayed Related topic Sending a fax Page 81 ...
Page 95: ...An image of the received faxwill be displayed Related topic Sending a fax Page 95 ...
Page 112: ...Page 112 ...
Page 139: ...Please click on the OK button to close the message and repeat the procedure Page 139 ...
Page 157: ...Page 157 ...
Page 197: ...An image of the received faxwill be displayed Related topic Sending a fax Page 197 ...
Page 218: ...An image of the received faxwill be displayed Related topic Sending a fax Page 218 ...
Page 223: ...Please click on the OK button to close the message and repeat the procedure Page 223 ...
Page 231: ...Click on the Yes button in the disconnection confirmation dialog boxthat appears Page 231 ...
Page 254: ...Page 254 ...
Page 294: ...Page 294 ...
Page 301: ...Page 301 ...
Page 327: ...Page 327 ...
Page 361: ...Page 361 ...
Page 366: ...The mouse will be connected Page 366 ...
Page 370: ...The new icon will appear Page 370 ...
Page 372: ...Page 372 ...
Page 378: ...Page 378 ...
Page 404: ...Page 404 ...
Page 427: ...Click on the Yes button in the disconnection confirmation dialog boxthat appears Page 427 ...
Page 440: ...Page 440 ...
Page 454: ...An image of the received faxwill be displayed Related topic Sending a fax Page 454 ...
Page 468: ...An image of the received faxwill be displayed Related topic Sending a fax Page 468 ...
Page 485: ...Page 485 ...
Page 512: ...Please click on the OK button to close the message and repeat the procedure Page 512 ...
Page 530: ...Page 530 ...
Page 570: ...An image of the received faxwill be displayed Related topic Sending a fax Page 570 ...
Page 591: ...An image of the received faxwill be displayed Related topic Sending a fax Page 591 ...
Page 596: ...Please click on the OK button to close the message and repeat the procedure Page 596 ...
Page 604: ...Click on the Yes button in the disconnection confirmation dialog boxthat appears Page 604 ...
Page 627: ...Page 627 ...
Page 667: ...Page 667 ...
Page 674: ...Page 674 ...
Page 700: ...Page 700 ...
Page 738: ...Page 738 ...


