Manually creating a virtual Bluetooth COM port
In order for a PC to connect to and communicate with a Bluetooth
TM
wireless technology device, the Bluetooth
TM
Utility will create a gateway for
data to be exchanged between the respective devices. This gateway is known as a "port" (or "virtual COM port").
Since one virtual COM port will be allocated to each device, trouble-free communication will still be possible even if several devices are being used.
When you use the Bluetooth
TM
Utility, a virtual COM port will be automatically created on set-up; however, virtual COM ports can be created
manually if so needed.
Note
Bluetooth Manager
must be active in order for you to be able to use Bluetooth Local COM.
Clients and servers
When Bluetooth
TM
wireless technology communications are performed, there will always be a "client/server" relationship between the various
devices. A "client" is a device that sends certain requests to another device, while a "server" is a device that provides a service on receipt of such
requests from another device.
For example, when a PC issues a print command to a wireless printer, the PC functions as the client, while the printer functions as the server.
When a PDA or other device attempts to receive files located on a PC by means of file transfer protocol, the PC functions as the server, while the
PDA functions as the client.
Virtual Bluetooth COM ports can be created both for clients and servers.
Bluetooth virtual COM port for a client
Virtual COM port used when your device is the client, and requests are sent to another device.
Bluetooth virtual COM port for a server
Virtual COM port used when your device is the server, and requests are received from another device.
Creating a virtual COM port
Bluetooth virtual COM ports are created according to the procedure below.
Procedure
1.
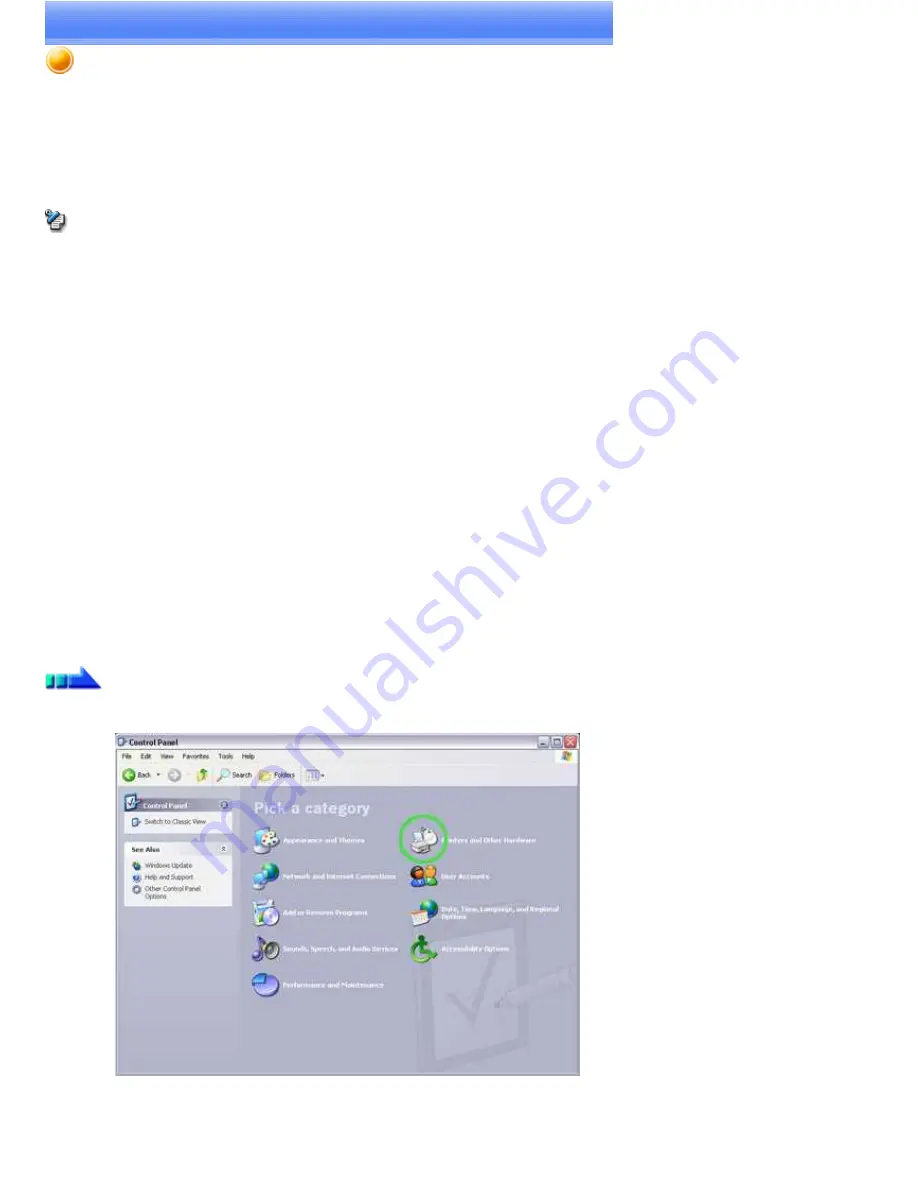
Click on the [Printers and Other Hardware] icon in the Control Panel
The [Printers and Other Hardware] window appears.
2.
Double-click on the [Bluetooth Local COM] icon
Page 358
Summary of Contents for VGN-BX563B - VAIO - Pentium M 1.73 GHz
Page 10: ...Relatedtopics Exchanging files with PCs and PDAs Page 10 ...
Page 54: ...Click on the Yes button in the disconnection confirmation dialog boxthat appears Page 54 ...
Page 67: ...Page 67 ...
Page 81: ...An image of the received faxwill be displayed Related topic Sending a fax Page 81 ...
Page 95: ...An image of the received faxwill be displayed Related topic Sending a fax Page 95 ...
Page 112: ...Page 112 ...
Page 139: ...Please click on the OK button to close the message and repeat the procedure Page 139 ...
Page 157: ...Page 157 ...
Page 197: ...An image of the received faxwill be displayed Related topic Sending a fax Page 197 ...
Page 218: ...An image of the received faxwill be displayed Related topic Sending a fax Page 218 ...
Page 223: ...Please click on the OK button to close the message and repeat the procedure Page 223 ...
Page 231: ...Click on the Yes button in the disconnection confirmation dialog boxthat appears Page 231 ...
Page 254: ...Page 254 ...
Page 294: ...Page 294 ...
Page 301: ...Page 301 ...
Page 327: ...Page 327 ...
Page 361: ...Page 361 ...
Page 366: ...The mouse will be connected Page 366 ...
Page 370: ...The new icon will appear Page 370 ...
Page 372: ...Page 372 ...
Page 378: ...Page 378 ...
Page 404: ...Page 404 ...
Page 427: ...Click on the Yes button in the disconnection confirmation dialog boxthat appears Page 427 ...
Page 440: ...Page 440 ...
Page 454: ...An image of the received faxwill be displayed Related topic Sending a fax Page 454 ...
Page 468: ...An image of the received faxwill be displayed Related topic Sending a fax Page 468 ...
Page 485: ...Page 485 ...
Page 512: ...Please click on the OK button to close the message and repeat the procedure Page 512 ...
Page 530: ...Page 530 ...
Page 570: ...An image of the received faxwill be displayed Related topic Sending a fax Page 570 ...
Page 591: ...An image of the received faxwill be displayed Related topic Sending a fax Page 591 ...
Page 596: ...Please click on the OK button to close the message and repeat the procedure Page 596 ...
Page 604: ...Click on the Yes button in the disconnection confirmation dialog boxthat appears Page 604 ...
Page 627: ...Page 627 ...
Page 667: ...Page 667 ...
Page 674: ...Page 674 ...
Page 700: ...Page 700 ...
Page 738: ...Page 738 ...


