1-8
36
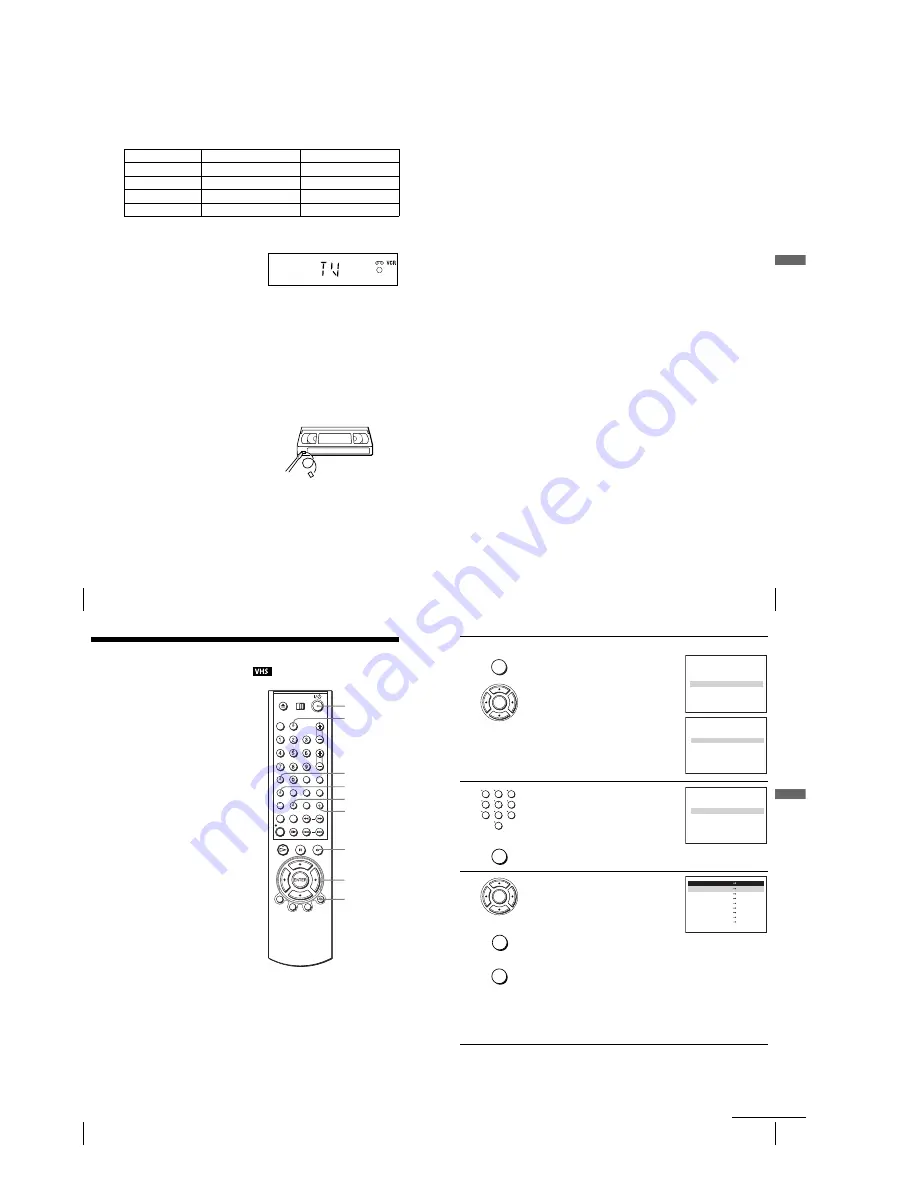
Recording TV programmes
In order to get an accurate remaining time indication, be sure “Tape Select” in the
“VIDEO FUNCTION SETUP” menu is set according to the tape type you use (see
page 90).
Maximum Recording Time
To watch another TV programme while recording
To watch a DVD while recording
To save a recording
To prevent accidental erasure, break
off the safety tab as illustrated. To
record on the tape again, cover the tab
hole with adhesive tape.
Tips
• To select a programme position, you can
use the number buttons on the remote commander. For two-digit numbers, for example, press
2 and 3 to select “PR 23.”
• If you connect additional equipment to a LINE connector or jack, you can select the input
signal using the INPUT SELECT or PROG +/– buttons.
• The DISPLAY information appears on the TV screen indicating information about the tape,
but the information will not be recorded on the tape.
• If you do not want to watch TV while recording, you can turn off the TV. When using a
decoder, make sure to leave it on.
Tape Length
SP
LP
E-180
3 hrs
6 hrs
E-240
4 hrs
8 hrs
E-260
4 hrs 20 mins
8 hrs 40 mins
E-300
5 hrs
10 hrs
1
Press TV/VIDEO to display “TV” in the display window.
2
Select another channel on the TV.
1
Press SELECT DVD to control the DVD player.
2
Press
Z
and place the disc on the disc tray.
3
Press
H
.
The disc tray closes and the DVD player starts playback. The TV screen will
automatically change to the DVD playback screen.
Safety tab
37
Recording TV programmes
Ba
sic
O
p
er
at
ions
Notes
• The DISPLAY information does not appear during still (pause) mode or slow-motion
playback.
• If a tape has portions recorded in both PAL and NTSC systems, the time counter reading will
not be correct. This discrepancy is due to the difference between the counting cycles of the
two video systems.
• When you insert a non-standard commercially available tape, the remaining time may not be
correct.
• The remaining time is intended for rough measurement only.
• About 30 seconds after the tape begins playback, the tape remaining time will be displayed.
• You cannot record a DVD to a VCR tape.
• To watch a TV programme during video recording, stop disc playback.
38
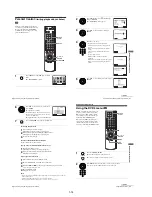
Recording TV programmes using the VIDEO Plus+
®
system
Recording TV programmes using the
VIDEO Plus+
®
system
The VIDEO Plus+ system is the feature that
simplifies programming the VCR to make
timer recordings. Just enter the PlusCode
number listed in the TV programme guide.
The date, times, and programme position of
that programme are set automatically. You
can preset a total of eight programmes,
including settings made with other timer
methods.
Before you start...
• Check that the DVD-VCR clock is set to
the correct time.
• Turn on the DVD-VCR and your TV.
• Set your TV to the video channel so that
the signal from the player appears on the
TV screen.
• Press SELECT VIDEO to control the
VCR.
• To record from a satellite or digital tuner,
turn it on.
• Insert a tape with its safety tab in place.
Make sure the tape is longer than the total
recording time.
• Set “TIMER METHOD” to
“VIDEOPLUS” or “VARIABLE” in the
“USER SET” menu (see page 95).
SET UP
INPUT
SELECT
V/v/B/b
ENTER
?
/
1
x
O
RETURN
CLEAR
TIMER
SELECT VIDEO
39
Recording TV programmes using the VIDEO Plus+
®
system
Ba
sic
O
p
er
at
ions
1
Press
TIMER.
• When you set “TIMER METHOD” to
“VARIABLE”:
The “TIMER METHOD” menu appears on
the TV screen. Press
V/v
to select
“VIDEOPLUS,” then press ENTER.
• When you set “TIMER METHOD” to
“VIDEOPLUS”:
The “VIDEOPLUS” menu appears on the
TV screen.
2
Press the number buttons to enter the PlusCode
number.
If you make a mistake, press CLEAR and re-
enter the correct number.
You can also press
B
to delete the last entered
number.
3
Press ENTER.
The date, start and stop times, programme
position, tape speed and PDC (Programme
Delivery Control) setting appear on the TV
screen.
• If “– –” appears in the “PR” (programme)
column (this may happen for local
broadcasts), you have to set the appropriate programme position
manually.
Press
V/v
to select the desired programme position.
• To record from other equipment connected to one or more of the LINE
inputs, press INPUT SELECT to display the connected line in the “PR”
position.
You will only have to do this operation once for the referred channel. The
VCR will then store your setting.
If the information is incorrect, press CLEAR to cancel the setting.
ENTER
SUBTITLE/
TIMER
RETURN
T I M E R M E T H O D
S T A N D A R D
ENTER
vV
V I D E O P L U S
COD E: 0 – 9
C O D E
– – – – – – – – –
RETURN
ENTER
V I D E O P L U S
C O R R E C T :
B
1
2
3
4
5
6
7
8
9
0
CLEAR
COD E: 0 – 9
C O D E
1 2 3 4 – – – – –
RETURN
ENTER
V I D E O P L U S
C O R R E C T :
B
INPUT
SELECT
ENTER
CLEAR
PR DAY
START
STOP
– –
–
– – –
: – –
– – –
– –
–
– – –
: – –
– – –
– –
–
– – –
: – –
– – –
– –
–
– – –
: – –
– – –
– –
–
– – –
: – –
– – –
– –
–
– – –
: – –
– – –
– –
–
–
–
–
–
–
–
– – – –
–
–
–
–
–
–
– : – –
– – –
RETURN
CLEAR
3 5
S 2
A 9 1 9 :
:
:
:
:
:
:
–
–
–
–
–
–
–
–
–
–
–
–
–
– :
0 0
0 0
0
2
:
V/P
–
–
–
–
–
–
–
–
SP
–
–
–
–
–
–
–
vV
B
b
continued
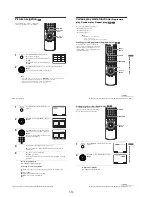
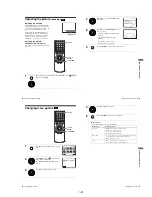
Summary of Contents for SLV-D900E
Page 39: ...3 Block Diagram 3 2E 3 1 SLV D900E D900G ...
Page 41: ...4 3 4 4 4 1 VCR Main COMPONENT SIDE ...
Page 42: ...4 6 4 5 CONDUCTOR SIDE ...
Page 43: ...4 7 4 8 4 2 DVD Main CONDUCTOR SIDE COMPONENT SIDE ...
Page 44: ...4 10E 4 9 4 3 FUNCTION Timer COMPONENT SIDE CONDUCTOR SIDE ...
Page 47: ...5 6 5 5 5 1 S M P S ...
Page 48: ...5 8 5 7 FROM TO DVD Audio Video CN4 5 2 Power Drive ...
Page 49: ...5 10 5 9 5 3 OSD VPS PDS ...
Page 50: ...5 12 5 11 5 4 NICAM ...
Page 51: ...5 14 5 13 5 5 A V ...
Page 52: ...5 16 5 15 5 6 Hi Fi ...
Page 53: ...5 18 5 17 5 7 Input Output ...
Page 54: ...5 20 5 19 5 8 TM ...
Page 55: ...5 22 5 21 5 9 SYSCON ...
Page 56: ...5 24 5 23 5 10 DVD Main Micom AV Decoder ...
Page 57: ...5 26 5 25 5 11 DVD Servo ...


