1-7
32
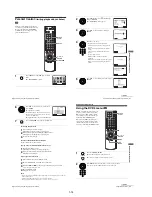
Playing a tape
Additional tasks
To turn off the power while rewinding (Rewind Shut Off)
Press
?
/
1
while the tape is rewinding. The power will turn off but the tape will keep
rewinding until it reaches the end.
To play/search at various speeds
To resume normal playback
Press
H
.
To use the time counter
Press CLEAR at the point on the tape that you want to find later. The counter in the
display window resets to “0:00:00.”
To display the counter on the TV screen, press DISPLAY.
To
Press
Stop play
x
Pause play
X
Resume play after pause
X
or
H
Fast-forward the tape
M
during stop
Rewind the tape
m
during stop
Eject the tape
Z
Playback options
Operation
View the picture during fast-
forward or rewind
During fast-forward, hold down
M
. During rewind, hold
down
m
.
Play at high speed
• During playback, briefly press
M
or
m
. The tape
continues to play at 5 times normal speed.
• During playback, hold down
M
or
m
. The tape
continues to play at 5 times normal speed. When you
release the button, normal playback resumes.
Play in slow motion
During pause, press
M
SLOW
y
.
Play frame by frame
During pause, press
C
STEP.
Play at various speeds
(Shuttle play)
During playback, press
.
or
>
SHUTTLE. You can
change the playback speed as follows.
REVIEW
y
–
×
2
y
–
×1
y
–SLOW
y
STILL
y
SLOW
y
PLAY
y
×
2
y
CUE
33
Playing a tape
Ba
sic
O
p
er
at
ions
Tip
• Adjust the picture using the TR/– buttons if:
– Streaks appear while playing in slow motion.
– Bands appear at the top or bottom while pausing.
– The picture shakes during pause.
Notes
• Tapes recorded in the LP mode on other VCRs can be played back on this VCR but the
picture quality cannot be guaranteed.
• The counter resets to “0:00:00” whenever a tape is reinserted.
• The counter stops counting when it comes to a portion with no recording.
• Depending on your TV, the following may occur while playing an NTSC-recorded tape:
– The picture becomes black and white.
– The picture shakes.
– No picture appears on the TV screen.
– Black streaks appear horizontally on the TV screen.
– The colour density increases or decreases.
• When 10 hours have passed, the counter in the display window returns to “0:00:00” and the
count starts over again.
• The sound is muted during playback at various speeds.
• The picture may show noise when playing at high speed in reverse.
• While playing a tape, you can display the “SETUP MENU” but the remote commander’s
function switches to DVD automatically. Press
O
RETURN repeatedly to exit the menu.
• Stop disc playback while playing back a video.
• The picture returns to normal playback from slow motion in reverse in 30 seconds.
34
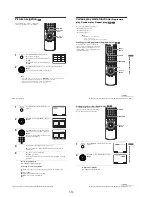
Recording TV programmes
Recording TV programmes
Before you start...
• Turn on the DVD-VCR and your TV.
• Switch the input selector on your TV so
that the signal from the player appears on
the TV screen.
• Press SELECT VIDEO to control the
VCR.
• To record from a satellite or digital tuner,
turn it on.
• Make sure the tape is longer than the total
recording time.
1
Insert a tape with its safety tab in place.
PROG +/–
z
REC
SP/LP
DISPLAY
TV/VIDEO
INPUT
SELECT
x
H
SELECT VIDEO
?/1
Z
35
Recording TV programmes
Ba
sic
O
p
er
at
ions
To stop recording
Press
x
.
To check the remaining time
Press DISPLAY twice. With the display on, press DISPLAY again to check the
remaining time.
2
• To record a normal channel, press PROG +/– until the programme
position number you want appears in the display window.
• To record from other equipment connected to one or more of the LINE
inputs, press INPUT SELECT until the connected line appears in the
display window.
3
Press SP/LP to select the tape speed, SP or LP.
LP (Long Play) provides recording time twice as long as SP. However, SP
(Standard Play) produces better picture and audio quality.
4
Press
z
REC to start recording.
The recording indicator lights up red in the display window.
• PROG/
TRACKING
INPUT
SELECT
SP / LP
REC
Recording indicator
Time counter
Remaining tape length
2
0 : 0 0 : 2
6
1 : 4
R E M A I N
continued
Summary of Contents for SLV-D900E
Page 39: ...3 Block Diagram 3 2E 3 1 SLV D900E D900G ...
Page 41: ...4 3 4 4 4 1 VCR Main COMPONENT SIDE ...
Page 42: ...4 6 4 5 CONDUCTOR SIDE ...
Page 43: ...4 7 4 8 4 2 DVD Main CONDUCTOR SIDE COMPONENT SIDE ...
Page 44: ...4 10E 4 9 4 3 FUNCTION Timer COMPONENT SIDE CONDUCTOR SIDE ...
Page 47: ...5 6 5 5 5 1 S M P S ...
Page 48: ...5 8 5 7 FROM TO DVD Audio Video CN4 5 2 Power Drive ...
Page 49: ...5 10 5 9 5 3 OSD VPS PDS ...
Page 50: ...5 12 5 11 5 4 NICAM ...
Page 51: ...5 14 5 13 5 5 A V ...
Page 52: ...5 16 5 15 5 6 Hi Fi ...
Page 53: ...5 18 5 17 5 7 Input Output ...
Page 54: ...5 20 5 19 5 8 TM ...
Page 55: ...5 22 5 21 5 9 SYSCON ...
Page 56: ...5 24 5 23 5 10 DVD Main Micom AV Decoder ...
Page 57: ...5 26 5 25 5 11 DVD Servo ...


