15(E)
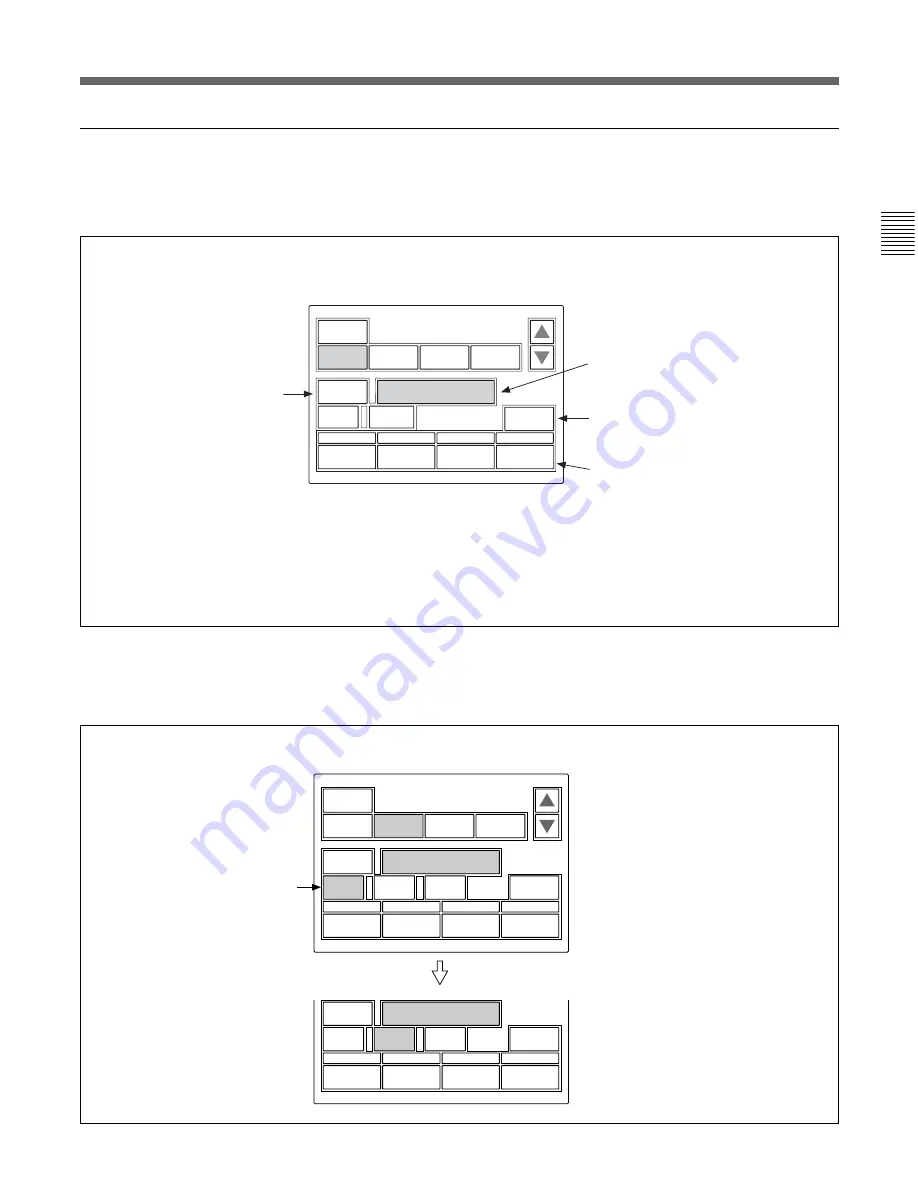
Adjustment display (Paint menu)
When you select an item on the initial display of the
Paint menu, the lower half of the panel becomes the
adjustment display for the selected item.
Submenu
If the selected item has many parameters, a submenu is
displayed.
When you press this, the upper
half of the panel becomes the
monitor output setting display
(see the next page).
The name of the item selected on the
initial display is displayed.
If you press this area after pressing
[Clear]
, all the adjustment values for the
selected item are initialized to standard.
The adjustment parameters for the
selected item and their adjustment
values are displayed.
You may adjust these items using the
corresponding control knobs.
If you press a value area after
pressing
[Clear]
, that adjustment value
is initialized to standard.
Clear
WF/PIX
Select
Skin Detail
Detail
1
Skin
Detail
Sat
Black
Gamma
1
2
3
2 / 7
Level
0
Phase
0
Width
0
Sat
0
Skin
DTL 1
WF/PIX
Select
Skin Detail
1
2
3
Level
0
Phase
0
Width
0
Sat
0
Skin
DTL 2
When there are any ON/OFF functions
related to the adjustment, the names of
the functions are displayed on this line.
Submenu
Press to switch the parameters.
Example: when you select “White” from the initial display
Example: when you select “Skin Detail” from the initial display
Clear
WF/PIX
Select
Color
Temp
White RGB
White
RGB
Black
Flare
Gamma
1 / 7
R
0
G
0
B
Master
ATW
0
12.0dB
Summary of Contents for RCP-750
Page 43: ......
Page 75: ...Printed in Japan Sony Corporation ...
Page 88: ...12 E Mounting on a Console The RCP 750 751 can be mounted on a console as shown below ...
Page 146: ...Specifications 77 ...
Page 147: ...Specifications 78 ...


