


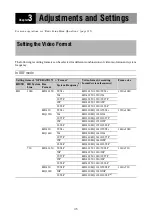


37
Note
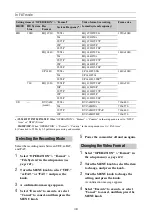
Always power the camcorder off before mounting or
removing a lens.
For information about using a lens other than the
supplied lens, refer to the operation manual for the
lens.
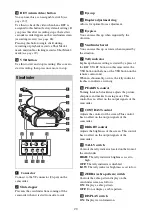
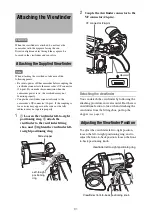
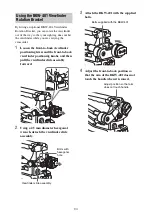
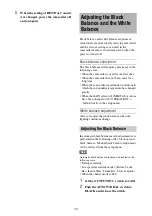
1
Push the lens locking lever up and
remove the lens mount cap from the
lens mount.
2
Align the center pin on the lens with the
center slot in the lens mount, and insert
the lens into the mount.
3
Holding the lens in place, push the lens
locking lever down to lock the lens.
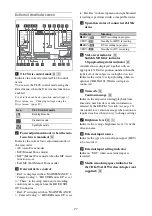
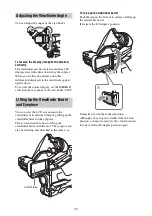
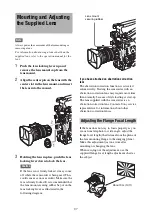
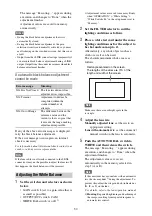
Caution
If the lens is not firmly locked, it may come
off while the camcorder is being used. This
could cause a serious accident. Make sure the
lens is firmly locked. It is recommended that
the lens mount securing rubber be put on the
lens locking lever as illustrated in the
following diagram.
If you have attached an aberration correction
lens
The aberration correction function is activated
automatically. Starting the camcorder with an
aberration correction lens may require more time
than normally because of data loading at start-up.
The lens supplied with the camcorder is an
aberration correction lens. Contact a Sony service
representative for information about other
aberration correction lenses.
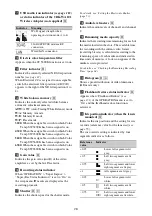
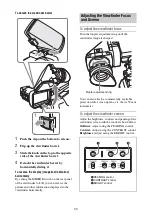
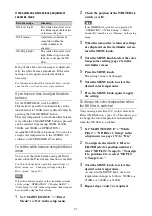
If the lens does not stay in focus properly as you
zoom from telephoto to wide angle, adjust the
flange focal length (the distance from the plane of
the lens mounting flange to the imaging plane).
Make this adjustment just one time after
mounting or changing the lens.
When carrying out the adjustment, use the
supplied flange focal length adjustment chart as
the subject.
Mounting and Adjusting
the Supplied Lens
Adjusting the Flange Focal Length
Lens mount
securing rubber
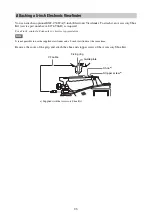
About 3 m (10 ft)
Summary of Contents for PXW-X320
Page 223: ......


