Getting Started
3
-EN
EN
Table of contents
21 Watching two programs at one time–PIP/P&P (Twin
View™)
21
Displaying a window picture (PIP)
22
Displaying a left picture (P&P)
22
Changing the window/left picture input mode
22
Changing TV channels in the window/left picture
22
Listening to the sound of the window/left picture
22
Changing the position of the window picture
22
Swapping the main/right and window/left pictures
23
Freezing the pictures
23
Watching eight TV channels at one time (CH INDEX)
23 Using the VIDEO menu
23
Adjusting the picture (VIDEO)
24
Adjusting the color temperature (TRINITONE)
24
Reducing picture noise (NR)
25
Enhancing the picture contrast (DYNAMIC
PICTURE)
25
Correcting the color (COLOR CORRECTION)
26 Using the AUDIO menu
26
Adjusting the sound (AUDIO)
27
Selecting stereo or bilingual programs (MTS)
27
Setting the speaker switch (SPEAKER)
28 Using the PROGRAM PALETTE menu
28
Selecting picture effect (PROGRAM PALETTE)
28
Adjusting the picture in PROGRAM PALETTE
29 Using the INPUT/OUTPUT menu
29
Selecting an output signal (INPUT/OUTPUT)
30
Setting video labels (VIDEO LABEL)
30 Using the TIMER menu
30
Setting the clock (CURRENT TIME)
32
Setting your daylight saving time (DS TIME)
32
Setting the timer to turn the projection TV on and off
(ON/OFF TIMER)
33
Blocking out a channel (CHANNEL BLOCK)
34 Using the SET UP menu
34
Customizing the channel names (CH CAPTION/
LOGO)
36
Setting your favorite channels (FAVORITE
CHANNEL)
36
Selecting a favorite channel
37
Selecting a VCR input directly (DIRECT PLAY)
37
Customizing the pointer (CUSTOMIZED POINTER)
38 Displaying Caption Vision/XDS (CAPTION VISION/XDS)
40 Operating video equipment
41 Operating a cable box or DBS receiver
42 Operating non-preprogrammed equipment—Learning
function
Additional Information
43 Troubleshooting
45 Specifications
46 Index
The captions in parentheses indicate menu names.
4
Welcome!
4
Precautions
Getting Started
5
Step 1: Installing the projection TV
6
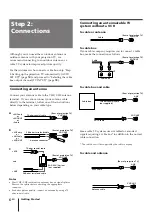
Step 2: Connections
6
Connecting an antenna
6
Connecting an antenna/cable TV system without a
VCR
7
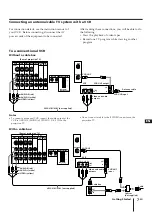
Connecting an antenna/cable TV system with a VCR
9
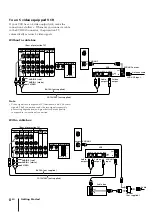
Connecting a DBS
®
receiver
10
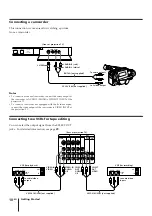
Connecting a camcorder
10
Connecting two VCRs for tape editing
11
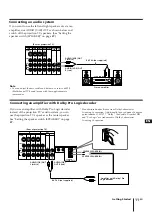
Connecting an audio system
11
Connecting an amplifier with Dolby Pro Logic
decoder
12
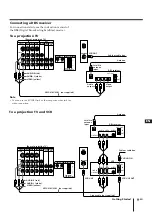
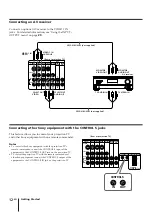
Connecting an AV receiver
12
Connecting other Sony equipment with the
CONTROL S jacks
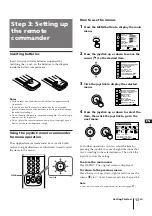
13 Step 3: Setting up the remote commander
13
Inserting batteries
13
Using the joystick remote commander for menu
operation
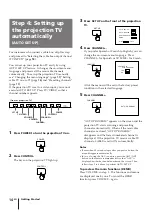
14 Step 4: Setting up the projection TV automatically
(AUTO SET UP)
15
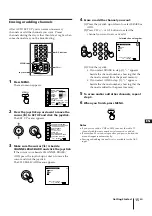
Erasing or adding channels
16
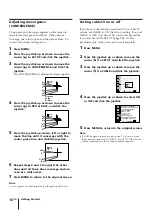
Adjusting convergence (CONVERGENCE)
16
Setting cable TV on or off
17
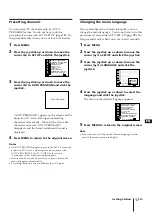
Presetting channels
17
Changing the menu language
18 Selecting the cable box output channel (TV INPUT)
Operations
19 Watching the TV
19
Switching quickly between two channels
20
Muting the sound
20
Displaying on-screen information
20
Freezing the picture
20
Setting the Sleep Timer
21
Watching a video input picture
21
Changing the VHF/UHF input to the AUX input
EN


