1-5
MVC-FD100/FD100H/FD200/FD200H
BBBB
Recor
ding
19
For the number of images you can record on a floppy disk or a
“Memory Stick”
See page 58.
Notes
•
When recording bright subjects, the color of the LCD screen may change after the
AE/AF is locked. However, this will not affect the recorded image.
•
While the image is being recorded on a floppy disk or a “Memory Stick,” the access
lamp lights. When this lamp is lit, do not shake or strike the camera. Also, do not
turn the power off, not change the position of the MS/FD selector, or not remove
the battery pack/floppy disk/“Memory Stick.” Otherwise, an image data breakdown
may occur and the floppy disk or the “Memory Stick” may become unusable.
•
When you press the shutter button fully down at once, the camera starts recording
after the automatic adjustment is complete. However, the recording cannot be
carried out if the flash is required for the recording and the
lamp (page 8) is
flashing.
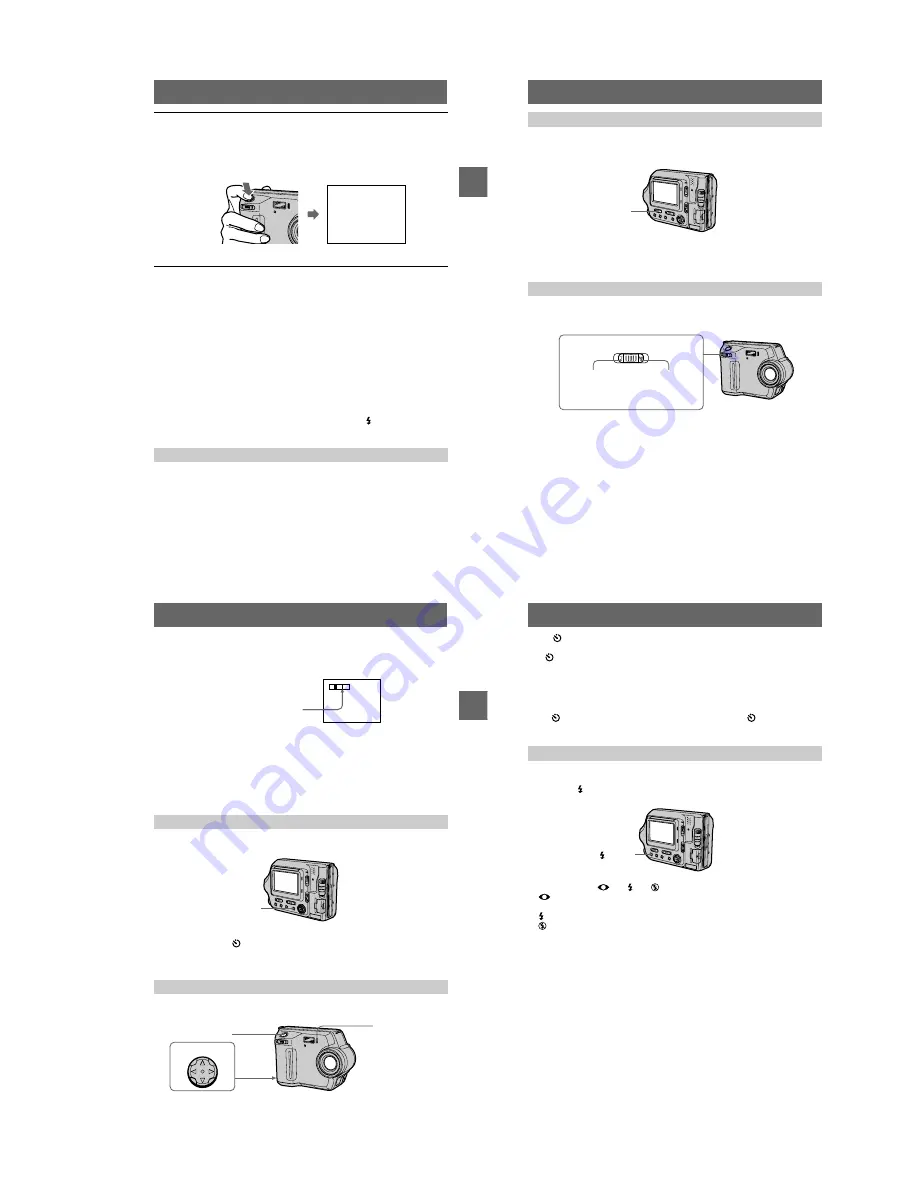
You can check the last recorded image by clearing the menu bar from the screen
(page 49) and pressing
b
on the control button.
To return to the normal recording mode
Press the shutter button lightly, or select [RETURN] with
b
/
B
on the control button
and then press the center
z
.
To delete the image
1
Select [DELETE] in the Quick Review screen using
b
/
B
on the control button
and press the center
z
.
2
Select [OK] using
v
/
V
on the control button and press the center
z
.
4
Press the shutter button fully down.
The shutter clicks. “RECORDING” appears on the
LCD
screen, and the image
will be recorded on the floppy disk or the “Memory Stick.” When
“RECORDING” disappears from the LCD screen, you can start the next
recording.
Checking the last recorded image (Quick Review)
RECORDING
RECORDING
20
Adjust the brightness with the [LCD BRIGHT] item in the menu settings (page 56).
This adjustment does not affect the brightness of the images recorded on the floppy disk
or the “Memory Stick.”
To turn off the LCD backlight
Set the LCD BACKLIGHT switch to OFF to save the battery.
If you cannot get a sharp focus on a close subject
Slide the zoom lever to the W side and move closer to the subject until the focus is
sharp (page 64).
Minimum focal distance to the subject
W side: About 25 cm (9 7/8 inches)
T side: About 80 cm (31 1/2 inches)
To record even closer subjects, see page 64.
Adjusting the brightness of the LCD screen
Using the zoom feature
LCD BACKLIGHT switch
W side: for wide-
angle (subject
appears farther
away)
T side: for
telephoto
(subject
appears closer)
Zoom lever
BBBB
Recor
ding
21
Digital zoom function
This camera has a digital zoom function.
Digital zoom enlarges the image by digital processing, and it starts to function when
the zoom exceeds 3
×
.
Using digital zoom
•
The maximum zoom magnification is 6
×
.
•
Digital zooming deteriorates the picture quality. When digital zoom is not
necessary, set [DIGITAL ZOOM] to [OFF] in the menu settings (page 54).
Note
Digital zoom does not work for moving images.
Press DISPLAY to turn on/off the indicators on the LCD screen. See page 97 for a
detailed description of the indicators.
Notes
•
You cannot turn off the
(self-timer) indicator and some of the indicators used in advanced
operations.
•
The indicators on the LCD screen are not recorded.
When you use the self-timer function, the subject is recorded approximately 10
seconds after you press the shutter button.
The indicators on the LCD screen during recording
Using the self-timer
T
W
The T-side of the bar shows the
digital zooming zone.
DISPLAY
Control button
Self-timer lamp
Shutter button
22
Select
on the LCD screen using
b
/
B
/
v
/
V
on the control button and press the
center
z
.
The
(self-timer) indicator appears on the LCD screen, and the subject is recorded
approximately 10 seconds after you press the shutter button. The self-timer lamp
flashes until the subject is recorded.
To cancel the self-timer
To cancel the self-timer, press
v
on the control button to display the menu bar and
select
and press the center
z
on the control button to clear
on the LCD
screen.
The initial setting is AUTO (no indication). In this mode, the flash is automatically
activated when the surroundings are dark. To change the flash mode to other than
AUTO, press
(Flash) several times until the desired flash mode indicator appears
on the LCD screen.
Each time you press the button, the indicator changes as follows.
(No indication)
t
t
t
t
(No indication)
Auto red-eye reduction : The flash strobes before recording to reduce the red-
eye phenomenon.
Forced flash : The flash strobes regardless of the surrounding brightness.
No flash : The flash does not strobe.
You can change the amount of the flash light with [FLASH LEVEL] in the menu
settings (page 54).
Notes
•
The recommended shooting distance of the built-in flash is 0.5 to 2.0 m (1 2/3 to 6 2/3 feet)
when [ISO] in the menu is [AUTO].
•
Attaching a conversion lens (optional) may block the light from the flash and the shadow of the
lens may be recorded.
•
Auto red-eye reduction may not produce the desired red-eye reduction effects depending on
individual differences, the distance to the subject, if the subject does not see the pre-strobe, or
other conditions.
•
The flash effect is not obtained easily when you use forced flash in a bright location.
Recording images with the flash
(Flash)


