background image

19

EN

Playing Discs

Notes

• Resume Play may not be available depending on the DVD.
• Resume Play is not available in Shuffle or Program Play mode.
• Depending on where you stopped the disc, the player may

resume playback from a different point.

• The point where you stopped playing is cleared when:

– you open or close the disc tray
– you disconnect the AC power cord
– you change the play mode
– you start playback after selecting a title, chapter or track
– you change the settings of “TV TYPE” in ”SCREEN SETUP”

in the setup display

– you change the settings of “PARENTAL CONTROL” in

”CUSTOM SETUP” in the setup display

TITLE

?

/

>

/

.

/

/

ENTER

DVD MENU

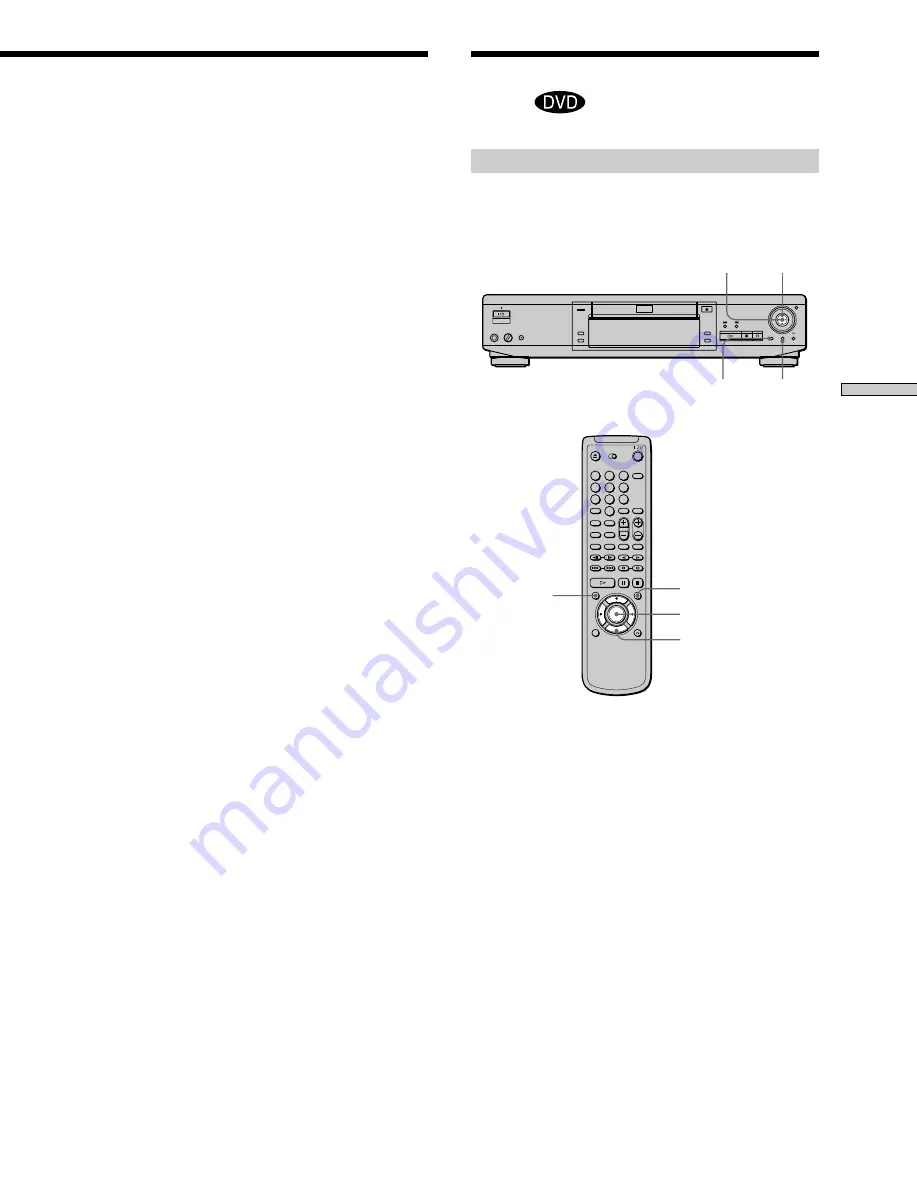
Using the title menu

A DVD is divided into long sections of a picture or a
music piece called “titles.”  When you play a DVD which
contains several titles, you can select the title you want
using the title menu.

1

Press TITLE.

The title menu appears on the TV screen.  The contents
of the menu vary from disc to disc.

2

Press 

?

/

>

/

.

/

/

 to select the title you want to

play.

Depending on the disc, you can use the number
buttons to select the title.

3

Press ENTER.

The player starts playing the selected title.

Notes

• Depending on the DVD, you may not be able to select the title.
• Depending on the DVD, a “title menu” may simply be called a

“menu” or “title” in the instructions supplied with the disc.
“Press ENTER.” may also be expressed as “Press SELECT.”

Using the Menu for Each
DVD 

TITLE

?

/

>

/

.

/

/

ENTER

DVD MENU

1

4

7

2

5

8

0

3

6

9

Summary of Contents for DVP S530D

Page 1: ...3 865 642 31 1 CD DVD Player 1999 by Sony Corporation DVP S530D 1 4 7 2 5 8 0 3 6 9 Operating Instructions Manual de instrucciones EN ES PT ...

Page 2: ...elf has been turned off Unplug the unit from the wall outlet if you do not intend to use it for an extended period of time To disconnect the cord pull it out by the plug never by the cord Installing Allow adequate air circulation to prevent internal heat buildup Do not place the unit on surfaces rugs blankets etc or near materials curtains draperies that may block the ventilation slots Do not inst...

Page 3: ... Time and Remaining Time 27 Selecting a Start Point Using the Time Code 27 Checking the Information of the Disc 28 Changing the Sounds 29 Displaying the Subtitles 30 Changing the Angles 31 Setting for Digital Cinema Sound 32 Creating Your Own Program Program Play 34 Playing in Random Order Shuffle Play 36 Playing Repeatedly Repeat Play 37 Repeating a Specific Portion A B Repeat 37 Checking the Pla...

Page 4: ...layer plays DVDs and VIDEO CDs according to the disc contents the software producers designed some playback features may not be available Also refer to the instructions supplied with the DVDs or VIDEO CDs About This Manual Conventions Instructions in this manual describe the controls on the player You can also use the controls on the remote if they have the same or similar names as those on the pl...

Page 5: ... 0 discs When playing DTS encoded CDs excessive noise will be heard from the analog stereo outputs To avoid possible damage to the audio system the consumer should take proper precautions when the analog stereo outputs of the DVD player are connected to an amplification system To enjoy DTS Digital Surround playback an external 5 1 channel DTS Digital Surround decoder system must be connected to th...

Page 6: ...oisture evaporates On adjusting volume Do not turn up the volume while listening to a portion with very low level inputs or no audio signals If you do the speakers may be damaged when a peak level portion is played On cleaning Clean the cabinet panel and controls with a soft cloth slightly moistened with a mild detergent solution Do not use any type of abrasive pad scouring powder or solvent such ...

Page 7: ... reproductor con el control remoto suministrado Inserte dos pilas R6 tamaño AA de forma que coincidan las polaridades y de las mismas Cuando emplee el control remoto oriéntelo hacia el sensor de control remoto g del reproductor z Es posible controlar televisores y receptores de AV con el control remoto suministrado Consulte la página 53 Notas No deje el control remoto en lugares extremadamente cál...

Page 8: ...o izquierda a blanco Realice las conexiones firmemente para evitar zumbido y ruido Si el TV cuenta con conector de entrada de video S conecte el componente a través del conector S VIDEO OUT con el cable de video S Obtendrá una mejor imagen Consulte las instrucciones suministradas con el TV que desee conectar DOLBY DIGITAL AC 3 PCM DTS DIGITAL OUT OPTICAL COAXIAL 5 1CH OUTPUT WOOFER FRONT REAR CENT...

Page 9: ...ste caso ajuste el elemento ATENUACION DE AUDIO de AJUSTE AUDIO en SI en la pantalla de ajustes Para obtener más información consulte la página 49 Ajustes para el reproductor Es necesario realizar algunos ajustes en el reproductor según el TV u otros componentes que vayan a conectarse Utilice la pantalla de ajustes para cambiar los distintos ajustes Para obtener más información sobre el uso de la ...

Page 10: ...los altavoces frontales Puede utilizar imágenes acústicas 3D para crear altavoces posteriores virtuales a partir del sonido de los altavoces frontales izquierdo derecho sin emplear altavoces posteriores reales VES Virtual Enhanced Surround Para más información consulte la página 32 Cables necesarios Cable de conexión de audio no suministrado 1 Cable de video S suministrado 1 Cuando conecte los cab...

Page 11: ...DIO y a continuación asigne el valor D PCM a DOLBY DIGITAL y NO a DTS en la pantalla de ajustes página 49 Éstos son los ajustes de fábrica Si cuenta con un componente digital por ejemplo un receptor amplificador con conector digital DAT o MD Conecte el componente a través del conector DIGITAL OUT OPTICAL o COAXIAL utilizando un cable de conexión digital óptico o coaxial no suministrado Al reproduc...

Page 12: ...mas 5 1CH OUTPUT CENTER y WOOFER Cable de video S suministrado Uno para las tomas S VIDEO OUT Blanco izquierdo Rojo derecho Rojo derecho Blanco izquierdo Negro Negro Conexiones para el sonido envolvente de 5 1 canales Notas No conecte el cable de alimentación de CA a una toma de corriente ni presione el interruptor 1 u POWER antes de finalizar todas las conexiones Los conectores de cable deben ins...

Page 13: ...DEO IN S VIDEO OUT WOOFER 5 1CH OUTPUT CENTER R R AUDIO 2 L VIDEO 2 REAR R L R L R L CENTER S VIDEO IN VIDEO S VIDEO OUT VIDEO S VIDEO OUT VIDEO S VIDEO IN VIDEO S VIDEO OUT VIDEO S VIDEO IN VIDEO IN L R REC OUT AUDIO IN L R L R AUDIO OUT AUDIO IN AUDIO OUT AUDIO IN FRONT REAR WOOFER CENTER TAPE VIDEO 2 DVD VIDEO 1 MONITOR PRE OUT IN CD IN REC OUT MD DAT IN TUNER IN PHONO DVD IN OPT DVD IN COAX TV...

Page 14: ...l proceso utilizando la pantalla de ajustes Presione SET UP Nota Los idiomas que pueden seleccionarse son los que se muestran en el paso 2 Para obtener más información consulte la página 44 1 4 7 2 5 8 0 3 6 9 AJUSTE DE IDIOMA MENU PANTALLA MENU DVD AUDIO SUBTITULO Para ajustar oprima y después Para sajir oprima ESPAÑOL ESPAÑOL ORIGINAL SEGUIR EL AUDIO ENTER SETUP AJUSTE DE IDIOMA MENU PANTALLA ME...

Page 15: ...anges to green and the front panel display lights up 3 Press and place the disc on the disc tray 4 Press The disc tray closes and the player starts playback continuous play Adjust the volume on the TV or the receiver amplifier After following Step 4 pWhen playing a DVD A DVD menu or title menu may appear on the TV screen see page 19 pWhen playing a VIDEO CD The menu screen may appear on the TV scr...

Page 16: ... is turned off p P Playing Discs 6 p P 1 u POWER 1 u POWER 7 3 1 4 7 2 5 8 0 3 6 9 Operation Press p Press P Press P or Press or 7 Press or Press Press Press 3 or When you find the point you want press to return to the normal speed Press 6 To Stop Pause Resume play after pause Play frame by frame Play in slow motion Go to the next chapter track or scene in continuous play mode Go back to the prece...

Page 17: ...SLOW1 opposite direction 2 about twice the normal speed FR10 about 10 times the normal speed FR20 about 30 times the normal speed If you turn the click shuttle quickly the playback speed goes to FF2 FR20 at once When you play back a CD VIDEO CD FF2 Faster than FF1 FF1 2 about twice the normal speed PLAY Normal speed SLOW1 playback direction SLOW2 playback direction slower than SLOW1 PAUSEP FR10 FR...

Page 18: ... where you stopped the disc in Step 1 z To play from the beginning of the disc When the playing time appears on the front panel display before you start playing press p to reset the playing time then press p Playing at Various Speeds Frame by Frame p To play the disc frame by frame changing the playback speed Jog mode 1 Press JOG JOG lights up during jog mode When you press JOG the player pauses 2...

Page 19: ...NTER DVD MENU Using the title menu A DVD is divided into long sections of a picture or a music piece called titles When you play a DVD which contains several titles you can select the title you want using the title menu 1 Press TITLE The title menu appears on the TV screen The contents of the menu vary from disc to disc 2 Press to select the title you want to play Depending on the disc you can use...

Page 20: ...teractive operations Refer to the instructions supplied with the disc as the operating procedure may differ according to the VIDEO CD ˆRETURN ENTER Number buttons ˆRETURN ENTER Using the DVD menu Some DVDs allow you to select the disc contents using the menu When you play these DVDs you can select the language for the subtitles the language for the sound etc using the DVD menu 1 Press DVD MENU The...

Page 21: ...layback starts automatically zTo cancel PBC playback of a VIDEO CD with PBC functions and play the disc in Continuous Play mode There are two ways Before you start playing select the track you want using or then press ENTER or Before you start playing select the track number using the number buttons on the remote then press ENTER or Play without PBC appears on the TV screen and the player starts C...

Page 22: ... TEXT Press TIME TEXT Press TIME TEXT Press TIME TEXT Text Press TIME TEXT Text Press TIME TEXT SEC MIN HOUR 1 2 3 4 5 6 7 8 9 10 11 12 13 14 15 1 2 3 4 5 6 7 8 9 10 11 12 13 14 15 1 2 3 4 5 6 7 8 9 10 11 12 13 14 15 1 2 3 4 5 6 7 8 9 10 11 12 13 14 15 1 2 3 4 5 6 7 8 9 10 11 12 13 14 15 CD VIDEOCD Digital DISC NTSC TRACK INDEX MPEG DTS PBC REPEAT 1 PGM A B SHUFFLE ANGLE NTSC CD VIDEOCD Digital DI...

Page 23: ...R Using the Control Menu Display Z Using the Control Menu display you can select the start point play in a order you like change the angles set for Digital Cinema Sound etc The items are different depending on the kind of disc For details on each Control Menu display item see pages 26 to 40 1 Press DISPLAY to show the Control Menu display on the TV screen 1 8 3 4 1 2 2 7 C 0 1 3 2 5 5 DVD PLAY To ...

Page 24: ...isplay ADVANCED display See page 39 Control Menu display off zYou can display some items using the remote Some items can be displayed by pressing the button of the remote In this case only the item you selected is displayed For the item and operations using the remote see the pages of each item Items Items Current item selected To select press then ENTER To select press then ENTER 1 8 3 4 1 2 2 7 ...

Page 25: ...g time of the disc You can search by inputting the time code You can check the DVD TEXT or CD TEXT of the disc on the TV screen and the front panel display AUDIO page 29 With DVDs recorded with multilingual sounds you can select the language you want while playing the DVD With multiplex CDs or VIDEO CDs you can select the sound from the right or left channel and listen to the sound of the selected...

Page 26: ...of VIDEO CDs You can search by selecting the title chapter track index scene Select TITLE CHAPTER TRACK INDEX or SCENE after pressing DISPLAY When you play back a DVD TITLE and CHAPTER are displayed When you play back a VIDEO CD CD TRACK and INDEX are displayed When you play back a VIDEO CD with PBC functions SCENE is displayed 1 Select TITLE CHAPTER TRACK or INDEX using is highlighted means optio...

Page 27: ...Remaining time of the current track D Playing time of the current disc D Remaining time of the current disc zYou can display TIME TEXT display using the remote Press TIME TEXT on the remote Each time you press the button the time information changes Selecting a Start Point Using the Time Code Z You can search by inputting the time code Select TIME TEXT after pressing DISPLAY The time code correspo...

Page 28: ...formation of the Disc Z You can check the DVD TEXT or CD TEXT of the disc on the TV screen and the front panel display DVD TEXT and CD TEXT are information recorded on the disc which you cannot change Select TIME TEXT after pressing DISPLAY Then press TIME TEXT on the remote until DVD CD TEXT is displayed The information is displayed at the bottom of the display zYou can display TIME TEXT display ...

Page 29: ...e right channel may output the vocals and the left channel may output the instrumental If you only want to hear the instrumental you can select the left channel and hear it from both speakers Select AUDIO after pressing DISPLAY pAUDIO When playing a DVD Select the language The languages you can select are different depending on the DVD When 4 digits are displayed they represent the language code S...

Page 30: ...isplay by using the remote Press SUBTITLE on the remote Each time you press the button the item changes Notes When playing a DVD on which no subtitles are recorded no subtitles appear Depending on the DVD you may not be able to turn the subtitles on even if they are recorded on it Depending on the DVD you may not be able to turn the subtitles off If the language is displayed as a 4 digit number re...

Page 31: ...g the remote Press ANGLE on the remote Each time you press the button the angle changes With DVDs on which various angles multi angles for a scene are recorded you can change the angles For example while playing a scene of a train in motion you can display the view from either the front of the train the left window of the train or from the right window without having the train s movement interrupt...

Page 32: ...ack a DVD you can select only OFF VES A or VES B when REAR in SIZE is set to NONE in the SPEAKER SETUP display Effects of each item OFF Outputs all channel signals recorded on the disc For example outputs 2 channel signals for stereo sound of the CD or 5 channel signals for Dolby Digital sound of the DVD When you connect fewer than 5 1 speakers the player distributes the output signal for the miss...

Page 33: ...angle including the listening position or the effects may be difficult to hear even if you select VES A or VES B When you select VES A or VES B the player outputs the audio signal from LINE OUT DIGITAL OUT OPTICAL COAXIAL or 5 1CH OUTPUT FRONT connectors In case of the signal from DIGITAL OUT OPTICAL COAXIAL however the surround effect will be heard only when you play DVD or VIDEO CD with DOLBY DI...

Page 34: ...elect In this case the selected number is displayed on the screen pWhen playing a DVD When both titles and chapters are recorded on the disc select the title then the chapter Title Chapter Creating Your Own Program Program Play Z TRACK is displayed when you play a VIDEO CD or a CD To select press then ENTER OFF OFF SET ON 1 8 3 4 1 2 2 7 C 0 1 3 2 5 5 DVD PLAY PROGRAM PROGRAM 1 TITLE ALL CLEAR 2 T...

Page 35: ... chapters or tracks During Program Play press REPEAT or SHUFFLE Or set REPEAT or SHUFFLE to ON in the Control Menu display zYou can display PROGRAM display using the remote Press PROGRAM Notes The number of titles chapters or tracks displayed are that of the titles chapters or tracks recorded on a disc The program is canceled when you open or close the disc tray you turn the power off You may not ...

Page 36: ... OFF does not play a disc in random order ON has the player shuffle titles or tracks and play in a random order When playing a VIDEO CD or CD when Program Play is set to OFF OFF does not play a disc in random order TRACK has the player shuffle tracks and play in a random order After selecting the item of SHUFFLE press The player starts Shuffle Play To cancel Shuffle Play Press CLEAR Playing in Ran...

Page 37: ...l the tracks on a disc TRACK repeats the current track When Program Play or Shuffle Play is set to ON OFF does not play repeatedly ON repeats Program Play or Shuffle Play To cancel Repeat Play Press CLEAR zYou can display the REPEAT display by pressing the button Press REPEAT Note Repeat play is canceled when you turn the power off Repeating a Specific Portion A B Repeat Z You can play a specific ...

Page 38: ... when you open or close the disc tray you turn the power off When you set A B Repeat the settings for Shuffle Play and Program Play are canceled You may not be able to set A B Repeat depending on the scene of the DVD or the VIDEO CD Repeating a Specific Portion A B Repeat 1 8 3 4 1 2 2 7 C 0 1 34 30 DVD A 18 01 32 55 B 18 01 34 30 CHAPTER TIME PLAY To select press then ENTER ON Setting a portion f...

Page 39: ...r and the point picked up OFF turns off ADVANCED display Checking the Play Information Z Displays of each item BIT RATE Bit rate refers to the amount of video audio data per second in a disc The higher the bit rate is the larger the amount of data When the bit rate level is high there is a large amount of data However this does not always mean that you can get higher quality pictures or sounds BIT...

Page 40: ...us Functions with the Control Menu LAYER Indicates where the disc is played When the DVD has dual layer the player indicates which layer is being read For details on layer see page 60 DVD Checking the Play Information ...

Page 41: ... Using the setup display you can do the initial setup adjusting the picture and sound quality setting the various outputs etc You can also set a language for the subtitles and the setup display limit playback by children etc For details on each setup display item see pages 44 to 52 Note You can display the setup display only when the player is in stop mode 1 Press SET UP to display the setup displ...

Page 42: ...o quit press ENGLISH SPANISH ORIGINAL AUDIO FOLLOW ENTER SETUP SCREEN SETUP TV TYPE SCREEN SAVER BACKGROUND To set press then To quit press 4 3 LETTER BOX ON JACKET PICTURE ENTER SETUP SCREEN SETUP TV TYPE SCREEN SAVER BACKGROUND To set press then To quit press 4 3 LETTER BOX ON JACKET PICTURE ENTER SETUP SCREEN SETUP TV TYPE SCREEN SAVER BACKGROUND To set press then To quit press 4 3 LETTER BOX 4...

Page 43: ...WIDE RANGE DOLBY DIGITAL DTS TRACK SELECTION OFF AUTO DOWNMIX DOLBY SURROUND NORMAL DIGITAL OUT ON OFF SCREEN SETUP page 45 TV TYPE 4 3 LETTER BOX 4 3 PAN SCAN 16 9 4 3 WIDE MODE BACKGROUND JACKET PICTURE GRAPHICS BLUE BLACK SCREEN SAVER ON OFF AUDIO SETUP page 49 SIZE FRONT CENTER DISTANCE FRONT CENTER REAR TEST TONE OFF ON REAR SUBWOOFER BALANCE FRONT REAR LEVEL CENTER REAR SUBWOOFER SPEAKER SET...

Page 44: ...or the subtitles changes according to the language for the setting you selected in AUDIO Select LANGUAGE SETUP after pressing SET UP LANGUAGE SETUP allows you to set various languages for on screen display or sound Default settings are underlined Note When you select a language that is not recorded on the DVD one of the recorded languages is automatically selected except for the OSD pOSD On Screen...

Page 45: ...ay SCREEN SETUP Z 4 3 WIDE MODE pSCREEN SAVER Turns on and off the screen saver If you turn on the screen saver the screen saver image appears when you leave the player or the remote in pause or stop mode for 15 minutes or when you play back a CD for more than 15 minutes The screen saver is useful to prevent your display from becoming damaged ON turns on the screen saver OFF turns off the screen s...

Page 46: ... the demonstration 2 automatically pDIMMER Adjusts the lighting of the front panel display BRIGHT makes the front panel display bright DARK makes the front panel display dark OFF turns off the lighting of the front panel display pPAUSE MODE Selects the picture in pause mode AUTO A picture including subjects that move dynamically is output with no jitter Normally select this position FRAME A pictur...

Page 47: ...you want using then press ENTER The lower the value is the more strict the limitation CUSTOM SETUP PARENTAL CONTROL Enter password then press To return press To cancel press RETURN SETUP ENTER CUSTOM SETUP PARENTAL CONTROL LEVEL OFF STANDARD CHANGE PASSWORD USA To set press then To cancel press ENTER SETUP CUSTOM SETUP PARENTAL CONTROL LEVEL OFF STANDARD CHANGE PASSWORD USA To set press then To ca...

Page 48: ...w password zYou can turn off the Parental Control function just after inserting the DVD Parental Control Temporarily Canceled When you set a playback limitation level and insert the DVD the PARENTAL CONTROL display appears Enter the password to turn off the Parental Control function When you stop playing the DVD the level returns to the original level zIf you have forgot your password Enter the 6 ...

Page 49: ... given AUTO Priority given Notes When you set this item to AUTO the language may change depending on the AUDIO settings in LANGUAGE SETUP The TRACK SELECTION setting has higher priority than that of AUDIO settings in LANGUAGE SETUP page 44 If you set DTS in AUDIO SETUP to OFF the DTS sound track is not played even if you set this item to AUTO and the highest numbered channel audio is recorded in D...

Page 50: ...ilt in DTS decoder ON when the player is connected to an audio component having a built in DTS decoder Note Select the setting correctly Otherwise no sound or strange sound will come out from the speakers affecting your ears or causing the speakers to be damaged Do not play the DTS sound tracks without connecting the player to an audio component having a built in DTS decoder You cannot hear the DT...

Page 51: ...e effects of the surround is difficult to hear select this This activates the Dolby Digital bass redirection circuitry and outputs the bass frequencies of the speaker from some other speakers SUBWOOFER NONE If you do not connect a subwoofer select this This activates the Dolby Digital bass redirection circuitry and outputs the LFE signals from the front speakers YES If you connect a subwoofer sele...

Page 52: ...ault adjustments are in the parentheses FRONT 0dB Adjust the balance between the front left and right speakers 6dB to 6dB 0 5dB steps REAR 0dB Adjust the balance between the rear left and right speakers 6dB to 6dB 0 5dB steps Note When you select VES A or VES B in VES in the Control Menu display you cannot adjust the level or the balance of the speakers except for the front speakers pLEVEL You can...

Page 53: ...entering them one at a time until you find the one that works with your TV Notes If you enter a new code number the code number previously entered will be erased When you replace the batteries of the remote commander the code number automatically resets to 01 Sony Reset the appropriate code number Code number 01 04 04 12 03 12 12 03 04 14 11 06 10 03 04 17 02 03 04 12 09 03 03 08 12 04 13 04 12 13...

Page 54: ...hat works with your receiver amplifer You can also change the sound volume of the AV receiver amplifier using VOL Note Depending on the AV receiver amplifier you may not be able to control your AV receiver amplifier VOL Controlling the TV or the AV Receiver Amplifier with the Supplied Remote When you set the TV DVD RECEIVER switch to TV you can control your TV using the keys below By pressing 1 u ...

Page 55: ...s from the player The picture noise appears Clean the disc If video from your DVD player has to go through your VCR to get to your TV the copy protection applied to some DVD programs could affect picture quality If you still experience problems after checking your connections please try connecting your DVD player directly to your TV s S input if your TV is equipped with this input page 8 The aspec...

Page 56: ...player appropriately page 8 10 12 Troubleshooting The surround effect is difficult to hear when you are playing a Dolby Digital sound track Check the speaker connections and settings page 12 51 Refer to the operating manual of your receiver amplifier Depending on the DVD the output signal may not be the entire 5 1 channel but monaural or stereo even if the sound track is recorded in Dolby Digital ...

Page 57: ...ed on the DVD The language for the subtitles cannot be changed when you play a DVD Multilingual subtitles are not recorded on the DVD Changing the language for the subtitles is prohibited on the DVD The subtitles cannot be turned off when you play a DVD Depending on the DVD you may not be able to turn the subtitles off The angles cannot be changed when you play a DVD Multi angles are not recorded ...

Page 58: ...he following table First three characters C13 C31 Exx xx is any number Cause and or Corrective Action The disc is dirty Clean the disc with a cleaning cloth page 6 The disc is not inserted correctly Open the disc tray and insert the disc correctly To prevent the player from malfunctioning the self diagnosis function has worked When you contact your Sony dealer or local authorized Sony service faci...

Page 59: ...17 3 3 4 12 in w h d incl projecting parts Mass approx 3 4 kg 7 lb 8 oz Operating temperature 41 F to 95 F 5 C to 35 C Operating humidity 5 to 90 Supplied accessories See page 7 The signals from LINE OUT AUDIO 1 2 connectors and 5 1 ch L R connectors are measured When you play the PCM sound tracks with 96 kHz sampling frequency the output signals from the DIGITAL OUT OPTICAL COAXIAL are converted ...

Page 60: ...e subwoofer channel in this format DTS provides the same 5 1 discrete channels of high quality digital audio found in DTS audio systems The good channel separation is realized because the all channel data is recorded discrete and processed in digital DVD page 4 A disc that contains up to 8 hours of moving pictures even though its diameter is the same as a CD The data capacity of a single layer and...

Page 61: ...ta is compressed to about 1 140 of its original size Consequently a 12 cm VIDEO CD can contain up to 74 minutes of moving pictures VIDEO CDs also contain compact audio data Sounds outside the range of human hearing are compressed while the sounds we can hear are not compressed VIDEO CDs can hold 6 times the audio information of conventional audio CDs There are 2 versions of VIDEO CDs Version 1 1 Y...

Page 62: ...sh 1150 Estonian 1151 Basque 1157 Persian 1165 Finnish 1166 Fiji 1171 Faroese 1174 French 1181 Frisian 1183 Irish 1186 Scots Gaelic 1194 Galician 1196 Guarani 1203 Gujarati 1209 Hausa 1217 Hindi 1226 Croatian 1229 Hungarian 1233 Armenian 1235 Interlingua 1239 Interlingue 1245 Inupiak 1248 Indonesian 1253 Icelandic 1254 Italian 1257 Hebrew 1261 Japanese 1269 Yiddish 1283 Javanese 1287 Georgian 1297...

Page 63: ...go to the next chapter or track or to go back to the previous chapter or track 9 Click shuttle 17 Changes the playback speed º ENTER button Selects and executes the items or settings JOG button indicator 17 Press to play a disc frame by frame PHONES connector 15 Connect the headphones to this connector PHONE LEVEL control 15 Adjusts the headphone volume PROGRAM button 35 Displays the PROGRAM displ...

Page 64: ...t to the video input connector on the TV or monitor 5 S VIDEO OUT 1 2 connectors 8 10 Connect to the S video input connector on the TV or VCR 6 COMPONENT VIDEO OUT connectors 9 Connect to a monitor or projector having component video input connectors Y PB B Y PR R Y that conform to output signals from the player 7 5 1CH OUTPUT connectors 13 Connect to a receiver amplifier having 5 1 channel input ...

Page 65: ... PLAY button 15 Plays a disc TITLE button 19 Displays the title menu on the TV screen ENTER button Selects and executes the items or settings DISPLAY button 23 Displays the Control Menu display on the TV screen to set or adjust the items 1 u POWER button 15 Turns on and off the power of the player and TV SET UP button 41 Displays the setup display on the TV screen to set or adjust the items ª ENTE...

Page 66: ... Front panel display 21 H I J K Handling discs 6 Hi speed search 17 Hooking up 8 10 12 INDEX 26 L M N LANGUAGE SETUP 44 LETTER BOX 45 LEVEL 52 Locating a specific point 16 by observing the TV screen 17 O On screen display Control Menu display 23 Setup display 41 OSD 44 P Q PAN SCAN 45 PARENTAL CONTROL 46 PBC functions 20 PBC Playback 20 60 PRO LOGIC 32 49 PROGRAM 34 Program Play 34 R Remote 7 53 R...

Page 67: ...67EN Additional Information ...

Page 68: ... los discos alejados de equipos con imanes potentes como hornos microondas o altavoces grandes No coloque objetos pesados sobre la unidad Si traslada la unidad directamente de un lugar frío a otro cálido es posible que se condense humedad en el interior del reproductor de CD DVD y se dañen las lentes Al instalar la unidad por primera vez o si la traslada de un lugar frío a otro cálido espere una h...

Page 69: ...de reproducción y tiempo restante 27 Selección de un punto inicial mediante el código de tiempo 27 Comprobación de la información sobre el disco 28 Cambio del sonido 29 Visualización de los subtítulos 30 Cambio de los ángulos 31 Ajuste para Digital Cinema Sound 32 ES Creación de un programa propio reproducción de programa 34 Reproducción en orden aleatorio reproducción aleatoria 36 Reproducción re...

Page 70: ...tware Puesto que este reproductor reproduce discos DVD y VIDEO CD en función del contenido del disco diseñado por los productores de software es posible que no pueda disponerse de determinadas funciones de reproducción Consulte también las instrucciones suministradas con los discos DVD o VIDEO CD Icono Significado Indica que sólo es posible utilizar el control remoto para realizar la tarea Indica ...

Page 71: ...l reproductor no puede reproducir los discos que no aparezcan enumerados en la tabla de la página 4 No es posible reproducir CD R CD ROMs que incluyen PHOTO CDs secciones de datos de CD EXTRAs ni DVD ROMs etc Es posible Realizar reproducciones de video imágenes en movimiento y de música Reproducir software interactivo utilizando pantallas de menú mostradas en la pantalla del TV reproducción PBC ad...

Page 72: ...nteunamediahorahastaquelahumedadse evapor e Ajuste del volumen Noaumenteelvolumenmientrasescuchaunapartecon entradasdenivelmuybajoosinseñalesdeaudio Silo hace losaltavocespuedendañarsealr epr oducirse algunapartedeniveldepico Limpieza Limpieelexterior elpanelyloscontr olesconunpaño suaveligeramentehumedecidoconunasolución deter gentepococoncentrada Noutiliceningúntipode estr opajoabrasivo deter ge...

Page 73: ... reproductor con el control remoto suministrado Inserte dos pilas R6 tamaño AA de forma que coincidan las polaridades y de las mismas Cuando emplee el control remoto oriéntelo hacia el sensor de control remoto g del reproductor z Es posible controlar televisores y receptores de AV con el control remoto suministrado Consulte la página 53 Notas No deje el control remoto en lugares extremadamente cál...

Page 74: ...o izquierda a blanco Realice las conexiones firmemente para evitar zumbido y ruido Si el TV cuenta con conector de entrada de video S conecte el componente a través del conector S VIDEO OUT con el cable de video S Obtendrá una mejor imagen Consulte las instrucciones suministradas con el TV que desee conectar DOLBY DIGITAL AC 3 PCM DTS DIGITAL OUT OPTICAL COAXIAL 5 1CH OUTPUT WOOFER FRONT REAR CENT...

Page 75: ...ste caso ajuste el elemento ATENUACION DE AUDIO de AJUSTE AUDIO en SI en la pantalla de ajustes Para obtener más información consulte la página 49 Ajustes para el reproductor Es necesario realizar algunos ajustes en el reproductor según el TV u otros componentes que vayan a conectarse Utilice la pantalla de ajustes para cambiar los distintos ajustes Para obtener más información sobre el uso de la ...

Page 76: ...los altavoces frontales Puede utilizar imágenes acústicas 3D para crear altavoces posteriores virtuales a partir del sonido de los altavoces frontales izquierdo derecho sin emplear altavoces posteriores reales VES Virtual Enhanced Surround Para más información consulte la página 32 Cables necesarios Cable de conexión de audio no suministrado 1 Cable de video S suministrado 1 Cuando conecte los cab...

Page 77: ...DIO y a continuación asigne el valor D PCM a DOLBY DIGITAL y NO a DTS en la pantalla de ajustes página 49 Éstos son los ajustes de fábrica Si cuenta con un componente digital por ejemplo un receptor amplificador con conector digital DAT o MD Conecte el componente a través del conector DIGITAL OUT OPTICAL o COAXIAL utilizando un cable de conexión digital óptico o coaxial no suministrado Al reproduc...

Page 78: ...mas 5 1CH OUTPUT CENTER y WOOFER Cable de video S suministrado Uno para las tomas S VIDEO OUT Blanco izquierdo Rojo derecho Rojo derecho Blanco izquierdo Negro Negro Conexiones para el sonido envolvente de 5 1 canales Notas No conecte el cable de alimentación de CA a una toma de corriente ni presione el interruptor 1 u POWER antes de finalizar todas las conexiones Los conectores de cable deben ins...

Page 79: ...DEO IN S VIDEO OUT WOOFER 5 1CH OUTPUT CENTER R R AUDIO 2 L VIDEO 2 REAR R L R L R L CENTER S VIDEO IN VIDEO S VIDEO OUT VIDEO S VIDEO OUT VIDEO S VIDEO IN VIDEO S VIDEO OUT VIDEO S VIDEO IN VIDEO IN L R REC OUT AUDIO IN L R L R AUDIO OUT AUDIO IN AUDIO OUT AUDIO IN FRONT REAR WOOFER CENTER TAPE VIDEO 2 DVD VIDEO 1 MONITOR PRE OUT IN CD IN REC OUT MD DAT IN TUNER IN PHONO DVD IN OPT DVD IN COAX TV...

Page 80: ...l proceso utilizando la pantalla de ajustes Presione SET UP Nota Los idiomas que pueden seleccionarse son los que se muestran en el paso 2 Para obtener más información consulte la página 44 1 4 7 2 5 8 0 3 6 9 AJUSTE DE IDIOMA MENU PANTALLA MENU DVD AUDIO SUBTITULO Para ajustar oprima y después Para sajir oprima ESPAÑOL ESPAÑOL ORIGINAL SEGUIR EL AUDIO ENTER SETUP AJUSTE DE IDIOMA MENU PANTALLA ME...

Page 81: ... el visor del panel frontal 3 Presione y coloque el disco en la bandeja de discos 4 Presione La bandeja de discos se cierra y el reproductor inicia la reproducción reproducción continua Ajuste el volumen en el TV o receptor amplificador Una vez realizado el paso 4 pAl reproducir un disco DVD Un menú DVD o de títulos puede aparecer en la pantalla del TV consulte la página 19 pAl reproducir un disco...

Page 82: ...raciones del menú de control consulte la página 23 Reproducción de discos z Es posible encender el reproductor con el control remoto Presione 1 u POWER cuando el indicador situado encima del botón 1 u POWER esté iluminado en color rojo Notas Si deja el reproductor o el control remoto en el modo de pausa o de parada durante 15 minutos aparece automáticamente la imagen de protección de pantalla Para...

Page 83: ...ad normal FR20 aproximadamente 30 veces la velocidad normal Si gira el conmutador lanzadera con rapidez la velocidad de reproducción cambiará inmediatamente a FF2 FR20 Conmutador lanzadera JOG Reproducción a distintas velocidades fotograma por fotograma Al reproducir un disco CD VIDEO CD FF2 más rápido que FF1 FF1 2 aproximadamente dos veces la velocidad normal PLAY velocidad normal SLOW1 sentido ...

Page 84: ...desde el principio Cuando aparezca el tiempo de reproducción en el visor del panel frontal antes de iniciar la reproducción presione p para restaurar el tiempo de reproducción y presione Reanudación de la reproducción desde el punto donde detuvo el disco reanudación de reproducción Para reproducir el disco fotograma por fotograma cambiando la velocidad de reproducción modo de avance 1 Presione JOG...

Page 85: ... DE BLOQUEO dentro de AJUSTE PERSONALIZADO en la pantalla de ajustes Uso del menú de títulos Un disco DVD se divide en largas secciones de imagen o sonido denominadas títulos Al reproducir un disco DVD que contenga varios títulos podrá seleccionar el que desee mediante el menú de títulos 1 Presione TITLE El menú de títulos aparece en la pantalla del TV El contenido del menú puede variar de un disc...

Page 86: ...rucciones suministradas con el disco ya que los procedimientos pueden variar en función del tipo de disco VIDEO CD ˆRETURN ENTER Botones numéricos ˆRETURN ENTER Uso del menú para cada disco DVD Reproducción de discos VIDEO CD con funciones PBC reproducción PBC Uso del menú DVD Ciertos discos DVD permiten seleccionar el contenido del disco mediante el menú Al reproducir dichos discos puede seleccio...

Page 87: ...mática zPara cancelar la reproducción PBC de un disco VIDEO CD con funciones PBC y reproducir el disco en el modo de reproducción continua Existen dos maneras Antes de iniciar la reproducción seleccione la pista que desee mediante o y a continuación presione ENTER o Antes de iniciar la reproducción seleccione el número de pista con los botones numéricos del control remoto y a continuación presione...

Page 88: ...nte del título no aparecen Al reproducir un CD VIDEO CD Información mostrada durante la reproducción del disco Uso del visor del panel frontal Presione TIME TEXT SEC MIN HOUR 1 2 3 4 5 6 7 8 9 10 11 12 13 14 15 1 2 3 4 5 6 7 8 9 10 11 12 13 14 15 1 2 3 4 5 6 7 8 9 10 11 12 13 14 15 1 2 3 4 5 6 7 8 9 10 11 12 13 14 15 1 2 3 4 5 6 7 8 9 10 11 12 13 14 15 CD VIDEOCD Digital DISC NTSC TRACK INDEX MPEG...

Page 89: ...egún el tipo de disco Para obtener más información sobre cada elemento de la pantalla del menú de control consulte las páginas 26 a 40 1 Presione DISPLAY para mostrar la pantalla del menú de control en la pantalla del TV DISPLAY ENTER Uso de distintas funciones con el menú de control En este capítulo se describe cómo reproducir discos en diferentes modos y cómo utilizar las cómodas funciones del m...

Page 90: ...trol cambiará de la siguiente forma Pantalla del menú de control Pantalla ADVANCED Consulte la página 39 Pantalla del menú de control desactivada zEs posible mostrar algunos elementos con el control remoto Algunos elementos pueden mostrarse presionando el botón apropiado del control remoto En este caso sólo aparece el elemento seleccionado Para obtener más información sobre los elementos y operaci...

Page 91: ... ángulos de las escenas que cuenten con diferentes ángulos Lista de elementos del menú de control VES página 32 Seleccione el modo para disfrutar de sonido envolvente multicanal como Dolby Digital Incluso si sólo conecta los altavoces frontales VES Virtual Enhanced Surround le permite disfrutar del sonido 3D utilizando imágenes acústicas 3D para crear altavoces posteriores virtuales a partir del s...

Page 92: ...l título capítulo pista índice escena Z Es posible realizar búsquedas seleccionando el título capítulo pista índice escena Seleccione TITLE CHAPTER TRACK INDEX o SCENE después de presionar DISPLAY Al reproducir un disco DVD aparecen TITLE y CHAPTER Al reproducir un disco VIDEO CD CD aparecen TRACK e INDEX Al reproducir un disco VIDEO CD con funciones PBC aparece SCENE 1 Seleccione TITLE CHAPTER TR...

Page 93: ...ción de la pista actual T Tiempo restante de la pista actual D Tiempo de reproducción del disco actual D Tiempo restante del disco actual zEs posible acceder a la pantalla de TIME TEXT con el control remoto Presione TIME TEXT en el control remoto Cada vez que presione el botón la información de tiempo cambiará Selección de un punto inicial mediante el código de tiempo Z Es posible realizar búsqued...

Page 94: ... en el control remoto Para que aparezca DVD CD TEXT presione TIME TEXT hasta que visualice DVD CD TEXT Nota El texto DVD DVD TEXT sólo aparece en inglés DVD CD TEXT 3 Introduzca el código de tiempo mediante los botones numéricos y presione ENTER El reproductor inicia la búsqueda Para cancelar el número presione CLEAR antes de presionar ENTER Para cancelar la entrada Presione ˆRETURN zEs posible ac...

Page 95: ...estéreo Por ejemplo para un disco que contiene una canción el canal derecho puede emitir el sonido vocal y el izquierdo el instrumental Si sólo quiere escuchar el sonido instrumental puede seleccionar el canal izquierdo y escucharlo a través de ambos altavoces Seleccione AUDIO después de presionar DISPLAY pAUDIO Mientras reproduce un disco DVD Seleccione el idioma Los idiomas que puede seleccionar...

Page 96: ...igo en la lista de la página 62 z Es posible mostrar la pantalla de SUBTITLE con el control remoto Presione SUBTITLE en el control remoto Cada vez que presione el botón el elemento cambiará Notas Al reproducir un disco DVD que no tenga subtítulos registrados no aparecerán subtítulos Con algunos discos DVD es posible que no pueda activar los subtítulos incluso si están registrados En el caso de alg...

Page 97: ...leccionado Notas El número de ángulos varía según el disco o escena El número de ángulos que puede cambiarse en una escena equivale al número de ángulos grabados para esa escena En el caso de algunos discos DVD es posible que no pueda cambiar los ángulos incluso si hay múltiples ángulos grabados en el disco zEs posible especificar el ángulo con anterioridad Especifique el ángulo cuando no se encue...

Page 98: ...éreo en los canales posteriores Seleccione el modo para disfrutar de sonido envolvente multicanal como Dolby Digital Incluso si sólo conecta altavoces frontales Virtual Enhanced Surround le permite disfrutar de un sonido 3D mediante imágenes acústicas 3D para crear altavoces posteriores virtuales a partir del sonido de los altavoces frontales L R sin emplear altavoces posteriores reales Podrá obte...

Page 99: ...átero que incluya la posición de escucha De lo contrario los efectos pueden resultar difíciles de apreciar incluso si selecciona VES A o VES B Si selecciona VES A o VES B el reproductor emite la señal de audio mediante los conectores LINE OUT DIGITAL OUT OPTICAL COAXIAL o 5 1CH OUTPUT FRONT No obstante en el caso de la señal del conector DIGITAL OUT OPTICAL COAXIAL el efecto de sonido envolvente s...

Page 100: ...pítulos y pistas Seleccione PROGRAM después de presionar DISPLAY Al seleccionar SI el indicador de PROGRAM se ilumina en color verde pPROGRAM NO reproducción normal AJUSTAR le permite crear su propio programa SI realiza la reproducción de programa Creación del programa 1 Seleccione AJUSTAR dentro de PROGRAM Aparece la pantalla de programación Título Capítulo Aparece PISTA al reproducir un VIDEO CD...

Page 101: ... aleatoria de los títulos capítulos o pistas programados Durante la reproducción de programa presione REPEAT o SHUFFLE o asigne el valor SI al elemento REPEAT o SHUFFLE en la pantalla del menú de control zEs posible acceder a la pantalla PROGRAMA con el control remoto Presione PROGRAM Notas El número de títulos capítulos o pistas que aparece corresponde al número de títulos capítulos o pistas grab...

Page 102: ...e el disco en orden aleatorio SI el reproductor establece el orden de los títulos o pistas y los reproduce en orden aleatorio Al reproducir un VIDEO CD o CD con la reproducción de programa desactivada NO no reproduce el disco en orden aleatorio PISTA el reproductor establece el orden de las pistas y las reproduce en orden aleatorio Después de seleccionar un elemento de SHUFFLE presione El reproduc...

Page 103: ... de un disco PISTA repite la pista actual Cuando la reproducción aleatoria o de programa está activada NO no se reproduce de forma repetida SI repite la reproducción de programa o aleatoria Para cancelar la reproducción repetida Presione CLEAR z Para acceder a la pantalla REPEAT presione el botón Presione REPEAT Nota La reproducción repetida se cancela al desactivar la alimentación Es posible repr...

Page 104: ...ión repetida A B Presione CLEAR zPara mostrar la pantalla del ajuste Repetición A B presione el botón Presione A B en el control remoto Notas La repetición A B sólo puede ajustarse para una parte específica La repetición A B se cancelará si abre o cierra la bandeja de discos desactiva la alimentación Si activa la repetición A B los ajustes para la reproducción aleatoria y de programa se cancelarán...

Page 105: ... LAYER muestra la capa y el punto reproducidos NO desactiva la pantalla ADVANCED Comprobación de la información de reproducción Z Pantallas correspondientes a cada elemento VELOCIDAD BITS La velocidad de bits se refiere a la cantidad de datos de video audio por segundo en un disco Cuanto más alta sea la velocidad de bits mayor será la cantidad de datos Cuando la velocidad de bits es alta existe un...

Page 106: ...ontrol 40ES LAYER capa Indica dónde se reproduce el disco Si el DVD tiene dos capas el reproductor indica cuál se está leyendo Para obtener más información sobre las capas consulte la página 60 DVD Comprobación de la información de reproducción ...

Page 107: ...magen y sonido ajustar las distintas salidas etc También es posible definir un idioma para los subtítulos y la pantalla de ajustes limitar la reproducción para niños etc Para obtener información detallada sobre cada elemento de la pantalla de ajustes consulte las páginas 44 a 52 Nota Sólo es posible acceder a la pantalla de ajustes cuando el reproductor se encuentra en modo de parada 1 Presione SE...

Page 108: ... oprima ENTER SETUP Para ajustar oprima y después Para salir oprima ENTER SETUP AJUSTE DE IDIOMA MENU PANTALLA MENU DVD AUDIO SUBTITULO ESPAÑOL ESPAÑOL ORIGINAL SEGUIR EL AUDIO AJUSTE PANTALLA TIPO TV PROTECTOR PANTALLA FONDO 4 3 LETTER BOX SI IMAGEN ÍNDICE Para ajustar oprima y después Para salir oprima ENTER SETUP Para ajustar oprima y después Para salir oprima ENTER SETUP AJUSTE PANTALLA TIPO T...

Page 109: ...CCION PISTA NO AUTO MEZCLA DOLBY SURROUND NORMAL SALIDA DIGITAL SI NO ESPAÑOL AJUSTE PANTALLA página 45 TIPO TV 4 3 PAN SCAN 16 9 4 3 MODO AMPLIO 4 3 LETTER BOX FONDO IMAGEN ÍNDICE GRÁFICOS AZUL NEGRO PROTECTOR PANTALLA SI NO AJUSTE AUDIO página 49 TAMAÑO FRONTAL CENTRAL DISTANCIA FRONTAL CENTRAL POSTERIOR TONO PRUEBA NO SI POSTERIOR SUBWOOFER BALANCE FRONTAL POSTERIOR NIVEL CENTRAL POSTERIOR SUBW...

Page 110: ...ma de las indicaciones y el sonido AJUSTE DE IDIOMA Z pAUDIO Cambia el idioma de los sonidos ORIGINAL idioma prioritario del disco ESPAÑOL PORTUGUES INGLES FRANCES ALEMAN ITALIANO HOLANDES CHINO JAPONES DINAMARQUÉS SUECO FINES NORUEGO RUSO OTROS Si selecciona OTROS elija e introduzca el código del idioma de la lista mediante los botones numéricos página 62 Tras realizar la selección aparece el cód...

Page 111: ... AZUL El color de fondo es azul NEGRO El color de fondo es negro Nota Si se reproduce un disco que no contenga imagen índice mientras FONDO está ajustado en IMAGEN ÍNDICE la imagen gráfica almacenada en el reproductor aparecerá automáticamente de fondo Seleccione AJUSTE PANTALLA después de presionar SET UP AJUSTE PANTALLA permite ajustar la pantalla según las condiciones de reproducción Los ajuste...

Page 112: ...os sin movimiento dinámico se reproducen con alta resolución pCONTROL DE BLOQUEO Define una contraseña y un nivel de limitación de la reproducción al reproducir discos DVD con la función de control de limitación para niños Para obtener más información consulte Limitación de la reproducción para niños control de limitación Limitación de la reproducción para niños control de limitación Seleccione AJ...

Page 113: ...a limitación Para volver a la pantalla normal Presione SET UP SETUP Para cancelar oprima Para volver oprima RETURN AJUSTE PERSONALIZADO CONTROL DE BLOQUEO Ingrese contraseña y oprima ENTER SETUP Para cancelar oprima Para volver oprima RETURN AJUSTE PERSONALIZADO CONTROL DE BLOQUEO Para confimar ingrese contraseña nuevamente y oprima ENTER Para ajustar oprima y después Para salir oprima ENTER SETUP...

Page 114: ...e insertar el disco DVD control de limitación temporalmente cancelado Tras ajustar un nivel de limitación de la reproducción e insertar el disco DVD aparece la indicación CONTROL DE BLOQUEO Introduzca la contraseña para desactivar la función de control de limitación Cuando termine de reproducir el disco DVD se recupera el nivel inicial z Si ha olvidado la contraseña Introduzca el número de 6 dígit...

Page 115: ...roducirá el sonido del canal de número más alto grabado en formato PCM DTS o Dolby Digital NO no se da prioridad AUTO se da prioridad Notas Si asigna a este elemento el valor AUTO el idioma puede cambiar dependiendo de los valores de AUDIO del elemento AJUSTE DE IDIOMA El ajuste SELECCION PISTA tiene una prioridad superior a la de los ajustes de AUDIO dentro de AJUSTE DE IDIOMA página 44 Si desact...

Page 116: ...no es posible ajustar DOLBY DIGITAL y DTS Ajuste para la señal a la salida digital Si selecciona SI ajuste DOLBY DIGITAL y DTS Cambia los métodos de envío de señales de audio al conectar un componente digital como receptor amplificador con conector digital un componente de audio con decodificador DTS incorporado un DAT o un MD mediante el conector DIGITAL OUT OPTICAL o COAXIAL utilizando un cable ...

Page 117: ...a y ajuste el balance y nivel A continuación utilice el tono de prueba para ajustar el volumen de los altavoces en el mismo nivel Para la conexión de los altavoces consulte las páginas 12 a 13 pTAMAÑO Selecciona el tamaño de los altavoces que van a conectarse FRONTAL GRANDE Seleccione esta opción normalmente PEQUEÑO Si el sonido se distorsiona momentáneamente o los efectos del sonido envolvente so...

Page 118: ... forma Los ajustes de fábrica se indican entre paréntesis FRONTAL 0dB Ajuste el balance entre los altavoces frontales izquierdo y derecho 6dB a 6dB incrementos de 0 5dB POSTERIOR 0dB Ajuste el balance entre los altavoces posteriores izquierdo y derecho 6dB a 6dB incrementos de 0 5dB Nota Al seleccionar VES A o VES B dentro de VES en la pantalla del menú de control no es posible ajustar el nivel ni...

Page 119: ...V Notas Si introduce un número de código nuevo se borrará el número introducido anteriormente Al sustituir las pilas del control remoto el número de código se vuelve a poner automáticamente en 01 Sony Vuelva a ajustar el código apropiado 1 u POWER Botones numéricos Conmutador TV DVD RECEIVER Control del TV o receptor de AV amplificador con el control remoto suministrado Z Fabricante Sony ajuste de...

Page 120: ...to Números de código de los receptores amplificadores que pueden controlarse Si aparece más de un número de código pruébelos de uno en uno hasta que encuentre el que funciona con su receptor amplificador También es posible cambiar el volumen del sonido del receptor de AV amplificador con VOL Nota Es posible que algunos receptores de AV amplificadores no puedan controlarse VOL TV VIDEO ENTER 1 u PO...

Page 121: ... de imagen Limpie el disco Si las imágenes del reproductor de DVD tienen que transmitirse a través de la videograbadora para llegar hasta el TV la señal de protección contra copia aplicada a ciertos programas DVD podría afectar a la calidad de imagen Si sigue experimentando problemas después de comprobar las conexiones intente conectar el reproductor de DVD directamente a la entrada de video S del...

Page 122: ...TEREO 1 IZQ 2 DER en la pantalla del menú de control página 29 Asegúrese de conectar adecuadamente el reproductor página 8 10 12 El efecto envolvente es difícil de apreciar al reproducir pistas de sonido Dolby Digital Compruebe las conexiones y ajustes de los altavoces página 12 51 Consulte el manual de instrucciones del receptor amplificador Según el disco DVD la señal de salida puede no ser de 5...

Page 123: ... no dispone de sonido multilingüe El cambio del idioma está prohibido en el disco DVD No es posible cambiar el idioma de los subtítulos al reproducir un disco DVD No hay subtítulos multilingües registrados en el disco DVD Está prohibido el cambio del idioma de los subtítulos en el disco DVD No es posible desactivar los subtítulos al reproducir un disco DVD Con algunos discos DVD no es posible desa...

Page 124: ...s caracteres C13 C31 Exx xx es cualquier número Causa y o acción correctiva El disco está sucio Limpie el disco con un paño suave página 6 El disco no se ha insertado correctamente Abra la bandeja de discos e inserte el disco correctamente Para evitar fallos de funcionamiento del reproductor se ha activado la función de autodiagnóstico Cuando se ponga en contacto con su proveedor Sony o con el cen...

Page 125: ...lida 2 Vrms a 50 kiloohmios 18 dBm 0 5 Vp p 1 0 Vp p Y 1 0 Vp p C 0 286 Vp p Y 1 0 Vp p PB B Y PR R Y 0 7 Vp p 12 mW 2 Vrms a 50 kiloohmios Impedancia de carga Superior a 10 kiloohmios Longitud de onda 660 nm Terminación de 75 ohmios 75 ohmios sincronización negativa 75 ohmios sincronización negativa Terminación de 75 ohmios 75 ohmios sincronización negativa 75 ohmios 32 ohmios Superior a 10 kiloo...

Page 126: ...lby Digital Se obtiene una óptima separación de canales debido a que los datos de todos los canales se registran por separado y se procesan digitalmente Dolby Pro Logic páginas 32 49 Tecnología de proceso de señales de audio desarrollada por Dolby Laboratories Corporation para el sonido envolvente Cuando la señal de entrada contiene el componente envolvente el proceso Pro Logic emite las señales f...

Page 127: ...la velocidad de bits mayor será la cantidad de datos No obstante esto no siempre significa que puedan obtenerse imágenes de calidad superior VIDEO CD página 4 Disco compacto que contiene imágenes en movimiento Los datos de imagen emplean el formato MPEG 1 uno de los estándares a nivel mundial de tecnología de compresión digital Dichos datos se comprimen hasta aproximadamente 1 140 de su tamaño ori...

Page 128: ...1 Japanese 1269 Yiddish 1283 Javanese 1287 Georgian 1297 Kazakh 1298 Greenlandic 1299 Cambodian 1300 Kannada 1301 Korean 1305 Kashmiri 1307 Kurdish 1311 Kirghiz 1313 Latin 1326 Lingala 1327 Laothianv 1332 Lithuanian 1334 Latvian Lettish 1345 Malagasy 1347 Maori 1349 Macedonian 1350 Malayalam 1352 Mongolian 1353 Moldavian 1356 Marathi 1357 Malay 1358 Maltese 1363 Burmese 1365 Nauru 1369 Nepali 1376...

Page 129: ...ecciona y ejecuta los elementos o ajustes Botón indicador JOG 17 Presiónelo para reproducir un disco fotograma por fotograma Índice de componentes y controles Para obtener más información consulte las páginas que se indican entre paréntesis Panel frontal Conector PHONES 15 Enchufe los auriculares a este conector Control PHONE LEVEL 15 Ajusta el volumen de los auriculares Botón PROGRAM 35 Muestra l...

Page 130: ...ecta al conector de entrada de video del TV o monitor 5 Conectores S VIDEO OUT 1 2 8 10 Se conecta al conector de entrada de video S del TV o videograbadora 6 Conectores COMPONENT VIDEO OUT 9 Se conecta a un monitor o proyector mediante conectores de entrada de video de componentes Y PB B Y PR R Y compatibles con las señales de salida del reproductor 7 Conectores 5 1CH OUTPUT 13 Se conecta a un re...

Page 131: ...ior Botón PLAY 15 Reproduce un disco Botón TITLE 19 Muestra el menú de títulos en la pantalla del TV Botón ENTER Selecciona y ejecuta los elementos o ajustes Botón DISPLAY 23 Muestra la pantalla del menú de control en la pantalla del TV para que el usuario pueda definir o ajustar los elementos Botón 1 u POWER 15 Enciende y apaga el reproductor y el TV Botón SET UP 41 Muestra la pantalla de ajustes...

Page 132: ...calización observando la pantalla del TV 17 un punto específico 16 M Manejo de discos 6 Menú de títulos 19 MENU PANTALLA 44 N O NIVEL 52 P Q PAN SCAN 45 Pantalla de ajustes 41 Pantalla del menú de control 23 Pilas 7 Pista 5 26 61 PRO LOGIC 32 49 PROGRAM 34 PROTECTOR PANTALLA 45 R Reanudación de reproducción 18 Rebobinado rápido 17 REPEAT 37 Repetición A B 37 Reproducción a cámara lenta 16 17 Repro...

Reviews: