


-145-
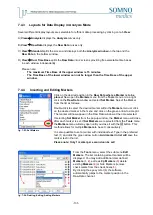
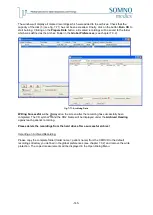
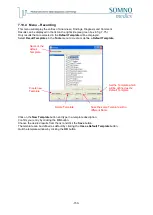
The window will display all marked recordings which were added to the archives. Check that the
capacity of the disk (
3
) (see fig. 7-71) has not been exceeded. Finally, click on the button
Burn CD
to
start burning. Clicking on the
Prepare Data
button, all marked recordings will be saved to the folder
which was defined as the Archive Folder in the
Global Preferences
(see chapter 7.3.2).
fig. 7-71: Archiving Data
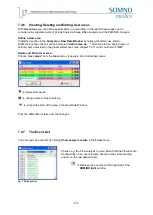
Writing Successful
will be displayed on the screen after the recording has successfully been
completed. The CD symbol
and the CDs’ Name will be displayed under the
Archived Heading
against each patient’s recording.
Please delete the recordings from the hard drive after a successful archive!
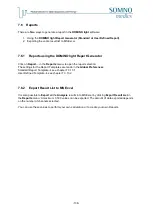
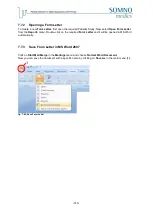
Importing an Archived Recording:
Please copy the complete folder (folder name = patient name) from the CD/DVD to the default
recordings directory you defined in the global preferences
(see chapter 7.3.2) and remove the write
protection. The copied measurements will be displayed in the Open Dialog Menu.
3
Summary of Contents for SOMNOwatch plus
Page 24: ...24 Body Temperature fig 6 8 Montage Temperature EDA fig 6 9 Montage EDA...
Page 25: ...25 Sleep Profile fig 6 10 Montage Sleep Profile ECG Analysis fig 6 11 Montage ECG...
Page 26: ...26 Training Rehab fig 6 12 Montage Training Rehab Flow Snore fig 6 13 Montage Flow Snore...
Page 42: ...42 Body Temperature fig 6 22 Analysis Template Temperature EDA fig 6 23 Analysis Template EDA...
Page 43: ...43 Sleep Profile fig 6 24 Analysis Template Sleep Profile...
Page 63: ...63 Choose the item Activity profil within the Select Report window...
Page 72: ...72 recording on both legs...
Page 162: ...162 10 9 Notes...


