


-116-
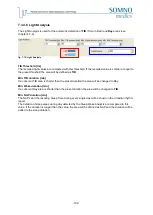
7.3.11 Menu
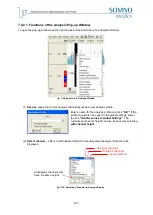
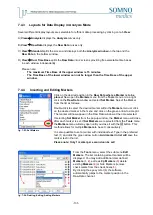
– Area Definition
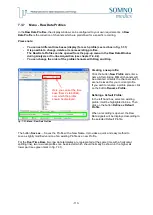
fig. 7-35: Menu
– Area Definition
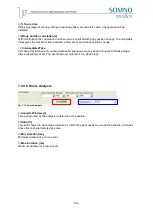
7.3.12 Menu
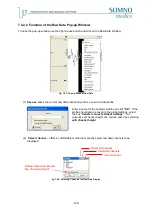
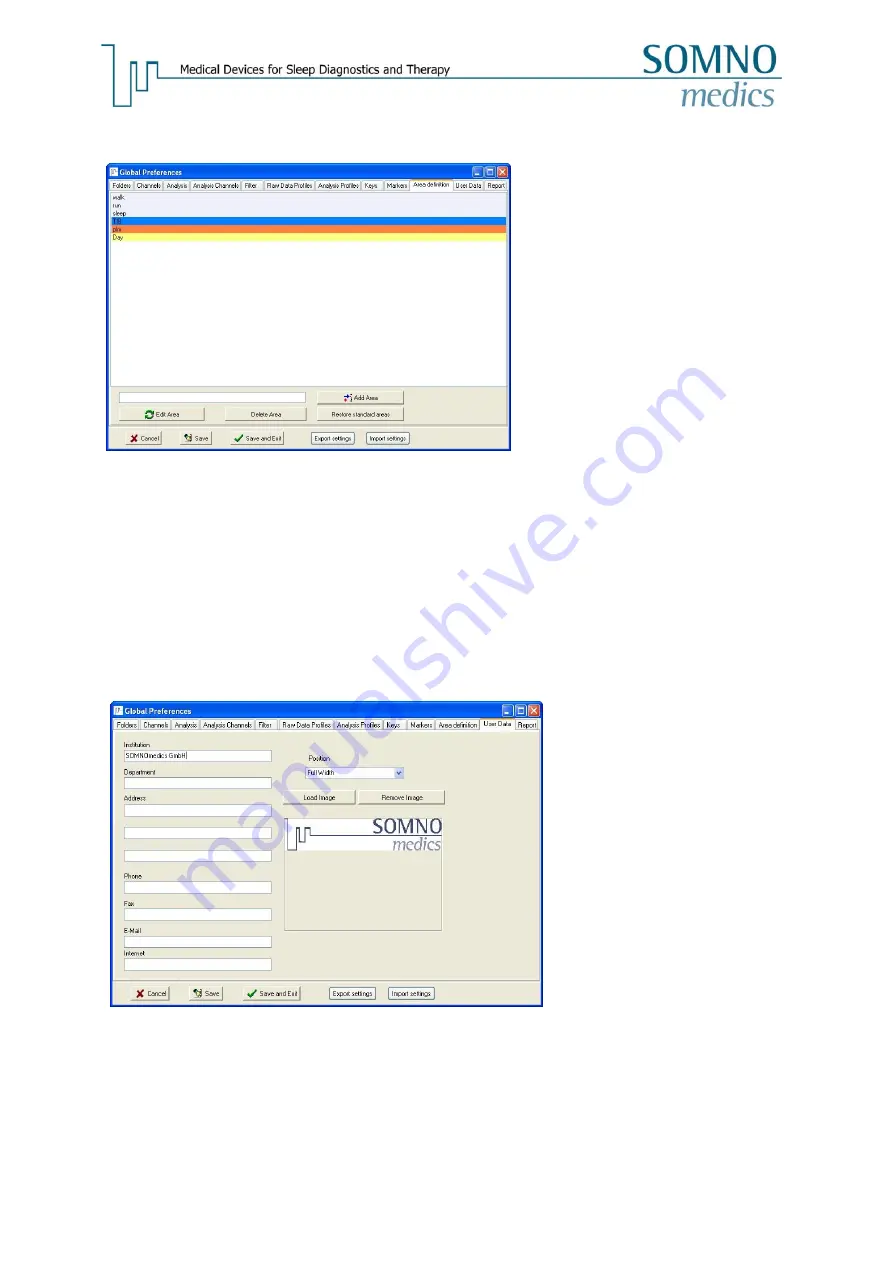
– User Data
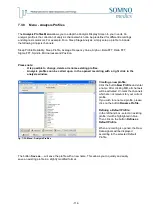
fig. 7-36: Menu
– User Data
It is possible to define own area definitions
in the Analysis window.
Adding areas:
Enter the name of the area in the field
marked
1
and click the button
“Add Area”
.
Renaming areas:
Please select an existing area from the list
and click the button
Edit Area
. It is
possible to enter a new name for the
current area and you will be prompted to
save it.
Deleting areas:
Select an existing area from the box and
click the button
Delete Area
.
It is possible to recover the default area
definitions by clicking the
Restore
standard areas
button.
1
Enter the information you require to be
printed as a heading for all reports.
Should you wish to include your own
logo on the report:
Click on the Remove Image to clear the
screen. Now activate the button
Load
Image
and select the path where the
logo is stored. Once the file has been
found, select it and confirm by clicking
on
“OK”.
In order for the logo to print correctly, set
the graphic file to the following
specifications:
-
JPG or BMP format
-
Optimum size:
➢
Aligned left or right:
200 x 122
➢
Aligned full page width:
660 x 122
Summary of Contents for SOMNOwatch plus
Page 24: ...24 Body Temperature fig 6 8 Montage Temperature EDA fig 6 9 Montage EDA...
Page 25: ...25 Sleep Profile fig 6 10 Montage Sleep Profile ECG Analysis fig 6 11 Montage ECG...
Page 26: ...26 Training Rehab fig 6 12 Montage Training Rehab Flow Snore fig 6 13 Montage Flow Snore...
Page 42: ...42 Body Temperature fig 6 22 Analysis Template Temperature EDA fig 6 23 Analysis Template EDA...
Page 43: ...43 Sleep Profile fig 6 24 Analysis Template Sleep Profile...
Page 63: ...63 Choose the item Activity profil within the Select Report window...
Page 72: ...72 recording on both legs...
Page 162: ...162 10 9 Notes...


