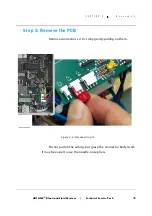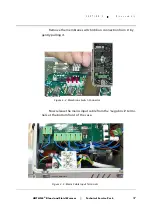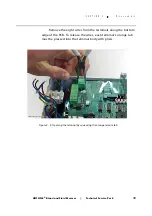
HOT LINE
®
Blood and Fluid Warmer
Technical Service Pack
34
S E C T I O N 4
D i s a s s e m b l y
Disassembly
Step 1: Open the case
WARNING:
Ensure that the HOTLINE
®
is disconnected from the Mains power.
If the HOTLINE
®
has been recently used, be aware that some
interior components may be hot.
Place the HOTLINE
®
on a firm surface at a convenient height.
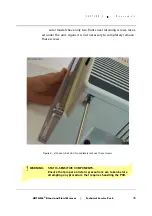
Loosen the front cover screws. Early models have six screws, facing
forward. These screws are tethered to the front panel, so it is neither
necessary or desirable to completely remove them.
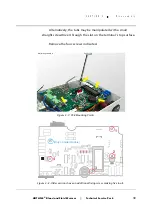
Figure 4 - 1: The underneath view of a HOTLINE® with the newer (one-part) case.
Summary of Contents for level 1 HOTLINE HL-90
Page 1: ......
Page 14: ...Introduction Specifications Blood and Fluid Warmer ...
Page 20: ...Sub Assemblies Blood and Fluid Warmer ...
Page 28: ...Technical Description Blood and Fluid Warmer ...
Page 45: ...Disassembly Procedures Blood and Fluid Warmer ...
Page 58: ...Blood and Fluid Warmer Maintenance Testing and Calibration ...
Page 83: ...Troubleshooting Blood and Fluid Warmer ...
Page 88: ...Spare Parts Blood and Fluid Warmer ...
Page 96: ...Rounding Off Blood and Fluid Warmer ...
Page 106: ...Appendix 1 Circuits Blood and Fluid Warmer ...
Page 110: ...Appendix 2 PCB Layout Blood and Fluid Warmer ...
Page 115: ...Appendix 3 Symbols Glossary Blood and Fluid Warmer ...
Page 118: ...Appendix 4 Frequently Asked Questions Information Bulletins Blood and Fluid Warmer ...
Page 132: ...Ndjg CdiZh 9 V gVbh ...


