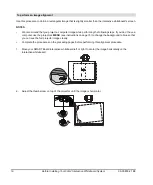
99-00850-21 B0
Before Installing Your 600i2 Interactive Whiteboard System
17
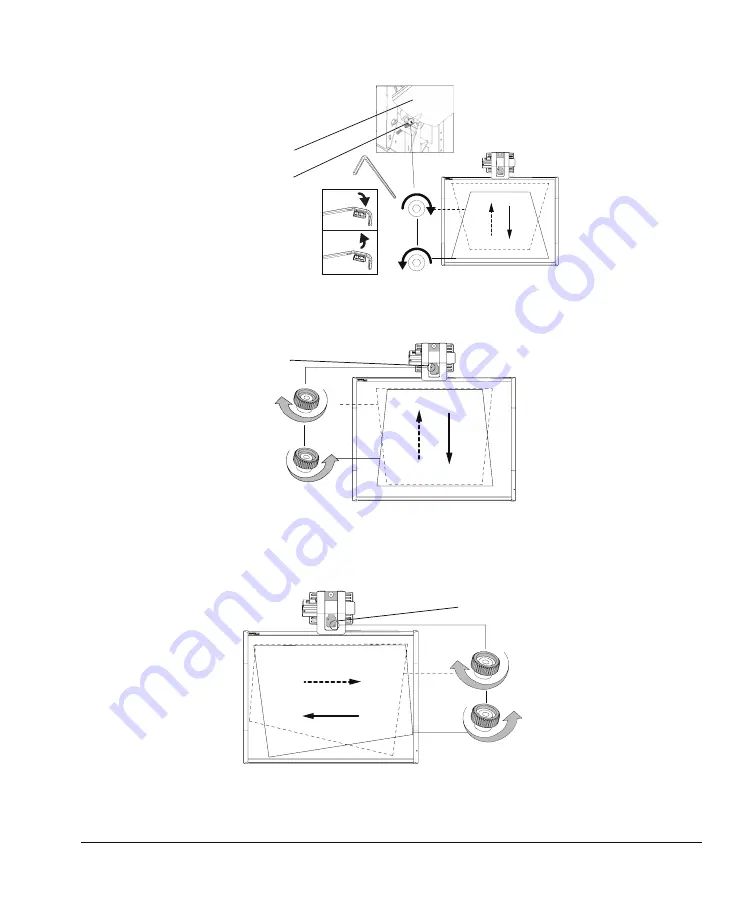
3.
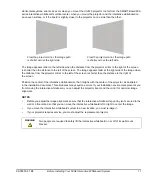
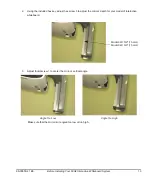
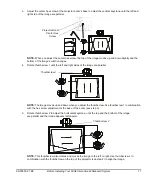
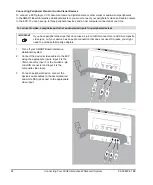
Adjust the center hex screw at the projector boom’s base to adjust the vertical keystone until the left and
right side of the image are parallel.
NOTE:
When you adjust the center hex screw, the top of the image moves up and down slightly and the
bottom of the image’s width changes.
4.
Rotate thumbscrew 1 until the left and right sides of the image are parallel.
NOTE:
The image moves up and down when you adjust the thumbscrew. Use thumbscrew 1 in combination
with the hex screw adjustment at the base of the boom (see step 3).
5.
Rotate thumbscrew 2 to adjust the horizontal keystone, until the top and the bottom of the image
are parallel and the image appears rectangular.
NOTE:
This thumbscrew also rotates and moves the image to the left or right. Use thumbscrew 2 in
combination with the thumbscrew on the top of the projector (see step 2) to align the image.
Projector Boom
Center Hex
Screw
Thumbscrew 1
Thumbscrew 2
Summary of Contents for SmartBoard 600i2
Page 1: ...Configuration and User s Guide SMART Board 600i2 Interactive Whiteboard System...
Page 8: ...vi Important Information 99 00850 21 B0...
Page 16: ...6 About Your 600i2 Interactive Whiteboard System 99 00850 21 B0...
Page 30: ...20 Before Installing Your 600i2 Interactive Whiteboard System 99 00850 21 B0...
Page 50: ...40 Maintaining Your 600i2 Interactive Whiteboard System 99 00850 21 B0...
Page 64: ...54 Remote Management of Your 600i2 Interactive Whiteboard System 99 00850 21 B0...
Page 72: ...62 Index 99 00850 21 B0...
Page 73: ......


