background image


Extend one head of the hose and screw it into the unit anti-clockwise. The hose can be removed by screwing the 
hose clockwise.   


3. In the same way connect the hose to the assembled adaptor (at least three rotations). 


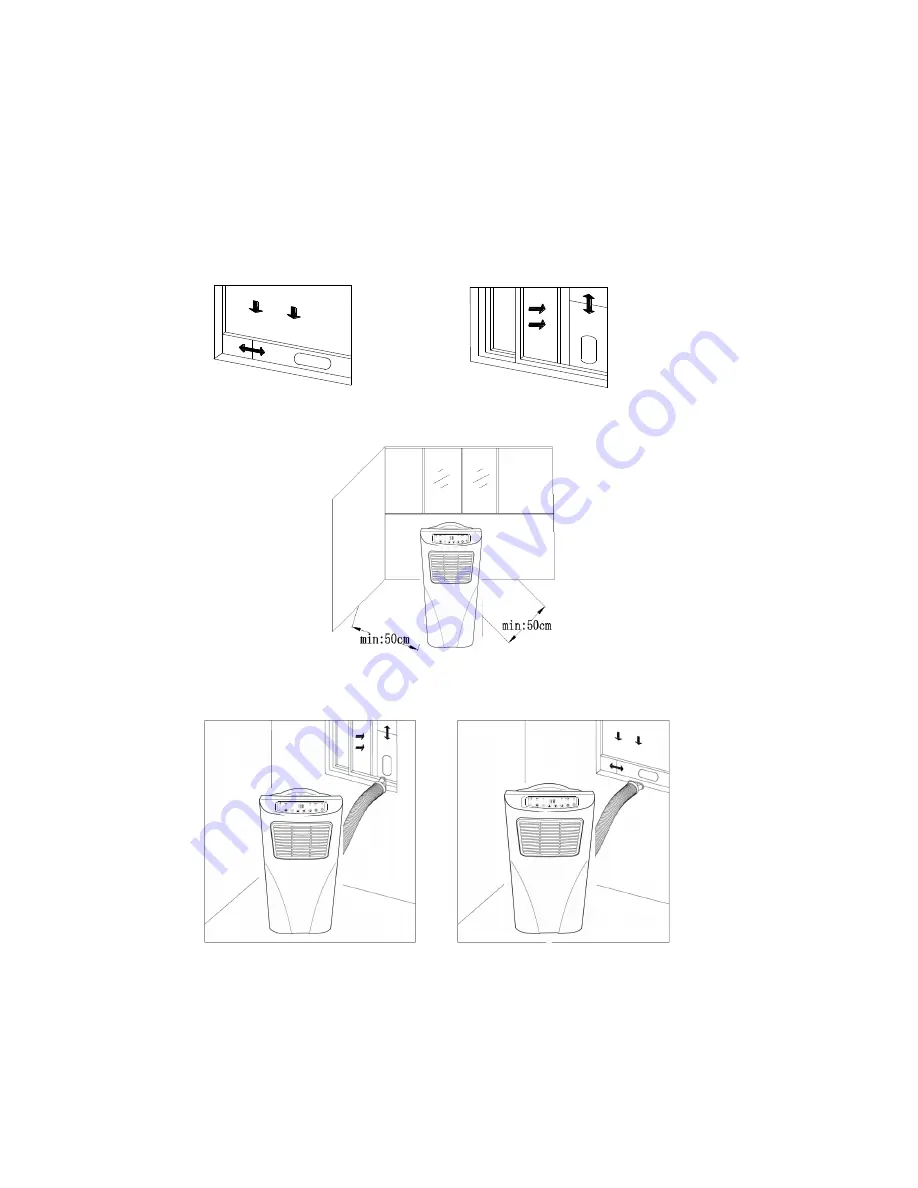
4. Installation of window kits. 


Partially open the window and then fix the window kit to the window. 


5. Make sure the unit is upright and there are no obstructions to the air inlets and outlet grills. 


6. Fix the other end of the hose to the air-outlet window kit. 


Note: 

The window kit is only designed to be installed with sliding or sash windows or doors. The window kit is 

not designed or to be used with any other style of windows. However, the fish tail adaptor can be used with 
most windows / doors. When using in cooling mode ensure that the opening left around the fishtail is as small 
as possible as the cooling will be less efficient. The best form of installation is through a wall duct. By properly 
venting you expel hot air from your room while efficiently cooling it. 

Summary of Contents for CLIM9000CE

Page 1: ...CLIM9000CE PORTABLE AIR CONDITIONER USER MANUAL Please read this user manual before using this innovative Air Conditioner and keep it safe for future reference...

Page 2: ...supply cord should be replaced by the manufacturer or a qualified electrician in order to avoid a hazard Any service other than regular cleaning or filter replacement should be performed by an author...

Page 3: ...g Cap 12 Power supply cord Installation Warning Before using this unit please keep it upright for at least 3 4 hours This unit can easily be moved from one room to another While moving the unit please...

Page 4: ...s and outlet grills 6 Fix the other end of the hose to the air outlet window kit Note The window kit is only designed to be installed with sliding or sash windows or doors The window kit is not design...

Page 5: ...is length the unit may malfunction and this can invalidate the warranty The outlet vent must be well ventilated and not obstructed as this will cause the unit to overheat Avoid bending the air hose mo...

Page 6: ...s Castors and handles for portability Compressor protection technology for extended life span 2 OPERATION Selection Keys and Display Indicator LED 1 Power On Off 9 Tank Full indicator light 2 Mode Sel...

Page 7: ...ss TIMER to adjust the timer from 1 to 24 hours Timer indicator turns on Unit will start after selected number of hours Under power on mode press TIMER to setup power off timer Press TIMER to adjust t...

Page 8: ...an alarm and the LCD temperature display area will show FL At this point you need to move the drainage pipe connecting the machine or the water outlet to sewer other drainage area or a flat tray to e...

Page 9: ...vaporated Please do not use continuous drainage if you intend to use the self evaporating facility Maintenance Cleaning Please shut off the unit and unplug from the mains before cleaning or performing...

Page 10: ...e it as directed in this user manual and only perform operations advised here Problems Reasons Solutions The air conditioning does not work There is no electricity Turn it on after connecting it to a...

Page 11: ...eatment is necessary Recycling facilities are now available for all customers at which you can deposit your old electrical products Customers will be able to take any old electrical equipment to parti...

Page 12: ...rm 1 Has the unit been standing upright for at least 2 hours 2 2 Is the unit plugged into the mains 3 Is the fuse OK 4 Switch the unit off and wait three minutes to see if the issue is resolved Restar...

Reviews: