


.
Notes Before Beginning
Construction
Any references to right or left refers to your
right or left as if you were seated in the cockpit.
To build good flying models, you need a good
straight building board. Crooked models don't
fly well! The building board can be a table, a
workbench, a reject "door core" from the
lumber yard, or whatever - as long as it is
perfectly flat and untwisted. Cover the top
surface of the building board with a piece of
celotex-type wall board or foam board, into
which pins can be easily pushed. Don't hesitate
to use plenty of pins during assembly to hold
drying parts in correct position.
When pinning and gluing parts directly over the
full-size plans, cover the plan with wax paper or
plastic kitchen wrap to prevent gluing the parts
to the plans.
Don't use a ball point pen for making marks on
the model during construction. If not sanded
off, these ink marks will show through the
model's final finish. Use a pencil instead of a
pen.
Leave all die-cut parts in the sheets until needed in construction. Then remove the pieces from the sheets carefully. If
difficulty is encountered, do not force the part from the sheet - use a modeling knife to cut it free.
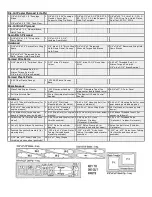
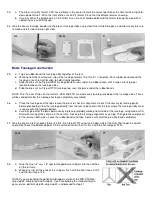
The die-cut balsa and plywood parts can be identified using the plans and the "Key To Die-Cut Parts" above. Mark the
identification numbers on the corresponding parts before removing them from the die-cut sheets.
All of the other parts can be identified by the "Complete Kit Parts List" above. Sort the different sizes of sticks and sheets into
individual piles to avoid confusion during building.
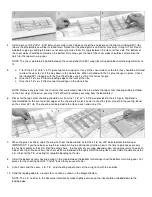
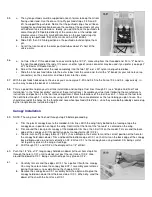
WING CONSTRUCTION
Before beginning wing construction, carefully splice together the Left Wing Panel plans so that the "X" and "Y" indicators meet.
Use a straightedge to double check the alignment of the plans before taping them at the seam. Tape or pin the plans to your
building board and protect them with a layer of waxed paper. Build each wing half separately.
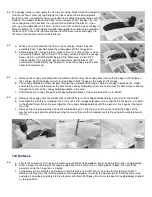
1.
a. Pin the 3/16"x3/8"x30" spruce main wing spar in place on the plan. Be careful not to place pins where they will
interfere with wing ribs which will be added later.
b. Pin the 1/16"x1-1/2"x30" balsa bottom trailing edge sheeting in place.
c. Use about three wing ribs to accurately position the 3/16" sq. x30" balsa rear spar, then pin the spar in place.
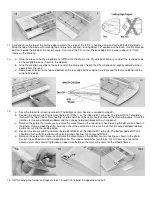
2.
a. Glue eight W-2 wing ribs to the spars and trailing edge sheeting.
b. Place scraps of 1/16" balsa near the main spar to accurately space the W-1 wing ribs up from the building board.
(The spacing is required for the center sheeting to be added later.)
c. Use the dihedral guage side of the die-cut Dual Tool to set the root W-1 rib at the proper dihedral angle before
gluing it in place. Add the two remaining W-1 ribs.
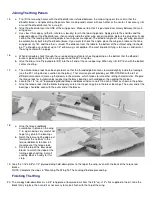
3.
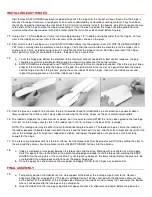
a. Glue the 1/4" sq. x 30" balsa trailing edge to the top of the T.E. sheeting and the ends of the wing ribs.
b. Remove the pins in the bottom T.E. sheeting and re-pin the back of the wing through the trailing edge stick that you
just installed.
c. Add the 1/16"x1-1/4"x30" top trailing edge sheeting. For this step it is recommended that you use Sig-Bond
(alphatic resin) along the back edge of the sheeting that glues to the trailing edge. That will make the joint easier to
sand when you reach step 11. Use thin CA to tack the front edge of the sheeting to the wing ribs.