


.
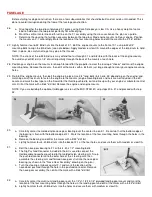
Experienced modelers know that oily engine exhaust likes to creep into every crack it can find, which means special care
must be taken to keep the hatch area as fuel proof as possible. When you cover the hatch be sure to cover the front and
rear edges, and wrap the material around both sides about 1/2". The bottom surface of the hatch and the plywood hatch
tongue should be protected with a couple of coats of clear dope. The covering material on the fuselage sides should wrap
around the top in the hatch area as well as the wing saddle area.
Another area that needs some clear dope for protection from exhaust is the rear side of the canopy former #1 (CF-1). For
a finishing touch on the canopy, use some 3/16" wide striping tape, such as Sig SuperStripe, around the rear edge and
along the side flanges.
Covering The Wing
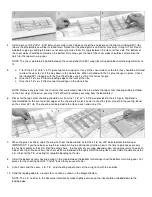
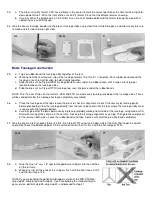
Begin the wing by covering the wingtips and plywood hold-down plates. Cover each wingtip with two pieces of material,
first the bottom, then the top. Seal each piece securely to the end rib and wingtip edge before shrinking it tight. Later, when
the main top and bottom covering pieces are applied, they will overlap the wingtip covering on the end rib.
Cover the hold-down plates with a single piece of material, extending it about 1/8" past the outside edges of the plates,
again to provide an area for overlap.
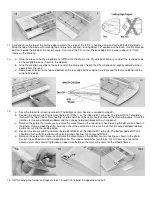
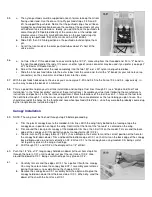
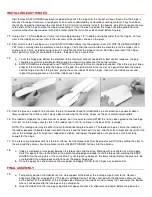
Cover the main portion of the wing starting with the bottom and then the top so
that the seams will be on the bottom where they will be less visible. The top
covering should overlap the full width of the leading & trailing edge.
Wait until both the top and bottom pieces of covering material have been sealed
completely around their edges before shrinking the large open areas between the
ribs. Alternate between the top and bottom surface to avoid uneven shrinking
which could cause a warp. Your sealing iron or a special "heat gun" can be used
(household blow dryers don't provide enough heat). Keep the heat gun moving at
all times or you may burn a hole in the covering. If you notice the covering
material "ballooning up", put a small pin hole in the bottom of each rib bay to
allow the expanding air to escape.
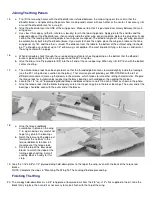
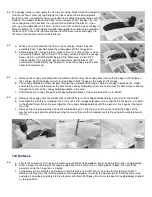
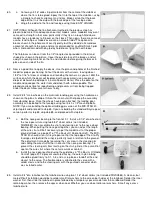
Covering The Tail Sufaces And Ailerons
The stabilizer, elevators, fin, rudder, and ailerons should each be covered with two pieces of material - bottom first, then
the top. Iron the material from the center out to avoid trapping air bubbles. Once the ailerons have been covered, cut away
the material to expose the slot and hole for the torque rods.
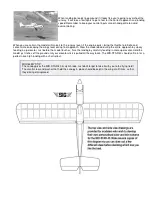
Applying The Decals
We recommend hinging the control surfaces before applying the decals. Instructions for decal application can be found in
step 82