


WIFI setting
19
Siemens AB
Security Products
05.2014
10
WIFI setting
Before accessing the IP Camera, the initial connection setting of the IP Camera
must be setup. However, with different ways of powering on the IP Camera, cam-
era connection will also be configured differently. The following describes how to
setup the IP Camera via the Power Adapter Connection and USB Connection.
Power Adapter Connection Setup (Recommended)
When the IP Camera is powered on with the power adapter, the camera is an
Access Point (AP) by default. As an AP, the camera serves as central transmitter
and receiver of Wi-Fi signals. In this case, users have to switch the IP Camera
from an AP to a WiFi device. Otherwise, the camera cannot be performed as a
surveillance camera. Follow the steps below to switch the IP Camera from an AP
to a WiFi device.
Step 1:
Power on the IP Camera with the power adaptor.
Step 2:
Enable WLAN on user
s’ computer or laptop.
Step 3:
Click on the internet connection icon <
> at the bottom-right of the
taskbar, a list of Access Points will be displayed.
Step 4:
Double click on <WiFiCamera> to connect the Access Point. The de-
fault password of the AP is 87654321.
Step 5:
Open a web browser and enter the default IP address of the IP Camera,
192.168.0.10. Then input the default username / password (
admin
/
admin
).
Step 6:
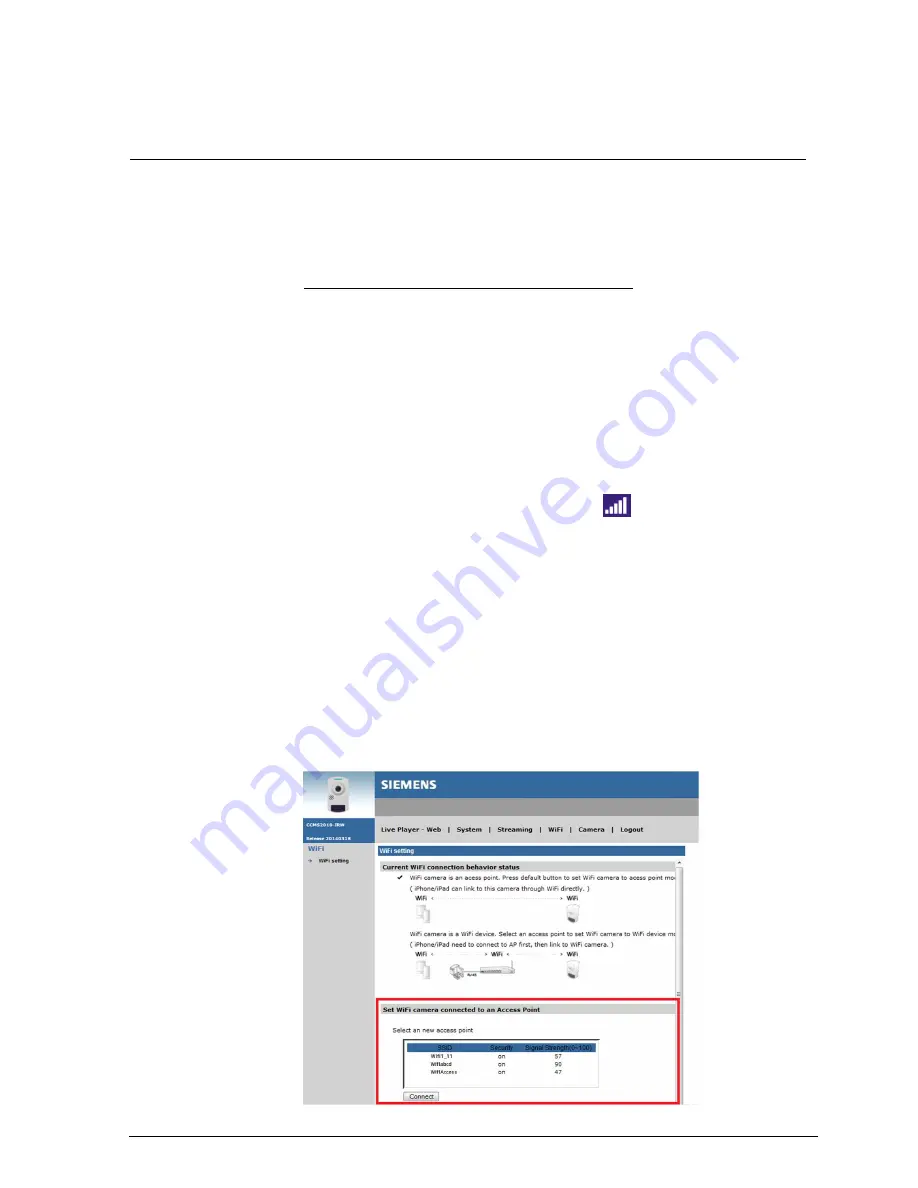
After the Browser-based Viewer is displayed, click on the <WiFi> tab to
connect the IP Camera to an Access Point.
Step 7:
Under <Set WiFi camera connected to an Access Point>, select a pre-
ferred Access Point and enter its password, and then click <Connect>.
See the figure below.
Summary of Contents for CCMS2010-IR
Page 95: ......