6
ENGLISH
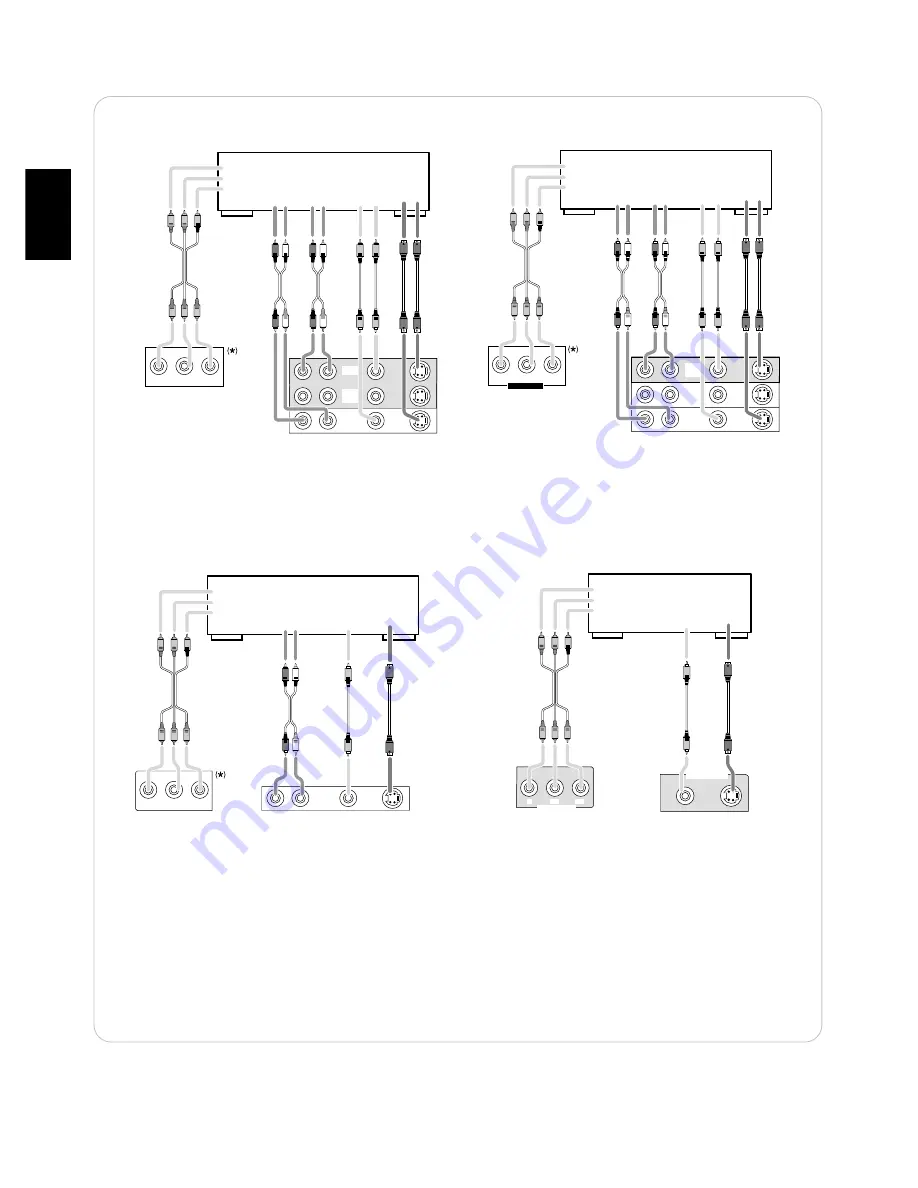
• The jacks of VIDEO 1 / VIDEO 2 may also be connected to a DVD recorder or other digital video recording
component. For details , refer to the operating instructions of the component to be connected.
• For ROOM 2 playback, the VIDEO 2 / ROOM 2 OUT jacks can be connected to the amplifier, TV , etc. installed in
another room. (For details , refer to “ROOM 2 connections” on page 10.)
VIDEO1
OUT
VIDEO 1
COMPONENT
OUT
Y
C
B
C
R
AUDIO
OUT
R L
AUDIO
IN
R L
(COMPOSITE)
VIDEO
OUT IN
S-VIDEO
OUT IN
VIDEO 1
Video deck, DVD recorder, etc.
IN1
Y
C
B
C
R
VIDEO2/
ROOM2
OUT
COMPONENT
OUT
AUDIO
OUT
R L
AUDIO
IN
R L
(COMPOSITE)
VIDEO
OUT IN
S-VIDEO
OUT IN
VIDEO 2
DVD player, DVD recorder, etc.
Y
C
B
C
R
VIDEO 1
VIDEO 2
IN2
COMPONENT
Y
C
B
C
R
VIDEO2/
ROOM2
OUT
• The jacks of VIDEO 3 / VIDEO 4 / VIDEO 5 can also be connected to an additional video component such as a
cable TV tuner, an LD player or satellite system .
• Connect the jacks of VIDEO 4 / VIDEO 5 to the video components in the same way.
Component video input default settings : (*)
• If you connect the COMPONENT VIDEO INs to your video components, it is easier to do so following the default
settings.
• If your component video connections are different from the default setting , you should assign the COMPONENT
VIDEO INs you used with the “When selecting the COMPONENT VIDEO SETUP” procedure on page 54.
• The default settings are as follows :
COMPONENT IN 1 : VIDEO 1, COMPONENT IN 2 : VIDEO 2, COMPONENT IN 3 : VIDEO 3
COMPONENT
OUT
AUDIO
OUT
R L
(COMPOSITE)
VIDEO
OUT
S-VIDEO
OUT
VIDEO 3
DVD player, LD player, Video deck, etc.
Y
C
B
C
R
VIDEO3
IN3
Y
C
B
C
R
MONITOR OUT
Y
C
B
C
R
MONITOR OUT
COMPONENT
IN
(COMPOSITE)
VIDEO
IN
S-VIDEO
IN
MONITOR
TV, Projector, etc.
Y
C
B
C
R


