AL-1551 UNPACKING AND INSTALLATION 5-4
8. Power to copier
1) Ensure that the power switch of the copier is in the OFF position.
Insert the attached power cord into the power cord socket at the rear
of the copier.
2) Plug the other end of the power cord into the nearest outlet.
9. Installing the printer driver
(Description of the printer driver)
The printer driver is the software program which runs the printer. It
converts the data in your file into information that the printer can
understand. It also controls communication between the printer and
computer as the data is printed.
(Checking the hardware and software requirements)
You will need the following hardware and software in order to install the
printer driver.
Hardware requirements, such as CPU performance rating and amount of
RAM installed, are the same as for your operating system.
• The printer driver included in this product cannot be used under
Windows NT 3.5x, OS/2, pure MS-DOS and other operating systems
which are not described above.
• If you are using some of your computer’s memory as a RAM drive, the
printer driver may not be allocated the correct amount of memory. In
such a case, reduce the size of your RAM disk, or do not use the RAM
disk. Please refer to your MS Windows documentation for further
information.
(Installing the printer driver)
The software for your printer is provided on CD-ROM.
Before installing the printer driver, be sure to check the following items.
• Is the printer connected properly to the computer?
• Does the printer have paper?
• Is there another GDI printer driver or Windows Printing System printer
driver already installed? If installed, change the printer port setting.
A. Windows 95/Windows NT 4.0
1) Load paper into the paper tray of the printer.
2) Turn on the printer.
3) Turn on your computer and start Windows.
• Before installing the printer driver, be sure to close all other applications
which may be open.
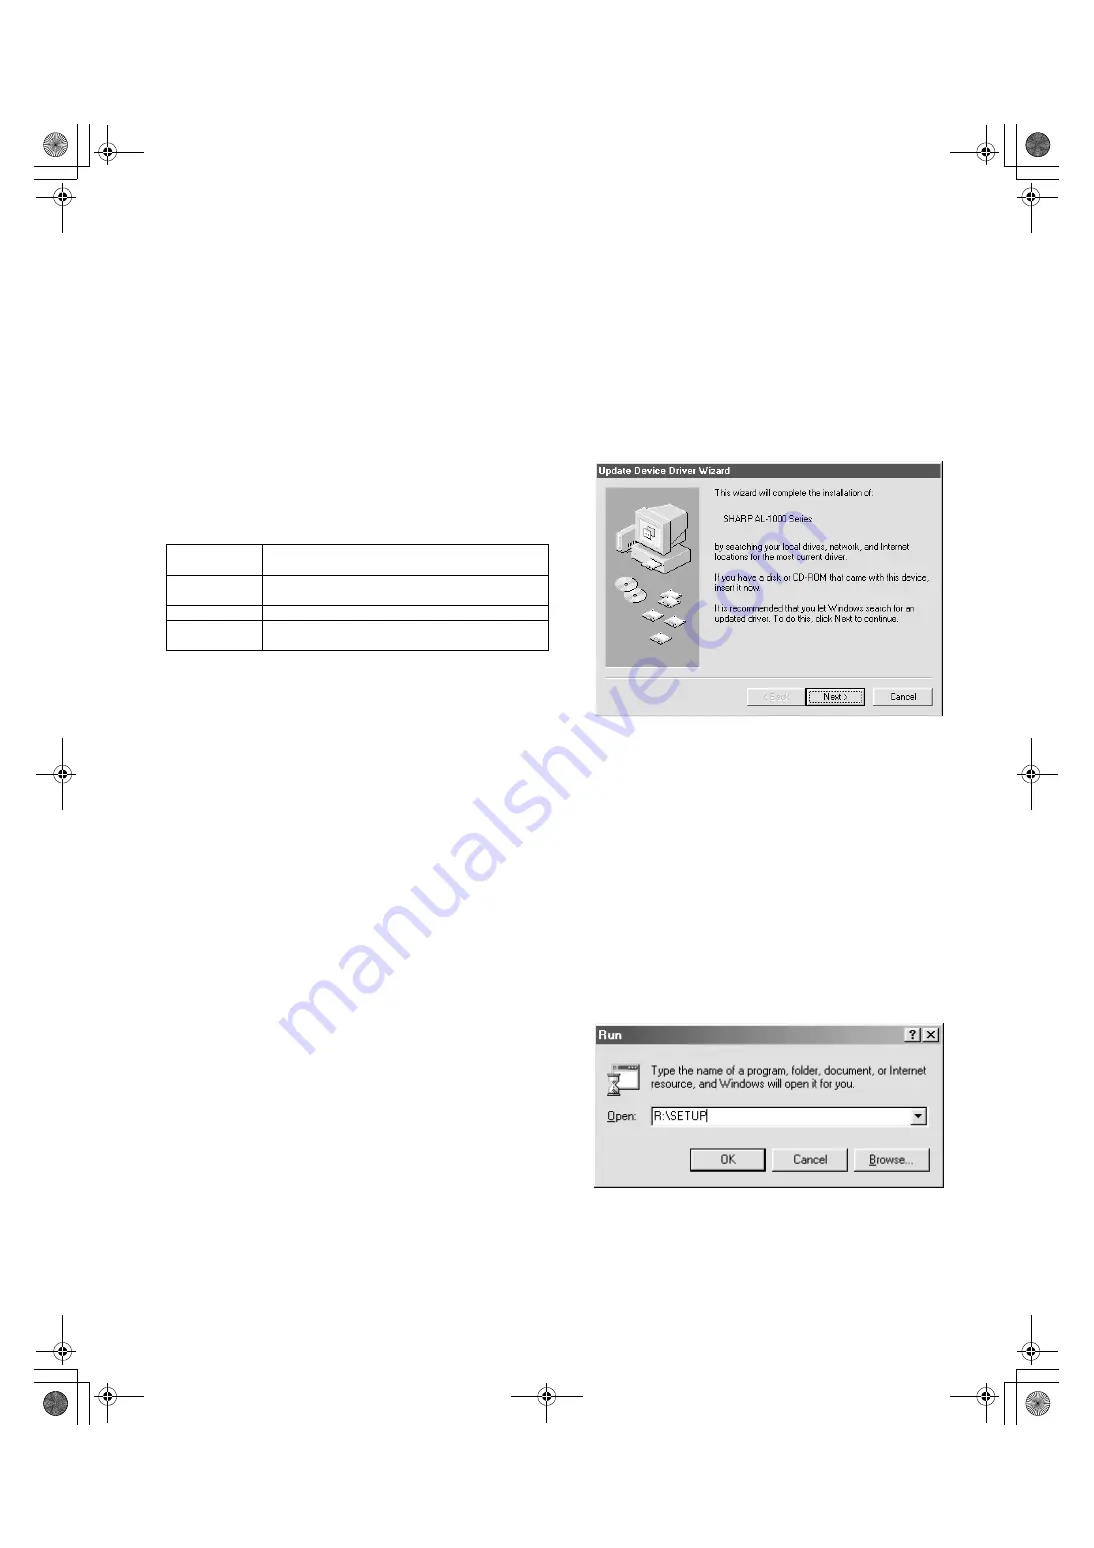
4) When using Windows 95 on a personal computer with plug & play,
the "Update Device Driver Wizard" window will appear. Insert the
installation CD-ROM into the CD-ROM drive. Click the Next button
and follow the on-screen instructions. If the "Copying Files" window
appears during this operation, enter R:\ (substitute the letter of your
CD-ROM drive for "R"), click the OK button and follow the on-screen
instructions.
• If you are using Windows 95 and the "New Hardware Found" window
will appear, select Driver from Disk Provided by Hardware Manufacturer
and then click the OK button. Proceed to step 6.
• If you are using Windows 95 and the screen shown above or the "New
Hardware Found" window does not appear, proceed to step 5.
• If you are using Windows NT 4.0, proceed to step 5.
*
Plug & play
This feature is effective if both the computer and peripheral
equipment are equipped with IEEE 1284 compliant parallel interface.
Note: The screen displayed depends on the version of Windows.
5) Insert the installation CD-ROM into the CD-ROM drive.
Click the Start button and select Run. When the screen shown below
appears, type R:\SETUP(substitute the letter of your CD-ROM drive
for "R") and click the OK button. Follow the on-screen instructions.
Computer type
IBM PC/AT or compatible computer equipped with a
bi-directional parallel interface and CD-ROM drive
Windows type
Windows 3.1x, Windows 95, Windows 98,
Windows Me, Windows NT 4.0, Windows 2000
Display
640 x 480 dots (VGA) or better
Hard disk
free space
10 MB or more
"# $%&'
Summary of Contents for AL-1043
Page 115: ...AL 1551 CIRCUIT DIAGRAM 13 8 OPU ...
Page 116: ...AL 1551 CIRCUIT DIAGRAM 13 9 GDI PWB ...
Page 117: ...AL 1551 CIRCUIT DIAGRAM 13 10 GDI MEMORY PWB 6MB ...
Page 118: ...AL 1551 CIRCUIT DIAGRAM 13 11 POWER SUPPLY 120V 127V ...
Page 119: ...AL 1551 CIRCUIT DIAGRAM 13 12 POWER SUPPLY 200V Series ...


