stepIM
Technical Training Manual
38
1.
Make sure the drive is disabled, and the drive is communicating (online)
with ServoStudio.
2.
Make sure all input switches on the Demo kit are in the Off position.
3.
In the ServoStudio Drive Objects table, set the value of object
2FC8h
to
1
.
4.
Select the
Motion
screen, and then set the CAN Operation mode to
3-Profile Velocity
.
5.
Select the
I/Os
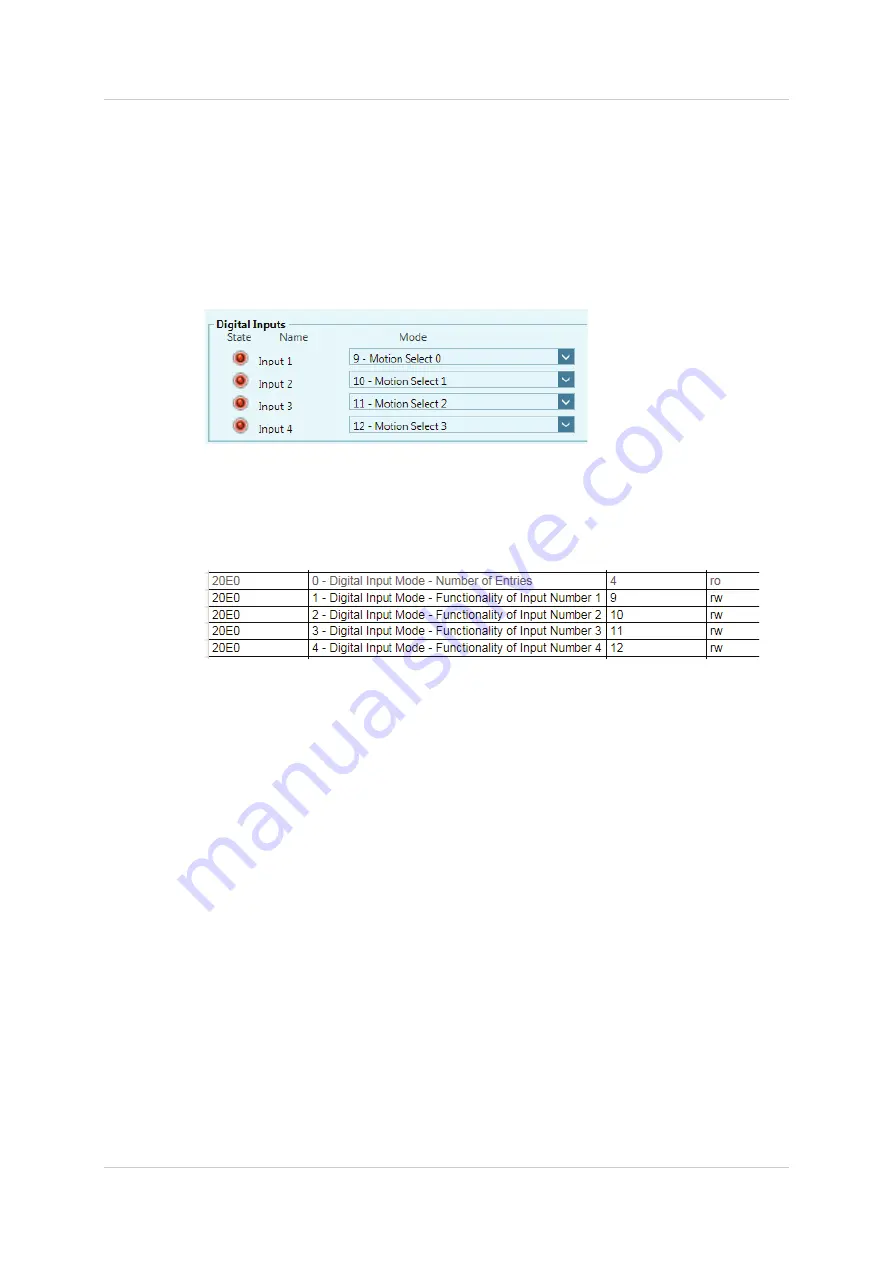
screen, and then assign the four digital inputs to the four
motion segments, as shown below.
6.
In the Drive Objects table, make sure the option
Update all objects
is
enabled.
7.
Check the values of Object
20E0
sub-indices.
Make sure the values are updated now appear as follows.
Using the Demo kit, switch the inputs on, off, and on again. Observe the
response.
8.
Switch on input 4. Motion is fast.
Move input switch to off position (note: motion does not stop).
Move switch back to on position.
9.
Switch on input 3. Motion is slower.
10.
Switch on input 2. Motion is even slower.
11.
Switch on input 1. Motion stops (velocity=0)
12.
All inputs are on. Turn them all off.
13.
Again switch on inputs one at a time.
14.
Switch off all inputs on the Demo Kit.
15.
Switch on input 1. Then switch it off.
A rising edge on digital input
1
triggers execution of motion segment
0
,
as defined in Object
2F90h
.
A rising edge on digital input
2
triggers execution of motion segment
1
,
as defined in Object
2F91h
.
A rising edge on digital input
3
triggers execution of motion segment
2
,
as defined in Object
2F92h
.
Summary of Contents for stepIM
Page 2: ......
Page 4: ...stepIM Technical Training Manual 2...


