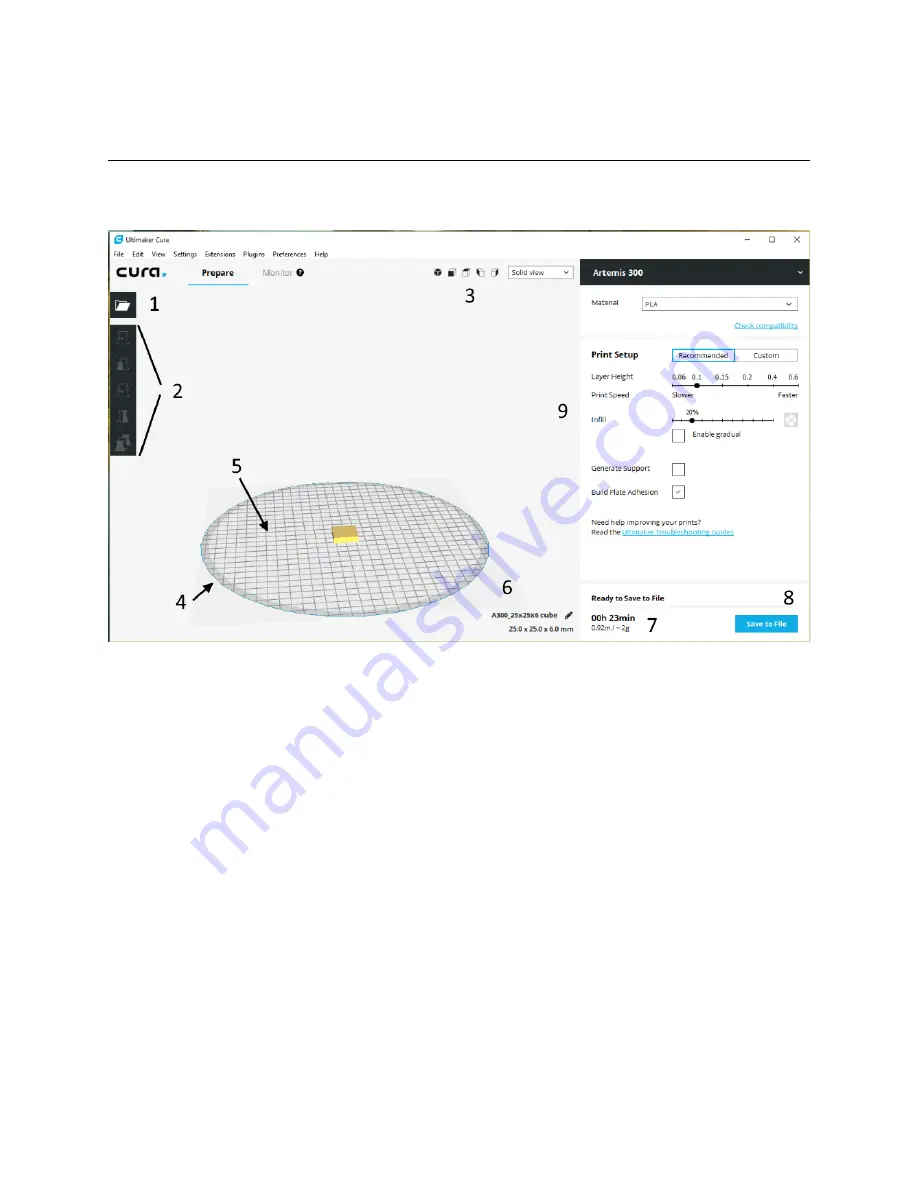
1 – The Cura Interface
The Cura interface is very straightforward and easy to understand. Let’s take a few
minutes to get familiar with it!
1.
Open File. This is the button you’ll click when you want to load an object into Cura.
2.
Adjustment Controls. These buttons control the size, orientation, and position of the model
on the build plate. We’ll cover them in detail later.
3.
These are the view orientation controls. They allow you to change the viewing position of the
model on the build plate with the click of a button. To the right of the orientation controls is a
drop-down that will allow you to select the type of view that the model will be presented in. The
choices are “Solid view”, “X-Ray view”, and “Layer view”. Like the adjustment controls, we’ll
cover these views in detail later.
4.
This gray area is the non-printable area of the bed.
5.
The printable area of the bed.
6.
Information on the currently loaded model. It includes the filename of the model as well as
the amount of space it occupies on the printed bed.
7.
Print job information. It includes estimates on the amount of time the job will take to print and
how much the printed part will weigh. If there’s enough information in the material description, it
may also include the cost of the material needed to print the part.
5


