4 – The Cura Material and Profile Managers
Cura comes equipped with an excellent selection of pre-configured materials from a
number of well known vendors. However, there will be a time when you’re going to want to add
your own filament to that selection – or more importantly, tweak one for your particular
configuration.
You can open the material
manager by clicking on
Settings
and then hover your mouse over
the
Material
caption. This will
expand a selection of the currently
available material choices. You
want to pick the last option in the
list,
Manage Materials…
.
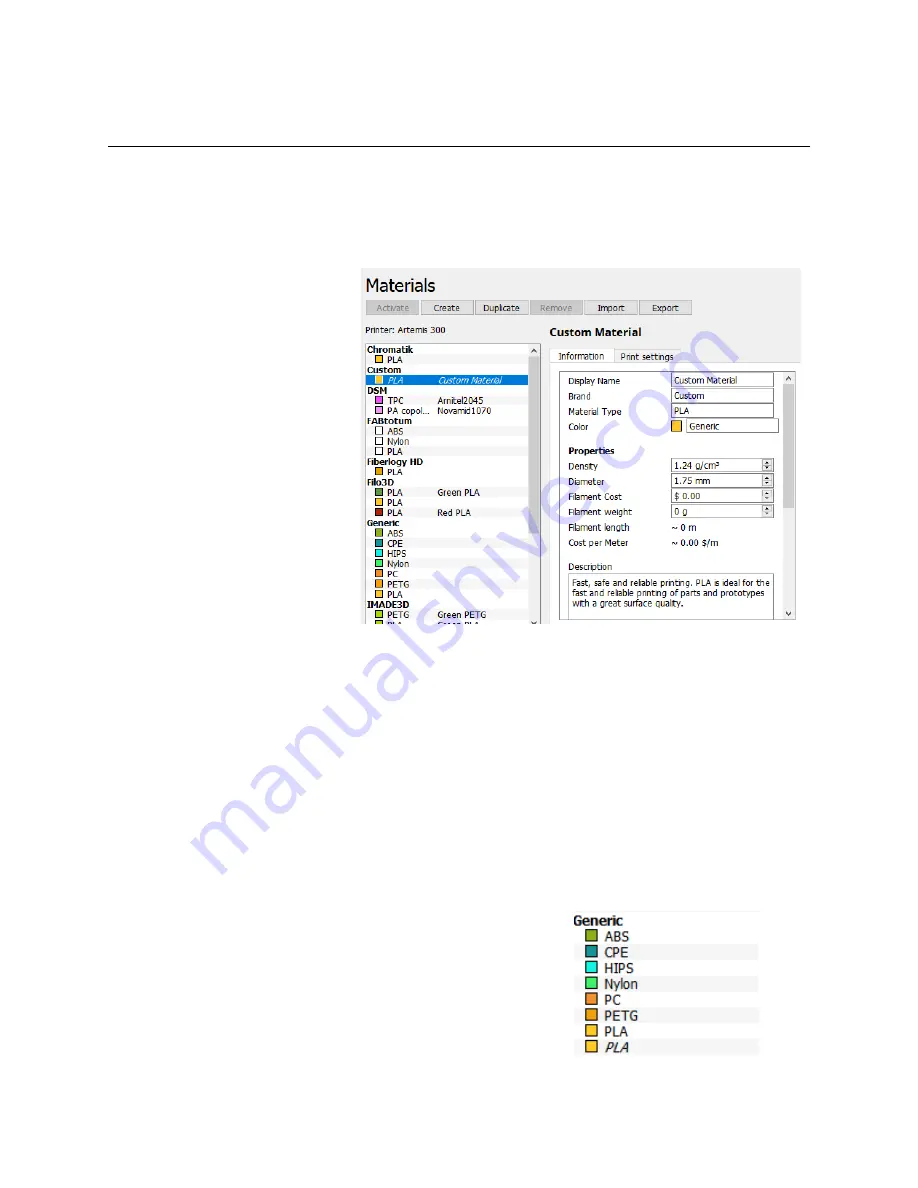
From this screen, you can
Activate
,
Create
,
Duplicate
,
Import
, or
Export.
The currently active material is shown with it’s descriptive text shown in
italics
. If the
Activate
button isn’t active (as in the example above), that indicates you’ve got the currently
active material profile already selected. Note that in order to
Remove
a material, you need to
deselect it by choosing a different material. The material display list categorizes by “brand” and
shows the color, material type, and display name of the material.
The simplest method to add a new material to Cura is to duplicate an existing material –
let’s try duplicating the
Generic
“brand” of PLA. Click on the PLA entry in the
Generic
brand
and then click the
Duplicate
button. After a short delay you’ll see that your new material has
been created and activated.
24
The Cura Material Manager.
New PLA material.


