Release Version 1.2
4
3.
Product Parts and Peripheral Device Connection
3-1. Front Interface
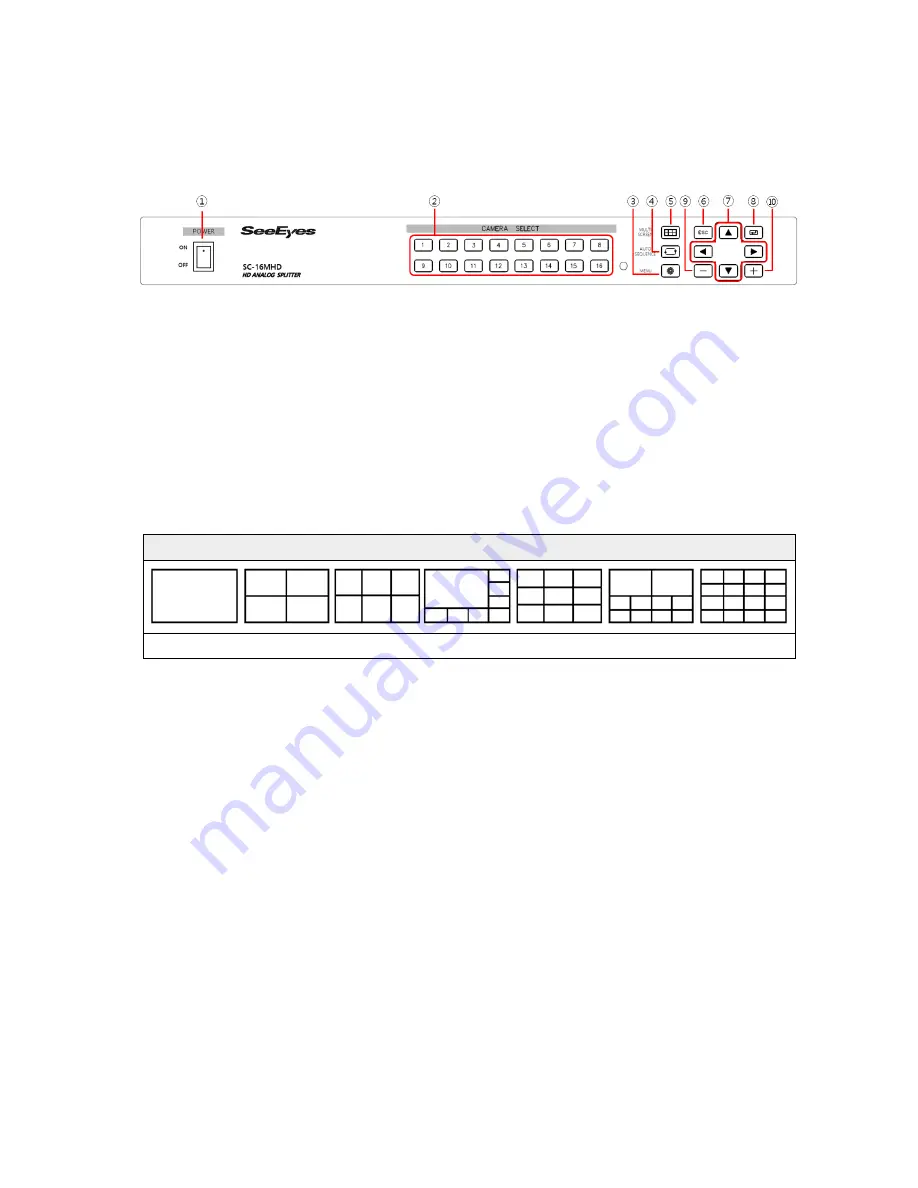
① POWER:
To turn the power on/off.
② CHANNEL DISPLAY:
To display a selected channel in Full screen.
③ MENU
: To set up this item and/or check the current settings.
④ AUTO SEQUENCE:
To enable auto sequence mode.
Once you press this button, the LED will be on and the set video will be displayed successively. Once
you press other buttons in the auto sequence mode again, the auto sequence mode will be terminated
and the function related to the pressed button will start.
⑤ MULTI SCREEN:
To set video screen split mode. The locations of split channels can be changed in
the Setup menu.
Split Screen
Full
Quad
6 Split
8 Split
9 Split
10 Split
16 Split
⑥ ESC:
To terminate sub-menus in the menu.
⑦ D-pad:
To move to the relevant sub-menu in the menu.
⑧ ENTER:
To set or check sub-menu in the menu.
⑨ MINUS:
To go to the previous channel or channels (available in split mode as well)
e.g.) When pressing this button in quad screen of 5CH, 6CH, 7CH and 8CH, the screen will be changed
to the quad screen of 1CH, 2CH, 3CH and 4CH.
⑩ PLUS:
To go to the next channel or channels (available in split mode as well)
e.g.) When pressing this button in quad screen of 5CH, 6CH, 7CH and 8CH, the screen will be changed
to the quad screen of 9CH, 10CH, 11CH and 12CH.


