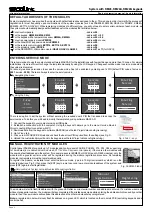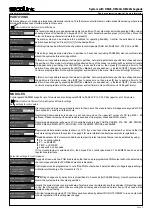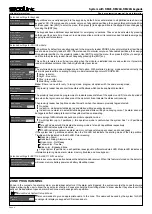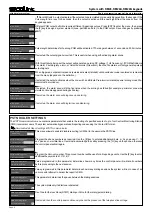
Short programming manual - basic information
Intruder alarm system
System with
KM24, KM24A
, KM24G keypads
Additional information:
PIN code length
Minimum number of PIN code variations could be calculated using this equation:
Number of variations
=
10
- Installer PIN
-
Max
total available number of users limited by panel.
For example: for P64 control panel when PIN code length is 4 digits, the number of
4
variations will be
10
- 1 - 63 = 9936. Remaining number of PIN code variations for each user can be calculated using this equation:
Number
of variations for a new user = Number of variations
- (
Number of enabled users - 1)
. For example: 1 user is enabled, then number of PIN
4
code variations is
10
- (1 - 1) = 9936.
Note:
the system doesn't allow to use same PIN codes for different users. User will be informed if the PIN is already taken. When user's PIN
code is recognized, notification message on LCD screen will ask to change it.
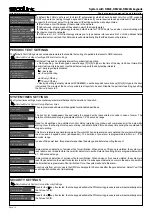
The keypad will block access to the system if invalid PIN code is entered 3 times. The system will be blocked for 90 seconds and this event
will be recorded in the event log.
User should press the [CLR] key multiple times to return to the main screen (date and time should be visible). This keeps the information
inaccessible for other non-system users. Installer should exit the service mode and block access to it when he finishes installation or
maintenance work. This keeps the information inaccessible for system users.
U01 User 01
Controls
New RCU
6
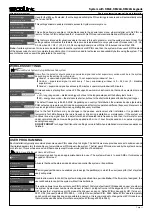
This menu entry is used to assign the remote control (RCU) or proximity tag to the system user. To assign the
RCU or tag - choose the corresponding menu and press
the
[ENT] key to program:
HC3S - s
imultaneously
hold down
all
buttons.
LT5 - s
imultaneously
hold down the buttons
[A]
and
[D]
.
Proximity tag - put the tag on a sensitive area of the proximity reader.
Removing the control unit can be done in the same menu.
Message
Done
should appear on keypad
's
LCD when
all
control unit
s
are removed from the user.
U01 User 01
U01 User 01
Rights
Arm
Disarm
Yes
Clear alarm
Yes
Abort arming
Yes
All Rights
Selected
7
7
All system users have all rights assigned by default. However, it is possible to change them. The user has
access to the following:
Arm
;
Disarm
;
Clear alarm
;
Abort arming
;
Bypass zones
;
Edit settings
;
View Event log
;
Test fire zones
;
Reporting test;
Run other tests
;
Control PGM outputs
;
Edit system users
;
Right to enable service
;
Page 12
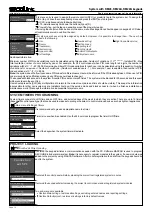
System timers consist of an ON time and an OFF time, and selected days of the week in which they are active. There are up to 16 timers
(depends on control panel type) that can be used to make auto arming schedule or to control various devices, such as lights or appliances.
Main menu
}
Settings
}
Timers
SYSTEM TIMERS PROGRAMMING
1
T01 Timer 01
Name
Timer 01
T01 Timer 01
ON time
08:00 Enabled
2
T01 Timer 01
OFF time
09:00 Enabled
3
It is recommended to give an appropriate name to a timer.
Timer is in use when it is enabled. Use the 24-hour clock to program the timer On/Off time .
T01 Timer 01
Check all days
Yes
3
Select the days when the system timer will activate.
PROJECT LOADING
Service Mode
}
Project Loading
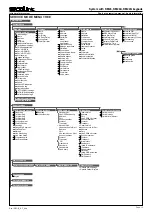
If entered the keypad initiates a communications session with the PC. Software MASCAD is used to program
SECOLINK intruder alarm system.
Note:
it is necessary to register modules to the system, if a new module was
added to the project by using MASCAD software. After module registration the data from
the
keypad should be
sent to the system.
1
Project Loading
Start connection with PC
Connect USB cable
Connection
with PC
2
Project Loading
From CP to KM24
If entered the control panel will start uploading the project to all registered system modules.
3
Project Loading
From KM24 to CP
Two sub-menus are available:
Restore Main settings
- restores all settings, excluding entered names and reporting settings.
Restore Default project
- restores all settings to factory default values.
4
1
2
Project Loading
Restore Project
Restore Project
Restore Main Settings
If entered the keypad will start uploading the project to control panel and all registered system modules.
Restore Default Project


