5
Care & Maintenance
5.2
Functional test
A"#$0$
Page 36
A
rt
.-
no
.:
2
.5
4
0
0
37
R
ev
.:
a
5.2.7
Paper Feed
1. Start printer with "MAN PRINT". Press the
key twice.
2. The paper has to stop exactly at the perforation. If this is not the case, control the
paper mark comparison.
5.2.8
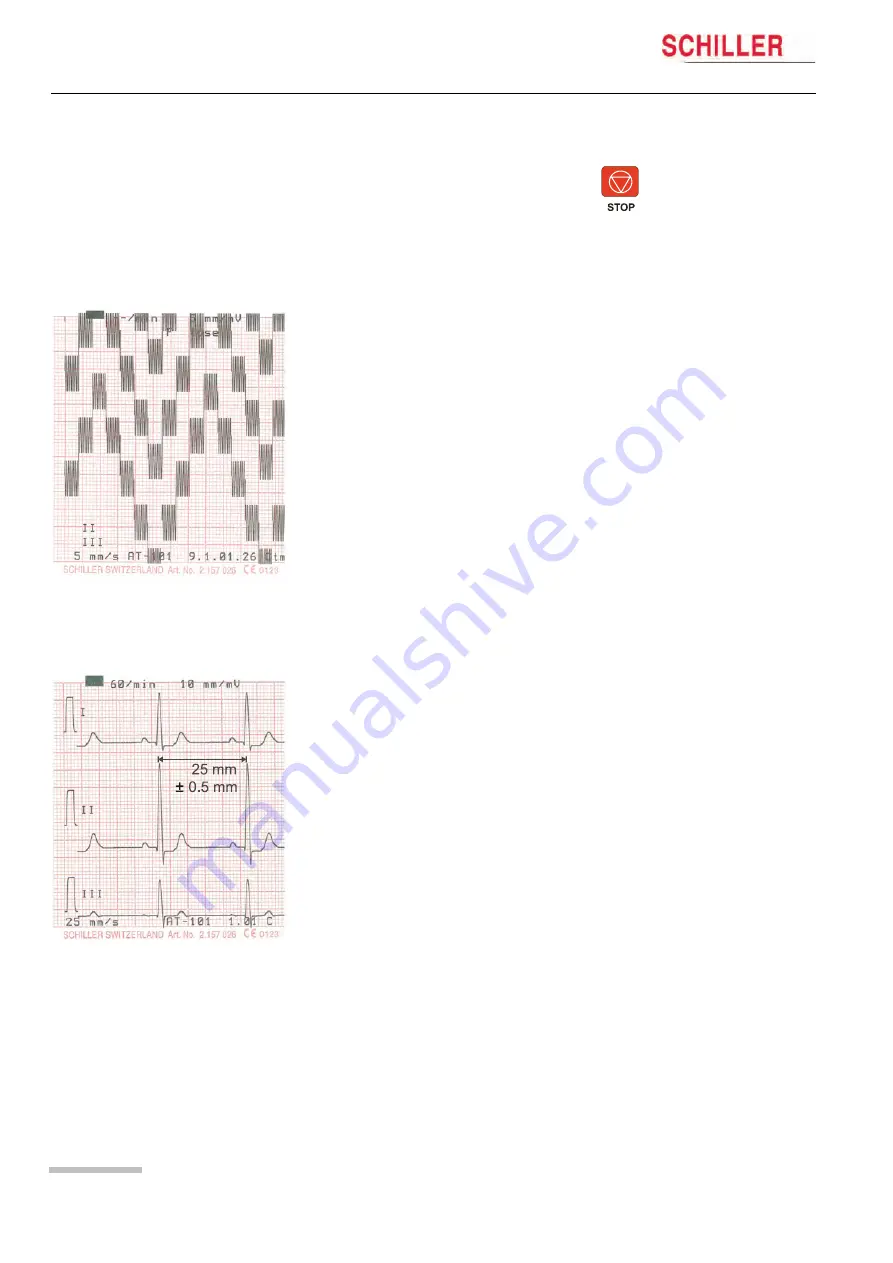
Printer quality test
5.2.9
Printing Speed
1. Go to the menu "LEAD TEST" and “MANUAL PRINT ”.
2. Select printer speed 5 mm/s key 7.
3. Press “FN” and “Manual PRINT”. A printout with test curves is executed.
4. Check the blackness for regularity and good readability on the complete print
width.
If individual points are missing, the problem is usually with the thermal print head. If
the print quality is inadequate, control the electrical / mechanical setting of the print
head according to the comparison in this handbook.
Fig. 5.1
Printer quality test
1. Connect the simulator to the ECG device using the patient cable and select a HR
of 60 / min. No arrhythmias.
2. Check that the HR shows exactly 60 on the LCD.
3. Set the printing speed to 5 mm/s and press the "MAN START" key. Printout a few
pages.
4. Select printing speed 10/25 and 50 mm/s.
5. Check on the 25 mm/s printout if the space between 2 R peaks according to the
paper grids. The space should be 25 mm and may not show a difference of more
than
!
0.5 mm.
Fig. 5.2
Printer speed test
Summary of Contents for AT-101
Page 1: ...A 0 ervi e andboo3 Art no 7 5400 Rev a 400 A 0 7 annel E G Devi e ...
Page 6: ...Page 4 Art no 2 540037 Rev a ...
Page 42: ...5 Care Maintenance 5 2 Functional test A 0 Page 40 Art no 2 540037 Rev a ...
Page 63: ...Page 61 Appendix 8 A 0 Service Handbook Checklist 8 1 Art no 2 540037 Rev a Other remarks ...
Page 64: ...8 Appendix 8 1 Checklist A 0 Page 62 Art no 2 540037 Rev a ...


