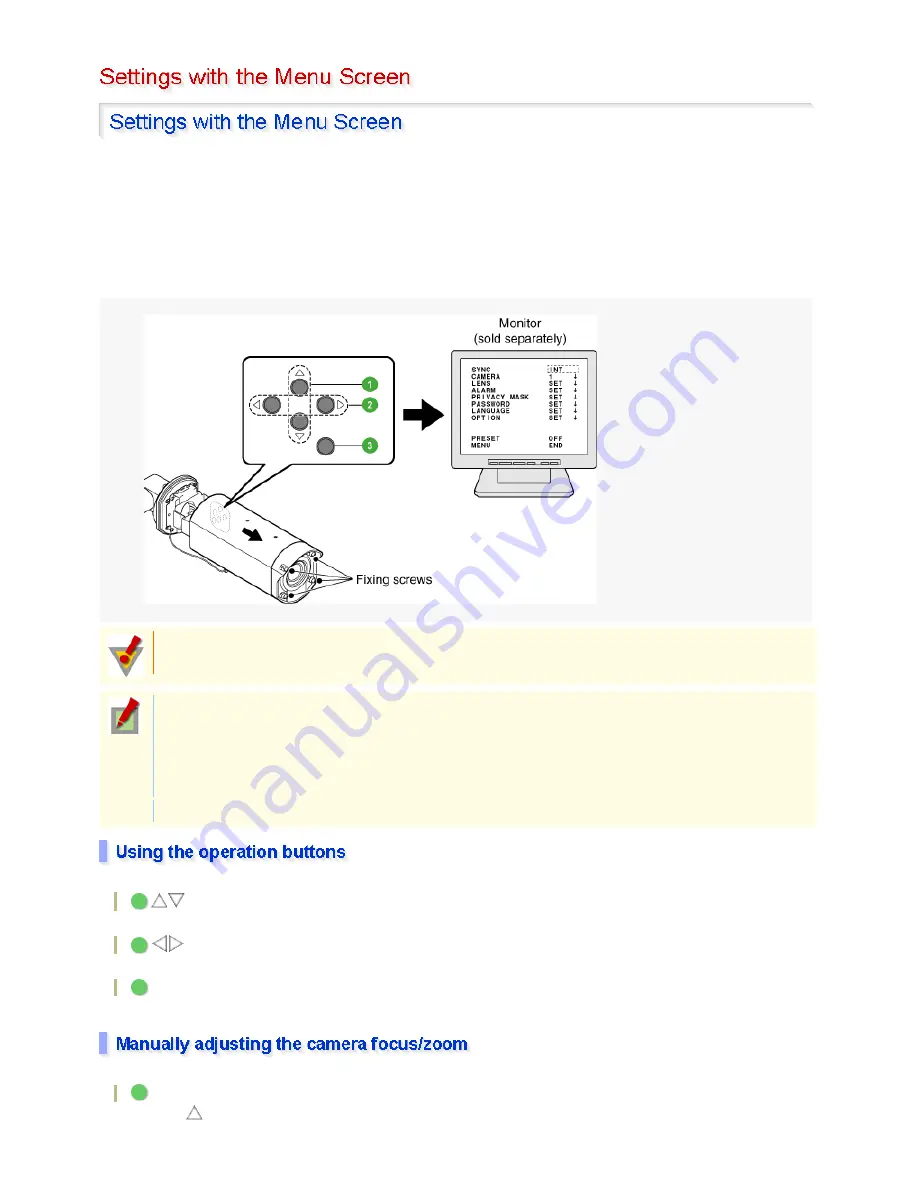
The menu screen allows you to set the operating conditions and required functions of the camera according to
your installation environment or other needs.
Completely loosen the four fixing screws located on the front face of the camera and pull the camera cover
forward.
Now, you can use the operation buttons on the right side face of the camera to set the operating conditions of
the camera.
(For details, refer to the separate installation manual.)
Pressing the SET button for approximately three seconds causes the main menu to appear on the monitor.
buttons
Used to vertically move the cursor to select a menu item.
buttons
Used to make adjustments in horizontal direction or choose a setting value.
SET button
Use the SET button to set the value you adjusted or chose for the selected item, or switch to the sub-menu.
When the menu screen is not displayed, the operation buttons can be used to perform the following operations:
Focus adjustment
Use the
button to set the focus to a near target.
After you complete setting up the camera, reinstall the camera cover in position and tighten the fixing
screws with a torque of 0.5 to 1 N·m (5 to 10 kgf·cm) to maintain the waterproof performance.
When the password lock is enabled, the user will be prompted for the entry of the password if he/she
attempts to access the setting on the menu screen.
Using this function, you can prevent users other than the password administrator from changing the
menu settings.
If you forget your password, contact the distributor from which you purchased the camera.
The menu screen will close automatically if no operation is performed for approximately 3 minutes.
1
2
3
1
8 / 153
Summary of Contents for VCC-XZN600P
Page 6: ...6 153 ...
Page 61: ...61 153 ...
Page 79: ...79 153 ...
Page 90: ...Weight Without sunshade Approx 1 8 kg With sunshade Approx 2 0 g 90 153 ...


