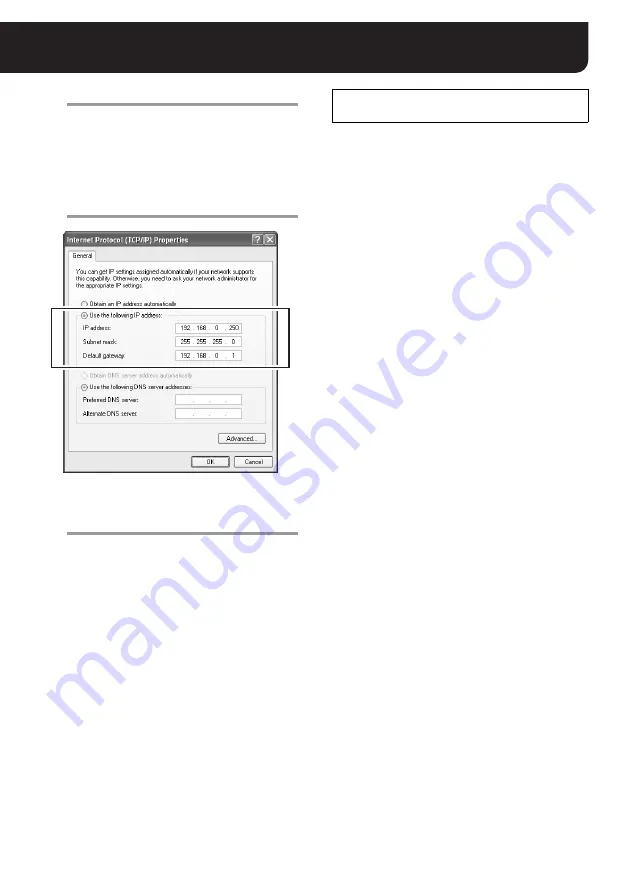
Configuring the TCP/IP Settings on PC
English
5
5
Click [Properties].
[General] tab appears in the [Internet Protocol
(TCP/IP) Properties] dialog box.
6
Select the [Use the following IP
address:] radio button and complete the
[IP address:], [Subnet mask:] and
[Default gateway:] fields.
7
Confirm the settings and click the [OK]
button.
This completes the TCP/IP settings. Close all
dialog boxes in the display.
Web browser is required to access the camera. Install
Internet Explorer Ver.6.0 or higher on your PC.
In the cases below, perform the Internet Explorer’s
settings by clicking [Tool] and then [Internet Options].
• When accessing the camera using SSL
encryption for video signal
1
Click the [Advanced] tab.
2
Make sure that the “Use SSL 2.0” and “Use SSL
3.0” options under the “Security” section are
enabled. If disabled, select the options.
• When the video update is unstable
1
Click the [General] tab.
2
Under the “Temporary Internet Files” section, click
the [Settings] button.
3
In the “Amount of disk space to use:” setting, set the
lower value.
• When the Java Script’s “Run Time Error” is
displayed
1
Click the [Advanced] tab.
2
Under the “Browsing” section, disable the “Display a
notification about every script error” option.
3
Enable the “Disable script debugging” option.
Preparing the Web Browser for Accessing
the Camera


