20
Chapter 2 Installation
✐
It is recommended to set up the Network PIN code when you connect the projection monitor
to the network. This setting is carried out through the projection monitor’s menu and also it
can be set through the network using the web browser. For further information, refer to item
"Initial Setting/Network PIN code setting" (
☞
p.29).
✐
Valid characters for the network PIN code are only numbers 0 to 9. The number "0000" means
no network PIN code is set.
✐
This network PIN code is not to restrict the use of the projection monitor. This network PIN
code is to set the security against the use of the projection monitor through the network.
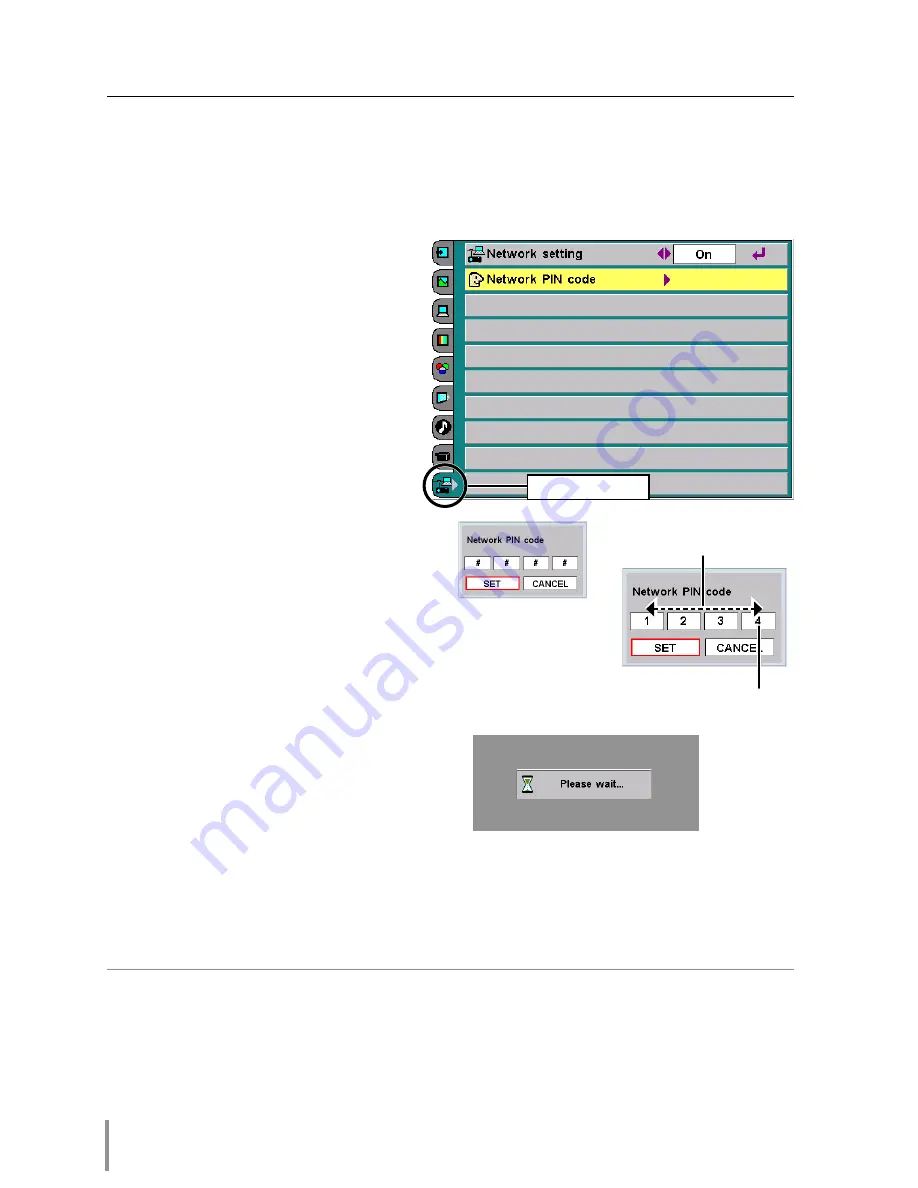
Network PIN code setting
The network PIN code can be set to restrict access to the setting page of the projec-
tion monitor using the web browser.
✽
Default network PIN code [0000] means no network PIN code is set.
1
Displaying network PIN code menu
Select network menu and then
select "Network PIN code" sub
menu. Press
SELECT
button to
display the Network PIN code entry
pallet.
2
Entering the network PIN code
To enter the network PIN code, use
pointer buttons (
▲
,
▼
,
7
,
8
) on the
projection monitor or the remote
control.
3
Fixing the network PIN code
After entering a 4-digit number,
press
SELECT
button. The red
frame cursor moves to "SET" and
press
SELECT
button. The Network
Unit starts re-booting and displays
message "Please wait..." on the
screen until the re-booting is com-
plete. Do not disconnect the AC
cord during this period. After that the
menu will disappear on the screen.
The new network PIN code change does required for the authentication of current
network PIN code. It is always effective a newly entered network PIN code. If you for-
get the network PIN code, set a new network PIN code.
(PIN code entry pallet)
Network menu
Move cursor left and right
with (
7
,
8
) buttons
Change number up and
down with (
▲
,
▼
) buttons
Summary of Contents for PJ-Net Organizer POA-PN30
Page 1: ...OWNER S MANUAL PJ Net Organizer MODEL No POA PN30 LINK POWER ACT PJ Net Organizer ...
Page 6: ...6 ...
Page 12: ...12 Chapter 1 Preparation ...
Page 22: ...22 Chapter 2 Installation ...
Page 58: ...58 Chapter 4 Controlling the Projection Monitor ...
Page 84: ...Printed in Japan 1AA6P1P4814 IDZL SANYO Electric Co Ltd ...


